Fan-Based Parts Tumbler Is A Breeze To Build

A parts tumbler is a great tool to have around. But if you don’t use it all the time, it’s hard to justify dropping hundreds of dollars on one. Fortunately, there are many ways to make your own tumbler while tailoring it to meet the need. Because really, as long as you get the medium moving enough to abrade the parts, you’re good.

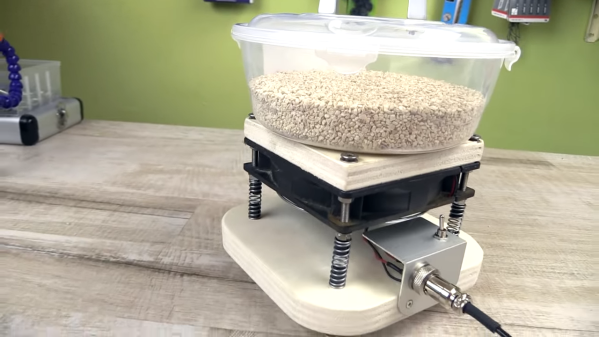
[Daniele]’s parts tumbler is cool because it’s fairly easy to make, it’s really quiet, and it does the job quickly. This tumbler moves the medium by using an imbalanced plastic fan, which [Daniele] created by drilling a hole through one of the blades and fastening a short bolt and nut through it. If you’ve ever tried to stop a washing machine from walking away, you may be thinking this is a strange idea, because now he’s got a 4500 RPM vibration machine scuttling about the shop. So really, the true genius of this build lies in the great pains [Daniele] took to absorb all that vibration.

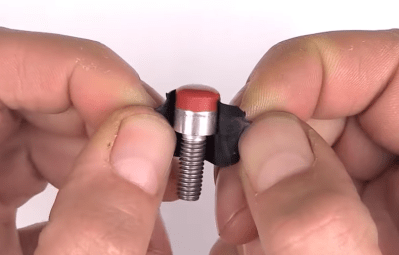
He’s got the fan float-mounted on rubber-lined springs and rubber mats under the washers involved in connecting the latching plastic box to the fan. Our favorite anti-vibration features are the twist-lock power connector and the custom silicone feet made from Motorsil D and cap bolts. We don’t know what the medium is here, but it’s got us thinking Grape-Nuts might work. Blow past the break to chew on the build video.

The only problem with this build is that this type of fan isn’t cheap, and using it this way will definitely shorten its life.

Not a fan of this type of tumbling? Here’s one that takes your drill for a spin.

Continue reading “Fan-Based Parts Tumbler Is A Breeze To Build”

Mechanisms: Solenoids

Since humans first starting playing with electricity, we’ve proven ourselves pretty clever at finding ways to harness that power and turn it into motion. Electric motors of every type move the world, but they are far from the only way to put electricity into motion. When you want continuous rotation, a motor is the way to go. But for simpler on and off applications, where fine control of position is not critical, a solenoid is more like what you need. These electromagnetic devices are found everywhere and they’re next in our series on useful mechanisms.

Continue reading “Mechanisms: Solenoids”

Mechanisms: The Spring

Most people probably don’t think about springs until one kinks up or snaps, but most of the world’s springs are pretty crucial. The ones that aren’t go by the name Slinky.

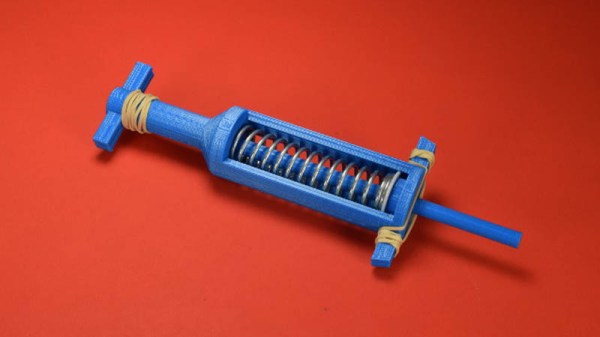
We all use and encounter dozens of different types of springs every day without realizing it. Look inside the world of springs and you’ll find hundreds of variations on the theme of bounce. The principle of the spring is simple enough that it can be extended to almost any shape and size that can be imagined and machined. Because it can take so many forms, the spring as a mechanism has thousands of applications. Look under your car, take apart a retractable pen, open up a stapler, an oven door, or a safety pin, and you’ll find a spring or two. Continue reading “Mechanisms: The Spring”

To Ferrule Or Not To Ferrule?

We recently posted about a spectacular 3D-printer fire that was thankfully caught and extinguished before spreading to the hacker’s house or injuring his family. Analyzing the remains of the printer, the hacker determined that the fire was caused when a loose grub screw let the extruder’s heater cartridge fall out and touch the ABS fan shroud. It ran full-on and set things on fire.

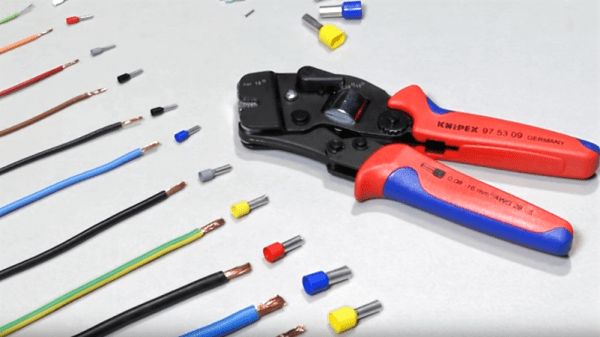
A number of us have similar 3D printers, so the comments for this article were understandably lively, but one comment stood out by listing a number of best practices for wiring, including the use of ferrules. In particular, many 3D printers connect the heated bed, which draws a lot of current, with screw terminals to the motherboard. While not the cause of the fire in the original post, melted terminal blocks are a common complaint with many DIY 3D printer kits, and one reason is that simply jamming thick stranded wire into a screw terminal and hoping for the best can result in increased resistance, and heat, at the joint. In such situations, the absolutely right thing to do is to crimp on a ferrule. So let’s talk about that.


Continue reading “To Ferrule Or Not To Ferrule?”

Junkyard Crossbow Aims To Be A Car Killer

[James], aka [Turbo Conquering Mega Eagle], is not your typical Hackaday poster boy. Most of his builds have a  “Junkyard Wars” vibe, and he’d clearly be a good man to have around in a zombie apocalypse. Especially if the undead start driving tanks around, for which purpose his current anti-tank compound crossbow is apparently being developed.

At its present prototype phase, [James]’ weapon o’ doom looks more fearsome than it actually is. But that’s OK — we’re all about iterative development here. Using leaf springs from a Toyota Hi-Lux truck, this crossbow can store a lot of energy, which is amplified by ludicrously large aluminum cams. [James] put a lot of effort into designing a stock that can deal with these forces, ending up with a composite design of laminated wood and metal. He put a lot of care into the trigger mechanism too, and the receiver sports not only a custom pistol grip cast from aluminum from his fire extinguisher foundry, but a hand-made Picatinny rail for mounting optics. Test shots near the end of the video below give a hint at the power this fully armed and operational crossbow will eventually have. The goal is to disable a running car by penetrating the engine block, and we’re looking forward to that snuff film.

If rubber band-powered crossbows are more your speed, take you pick — fully automatic, 3D-printed, or human-launching.

Continue reading “Junkyard Crossbow Aims To Be A Car Killer”

Electronifying A Horror Fraught Hydraulic Press

[Josh] is replacing the springs in his car’s suspension. He wanted to know the travel rates of these springs, but apparently, this is a closely guarded trade secret in the industry. One company did manage to publish the spring rates, but they weren’t believable. Instead of taking this company’s word, [Josh] built a spring tester.

The theory behind a spring tester is pretty simple: apply a force to a spring, measure it, then measure how much the spring has traveled. Or compress a spring an inch or so, measure the force, and compress it some more. Either gets you the same data.

This spring tester is built around a Harbor Freight hydraulic press. Yes, the spring is completely captured and won’t fly out of the jig if you look at it wrong. The bottom of the press contains a few load cells, fed into an ATmega8, which displays a value on an LCD. For the displacement measurement, a ruler taped to the side of the press will suffice, but [Josh] used a Mitutoyo linear scale.

What were the results of these tests? You shouldn’t buy coils from Bilstein if these results are correct. The rates for these springs were off by 70%. Other springs fared better and won’t bind when going over bigger bumps. That’s great work, and an excellent application of Horror Fraught gear.

Microswitches: Past The Tipping Point

You find them everywhere from 3D printers to jet airliners. They’re the little switches that detect paper jams in your printer, or the big armored switches that sense when the elevator car is on the right floor. They’re microswitches, or more properly miniature snap-action switches, and they’re so common you may never have wondered what’s going on inside them. But the story behind how these switches were invented and the principle of physics at work in the guts of these tiny and useful switches are both pretty interesting.

Continue reading “Microswitches: Past The Tipping Point”