STM32 F3 Discovery Dev Board Includes Some Extras

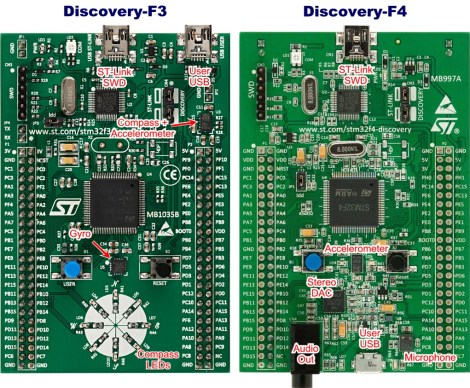
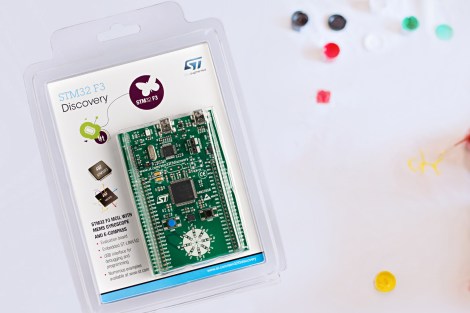
ST Microelectronics keeps kicking out development boards to show off their new ARM processor line. Yesterday they issued a press release announcing the STM32 F3 Discovery Board. As their naming scheme implies, this carries an ARM Cortex-M3 processor, but compared to the F0 Discovery board (which we loved) it’s got several extra goodies built into it.

We took a look at the F3 Discovery product page and it doesn’t look like you can order these quite yet. But click-through to the pricing and you’ll see they’ve set it at $10.90. Digikey lists the board at that price point, Mouser lists it at about $16, but neither supplier has any available. We also didn’t see a link for free boards like when the F0 model was released. If you do come across a giveaway link please tip us off about it.

Okay, now let’s discuss those extras. We think this dev kit could be used as an IMU for applications like a quadcopter or a self-balancing robot. That’s because it has a gyroscope and an accelerometer. It’s also got ten LEDs, eight of which are arranged on that white circle. We’d guess that layout is for displaying orientation data from the IMU sensors. There’s also a second USB port to use when developing USB applications for the chip.

Like the other boards in the Discovery family this has the STlinkV2 built-in to use as a programmer. We don’t know if OpenOCD has support for the F3 chipset yet, which is what we’ve been using to program STM chips in a Linux environment.

An STM32 Processor Powers This PC

This 32-bit computer is a project [Bogdan Marinescu] built as a contest entry. Sadly he didn’t win, but he did do an excellent job of documenting the build. Having seen several other home built PC projects we’re familiar with the challenges that go into such a thing, and he found some great solutions to each of them.

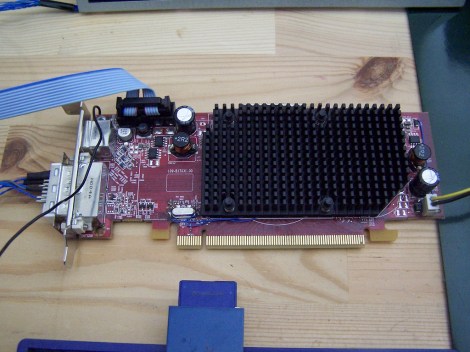
He started with an STM32F103ZET6 chip. This is an ARM Cortex-M3 processor which brings a lot of power to the playing field. That being said, generating a VGA signal would pretty much zap the usefulness of the chip for other processes so he offloaded that work on a separate Propeller chip. A microSD card serves as storage for the machine, which runs eLua (embedded Lua programming language). There is 1 MB of external RAM and a PS/2 port for keyboard interface. The system is networked thanks to an ENC28J60 Ethernet controller. Don’t miss the video after the break where you can see several demos running on the system.

Continue reading “An STM32 Processor Powers This PC”

ARM-based Debugging Tool Aims To Improve On The Bus Pirate Performance

The Bus Pirate is a fantastic development tool. It does an amazing job at a lot of different things. And as it has matured, community support has driven it to new areas beyond the original design. This is where its hardware holds back performance a little bit. For instance, as an I2C or SPI sniffer it has limited capture speed. That’s the type of thing that this board could improve upon. It’s a debugging tool based on an STM32 F4 microcontroller. That’s an ARM Cortex-M4 chip which runs at 168 MHz, and has 192 KB of SRAM.

[TitanMKD] has been working on the design but it is still just in digital form. Since there’s no prototype there is also no firmware for the device. That’s a tall mountain to climb and it’s one of the reasons we’re featuring the project now. [Titan’s] plan is to model this after the Bus Pirate interface. We think it’s a good idea since a lot of folks have already learned the syntax. We didn’t see a contact form on his site, but if you’re interested in contributing to the project you might want to leave a comment here or on his project page (linked above).

New STM32 Discovery Board Can Now Be Programmed On Linux

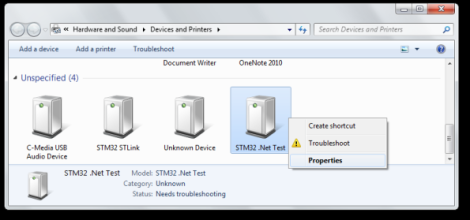
Last Wednesday I posted a video review of the new STM32F0-Discovery board which is built around an ARM Cortex-M0 chip. I speculated that it should work with the open source project aimed at programming these discovery boards. I tested it out and a connection could be made, but no code could be flashed. So I spent a few hours over the weekend and added support.

My updates are already in the stlink repository. After cloning the code, you can use three commands to compile the software (./autogen.sh, ./configure, make). That’s assuming you have all of the necessary dependencies (I had to install libusb-1.0-0-dev) and that you add the udev rule suggested in the documentation (also found in the repository). The program st-util connects to the board and provides a listening port for an ARM debugger (I’m using arm-none-eabi-gdb from CodeSourcery G++ Lite).

When I first started testing, the chip id was reporting as 0. It turns out the register address polled for this information was wrong. After finding that in the almost-900 page reference manual I went through the painstaking process of finding the hex values necessary to properly memory map the device. From there I also updated the blink example to generate an ELF file compatible with the Cortex-M0 chip. So out of the gate you should be able to use an ARM cross compiling toolchain to compile the example, connect to the board with this utility, then use the debugger from the toolchain to connect and flash that example to RAM.

There’s lots more to be done. To fully utilize the chip it is necessary to use a startup file and linker script when compiling. I’ve done nothing in this area, but I hope to work on some tutorials as I get further along. Of course if you have your own successes developing for this board using a Linux machine we want to hear about it!

Video Review: STM32F0-Discovery Board

The STM32 Discovery boards are nothing new, we’ve looked at them several times. But the newest sibling in the line might be just the thing to make the leap from your steadfast 8-bit projects. We got our hands on it and recorded a video review.

The STM32F0-Discovery gives you a programmer and ARM Cortex-M0 chip all on one convenient board. The top portion is the ST-Link V2 programmer, and includes jumpers and a programming header which let it easily program off-board chips.

The included microcontroller is an STM32F051R8T6 which includes 64kb of program memory and 8kb of RAM. Coming in at $1.80-3.77 in single units and in a hand-solderable LQFP package this raises an eyebrow for our future projects. It has an 8 MHz internal oscillator with 6x PLL which means you can run at 48 MHz without an external crystal (check out [Kenneth Finnegan’s] PLL primer if you don’t know what this is).

The only thing holding us back is the development environment. ST provides everything you need if you’re on Windows, but we want a Linux friendly solution. We know other Discovery boards have worked under Linux thanks to this project. This uses the same ST-LINK V2 so it should work as well. If you want one of your own head over the ST page to see if they’re still giving away samples. There should be a button labeled “Register for your FREE KIT”.

Resizable ARM Dev Board; Just Take Some Off The Top

[Bob Alexander’s] most recent project is a hack saw resizable ARM breakout board. He wanted to start using more ARM microcontrollers in his projects and went for a breadboard friendly design. It uses a 40-pin dip package, but if you need the horsepower but not the I/O you can literally cut it down to size. We might recommend grabbing some tin snips, which can cut through a PCB like butter, but to each his own.

The board is based around an STM32 chip. You’ll find a crystal oscillator for the system clock, and a clock crystal if you need it. On the other side of the chip he included a footprint for a voltage regulator. This setup provides a remarkable range of input voltages, accepting from 2 to 3.6 volts without the regulator, and up to 16 volts if the regulator is present. He designed a package footprint that can be easily bridged if there’s no SMD part there. Just make sure you insulate that pad if you are using one with a conductor on the bottom. He explains this in detail in his writeup.

You’ll need a programmer to work with the board. He uses an STM32 Discovery Board for this but there are quite a few other options out there too.

Using A Touch Screen With An STM32 Microcontroller

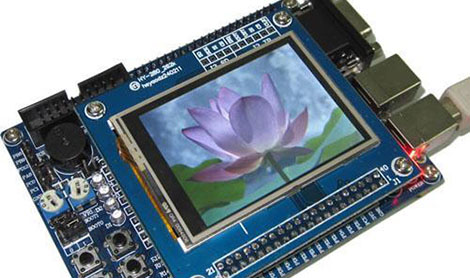
[Andy Brown] has been working on a series of tutorials revolving around the STM32 processor family. He’s using the STM32plus development board, with an STM32F1 ARM Cortex M3 processor to drive a couple of different full color graphic LCD screens. His latest installment shows how to read from the touch screen included with both displays.

After the break we’ve embedded the video from which this screenshot was taken. As an example, [Andy] has programmed a painting program to show off what the touchscreen overlay is capable of. It starts off with the calibration routine we’re all familiar with, then drops to this screen with a virtual control panel and blank canvas.

This hardware uses the Texas Instruments ADS7843 controller, which [Andy] says is extremely common and that several other manufacturers use the same communications protocols. He discusses how to communicate with the controller, and how to incorporate the data into your program. Included is an open source library which you can use in your own projects.

Continue reading “Using A Touch Screen With An STM32 Microcontroller”