New to astrophotography, [Jason Bowling] had heard that the Raspberry Pi’s camera module could be used as a low-cost entry into the hobby. Having a Raspberry Pi B+ and camera module on hand from an old project, he dove right in, detailing the process for any other newcomers.
Gingerly removing the camera’s lens, the module fit snugly into a 3D printed case — courtesy of a friend — and connected it to a separate case for the Pi. [Bowling] then mounted he camera directly on the telescope — a technique known as prime-focus photography, which treats the telescope like an oversized camera lens. A USB battery pack is perfect for powering the Pi for several hours.
When away from home, [Bowling] has set up his Pi to act as a wireless access point; this allows the Pi to send a preview to his phone or tablet to make adjustments before taking a picture. [Bowling] admits that the camera is not ideal, so a little post-processing is necessary to flesh out a quality picture, but you work with what you have. Continue reading “Budget Astrophotography With A Raspberry Pi”→
We’ve all enjoyed looking up at a clear night sky and marveled at the majesty of the stars. Some of us have even pointed telescopes at particular celestial objects to get a closer view. Anyone who’s ever looked at anything beyond Jupiter knows the hassle involved. It is most unfortunate that the planet we reside on happens to rotate about a fixed axis, which makes it somewhat difficult to keep a celestial object in the view of your scope.
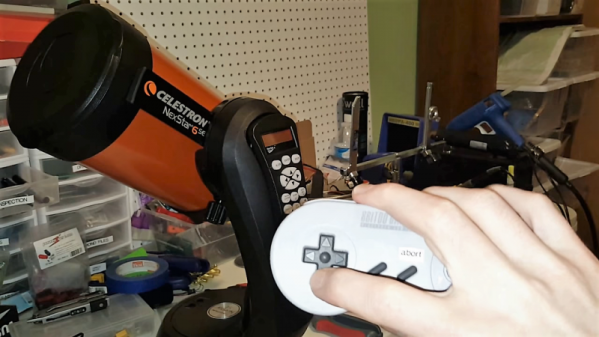
It doesn’t take much to strap a few steppers and some silicon brains to a scope to counter the rotation of earth, and such systems have been available for decades. They are unfortunately quite expensive. So [Dessislav Gouzgounov] took matters into his own hands and developed the rDuinoScope – an open source telescope control system.
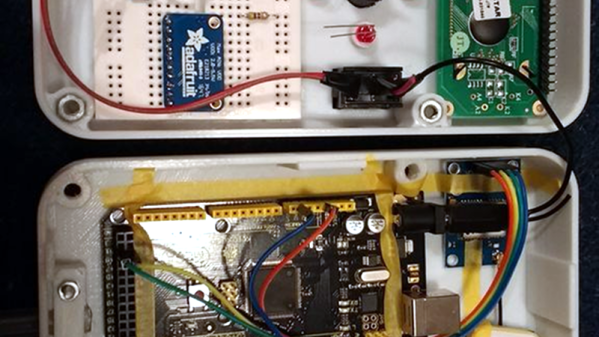
Based on the Arduino Due, the systems stores a database of 250 stellar objects. Combined with an RTC and GPS, the rDunioScope can locate and lock on to your favorite nebula and track it, allowing you to view it in peace. Be sure to grab the code and let us know when you have your own rDuinoScope set up!
Like any Moore’s Law-inspired race, the megapixel race in digital cameras in the late 1990s and into the 2000s was a harsh battleground for every manufacturer. With the development of the smartphone, it became a war on two fronts, with Samsung eventually cramming twenty megapixels into a handheld. Although no clear winner of consumer-grade cameras was ever announced (and Samsung ended up reducing their flagship phone’s cameras to sixteen megapixels for reasons we’ll discuss) it seems as though this race is over, fizzling out into a void where even marketing and advertising groups don’t readily venture. What happened?
The Technology
A brief overview of Moore’s Law predicts that transistor density on a given computer chip should double about every two years. A digital camera’s sensor is remarkably similar, using the same silicon to form charge-coupled devices or CMOS sensors (the same CMOS technology used in some RAM and other digital logic technology) to detect photons that hit it. It’s not too far of a leap to realize how Moore’s Law would apply to the number of photo detectors on a digital camera’s image sensor. Like transistor density, however, there’s also a limit to how many photo detectors will fit in a given area before undesirable effects start to appear.
Image sensors have come a long way since video camera tubes. In the ’70s, the charge-coupled device (CCD) replaced the cathode ray tube as the dominant video capturing technology. A CCD works by arranging capacitors into an array and biasing them with a small voltage. When a photon hits one of the capacitors, it is converted into an electrical charge which can then be stored as digital information. While there are still specialty CCD sensors for some niche applications, most image sensors are now of the CMOS variety. CMOS uses photodiodes, rather than capacitors, along with a few other transistors for every pixel. CMOS sensors perform better than CCD sensors because each pixel has an amplifier which results in more accurate capturing of data. They are also faster, scale more readily, use fewer components in general, and use less power than a comparably sized CCD. Despite all of these advantages, however, there are still many limitations to modern sensors when more and more of them get packed onto a single piece of silicon.
While transistor density tends to be limited by quantum effects, image sensor density is limited by what is effectively a “noisy” picture. Noise can be introduced in an image as a result of thermal fluctuations within the material, so if the voltage threshold for a single pixel is so low that it falsely registers a photon when it shouldn’t, the image quality will be greatly reduced. This is more noticeable in CCD sensors (one effect is called “blooming“) but similar defects can happen in CMOS sensors as well. There are a few ways to solve these problems, though.
First, the voltage threshold can be raised so that random thermal fluctuations don’t rise above the threshold to trigger the pixels. In a DSLR, this typically means changing the ISO setting of a camera, where a lower ISO setting means more light is required to trigger a pixel, but that random fluctuations are less likely to happen. From a camera designer’s point-of-view, however, a higher voltage generally implies greater power consumption and some speed considerations, so there are some tradeoffs to make in this area.
Another reason that thermal fluctuations cause noise in image sensors is that the pixels themselves are so close together that they influence their neighbors. The answer here seems obvious: simply increase the area of the sensor, make the pixels of the sensor bigger, or both. This is a good solution if you have unlimited area, but in something like a cell phone this isn’t practical. This gets to the core of the reason that most modern cell phones seem to be practically limited somewhere in the sixteen-to-twenty megapixel range. If the pixels are made too small to increase megapixel count, the noise will start to ruin the images. If the pixels are too big, the picture will have a low resolution.
There are some non-technological ways of increasing megapixel count for an image as well. For example, a panoramic image will have a megapixel count much higher than that of the camera that took the picture simply because each part of the panorama has the full mexapixel count. It’s also possible to reduce noise in a single frame of any picture by using lenses that collect more light (lenses with a lower f-number) which allows the photographer to use a lower ISO setting to reduce the camera’s sensitivity.
Gigapixels!
Of course, if you have unlimited area you can make image sensors of virtually any size. There are some extremely large, expensive cameras called gigapixel cameras that can take pictures of unimaginable detail. Their size and cost is a limiting factor for consumer devices, though, and as such are generally used for specialty purposes only. The largest image sensor ever built has a surface of almost five square meters and is the size of a car. The camera will be put to use in 2019 in the Large Synoptic Survey Telescope in South America where it will capture images of the night sky with its 8.4 meter primary mirror. If this was part of the megapixel race in consumer goods, it would certainly be the winner.
With all of this being said, it becomes obvious that there are many more considerations in a digital camera than just the megapixel count. With so many facets of a camera such as physical sensor size, lenses, camera settings, post-processing capabilities, filters, etc., the megapixel number was essentially an easy way for marketers to advertise the claimed superiority of their products until the practical limits of image sensors was reached. Beyond a certain limit, more megapixels doesn’t automatically translate into a better picture. As already mentioned, however, the megapixel count can be important, but there are so many ways to make up for a lower megapixel count if you have to. For example, images with high dynamic range are becoming the norm even in cell phones, which also helps eliminate the need for a flash. Whatever you decide, though, if you want to start taking great pictures don’t worry about specs; just go out and take some photographs!
(Title image: VISTA gigapixel mosaic of the central parts of the Milky Way, produced by European Southern Observatory (ESO) and released under Creative Commons Attribution 4.0 International License. This is a scaled version of the original 108,500 x 81,500, 9-gigapixel image.)
[GregO29] had a 10″ GoTo telescope but at 70lbs, it wasn’t really portable. And so he did what any self-respecting CNC enthusiast would do, he put his CNC skills to work to make an 8″ Newtonian reflector, semi-Nasmyth mount telescope of his own design. It also gave him a chance to try out his new Chinese 6040 router/engraver with 800W water-cooled spindle.
What’s all that fancy terminology, you say? “Newtonian reflector” simply means that there’s a large concave mirror at one end that reflects a correspondingly large amount of light from the sky to a smaller mirror which then reflects it toward your eye, preferably along with some means of focusing that light. “Semi-Nasmyth mount” means that the whole thing pivots around the eyepiece so that you can keep your head relatively still (the “semi” is because the eyepiece can also be pivoted, in which case you would have to move your head a bit).
We really like the mechanism he came up with for rotating the telescope in the vertical plane. Look closely at the photo and you’ll see that the telescope is mounted to a pie-shaped piece of wood. The curved outer circumference of that pie-shape has gear teeth on it which he routed out. The mechanism that moves these teeth is a worm screw made from a 1″ spring found at the hardware store that’s on a 3/4″ dowel. Turn the worm screw’s crank and the telescope rotates.
Scanning the heavens with a telescope is a great way to spend long, clear winter nights, but using a manual telescope can get to be a drag. A motorized mount with altitude and azimuth control is basic equipment for the serious observer, but adding a servo to control the focus of your telescope is one step beyond your average off-the-shelf instrument.
Having already motorized the two axes of the equatorial mount of his modest telescope as a senior project, [Eric Seifert] decided to motorize the focus rack as well. His first inclination was to use a stepper motor like he did on the other two axes, but with a spare high-torque servo at hand, he hacked a quick proof-of-concept. The servo was modified for continuous rotation in the usual way, but with the added twist of replacing the internal potentiometer with an external linear pot. Attached to the focus tube, the linear pot allows [Eric] to control the position and speed of the modified servo. Sounds like controlling the focus will be important to [Eric]’s planned web interface for his scope; we’ll be looking for details on that project soon.
We like the simplicity of this solution, and it’s a trick worth keeping in mind for other projects. But if fancy steppers and servos aren’t your thing, fear not — astrophotography is as easy as slapping a couple of boards together with a hinge.
A telescope isn’t an unusual thing to own if you are technically inclined. You might have even made one, at some point. However, despite improvements in optical technology and computer aiming devices, your four to twenty-inch instrument is never going to show you images like you see from big giant telescopes. The problem is, going really big requires a lot of investment in time, money, and sometimes even real estate. The big scopes get buildings constructed for them, and in exotic locations; why would you build a 24-inch scope only to try to see through the light pollution in your backyard?
Here’s an idea: take an astronomy class at a college and use their big telescope. Well, who has the time and money for that? Actually, you do. Skynet is a global network of telescopes headquartered at the University of North Carolina. As part of their mandate, they offer several tuition-free astronomy classes over the Internet. The best part? You also get free time on Skynet’s telescopes to complete your class assignments. There is a small fee (between $45 and $65) to a “benefit corporation” to administer assignments. You do get a certificate upon graduation. If you don’t want to do the assignments and you don’t want a certificate, you can still “take” the classes by simply watching them on YouTube. You can see one of the classes in the video below.
[Chris] recently got his hands on an old telescope. While this small refractor with an altitude-azimuth mount is sufficient for taking a gander at big objects in our solar system, high-end telescopes can be so much cooler. Large reflecting telescopes can track the night sky for hours, and usually come with a computer interface and a GOTO button. Combine this with Stellarium, the open source sky map, and you can have an entire observatory in your back yard.
For [Chris]’ entry into the 2016 Hackaday Prize, he’s giving his old telescope an upgrade. With a Raspberry Pi, a few 3D printed adapters, and a new telescope mount to create a homebrew telescope computer.
The alt-az mount really isn’t the right tool for the astronomical job. The earth spins on a tilted axis, and if you want to hold things in the night sky still, it has to turn in two axes. An equatorial mount is much more compatible with the celestial sphere. Right now, [Chris] is looking into a German equatorial mount, a telescope that is able to track an individual star through the night sky using only a clock drive motor.
To give this telescope a brain, he’ll be using a Raspberry Pi, GPS, magnetometer, and ostensibly a real-time clock to make sure the build knows where the stars are. After that, it’s a simple matter of pointing the telescope via computer and using a Raspberry Pi camera to peer into the heavens with a very, very small image sensor.
While anyone with three or four hundred dollars could simply buy a telescope with similar features, that’s really not the point for [Chris], or for amateur astronomy. There is a long, long history of amateur astronomers building their own mirrors, lenses, and mounts. [Chris] is just continuing this very long tradition, and in the process building a great entry for the 2016 Hackaday Prize