Hacklet 111 – Advanced Microscopy Projects

Last week on the Hacklet we covered optical microscopy projects. Those are the familiar scopes that many of us have at work or even at home on our benches. These are scopes that you typically can use with your eye, or an unmodified camera. This week we’re taking a look at more extreme ways of making small things look big. Electron streams and the forces of a single atom can be used to create incredibly magnified images. So let’s jump right in and check out the best advanced microscopy projects on Hackaday.io!
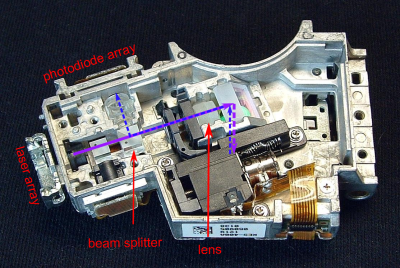
blubeamWe start with [andreas.betz] and BluBEAM – a scanning laser microscope. [Andreas] aims to create a scanning confocal microscope. The diffraction limit is the law of the land for standard optical microscopes. While you can’t break the law, you can find ways around it. Confocal microscopy is one technique used quite a bit in medicine and industry. Confocal scopes are generally very expensive, well outside the budget of the average hacker. [Andreas] hopes to break that barrier by creating a scanning confocal microscope using parts from a PlayStation 3 Blu-Ray optical drive. Optical drives use voice coils to maintain focus. [Andreas] had to create a custom PCB with a voice coil driver to operate the PS3 optics assembly. He also needed to drive the laser. BluBeam is still very much a work in progress, so keep an eye on it!
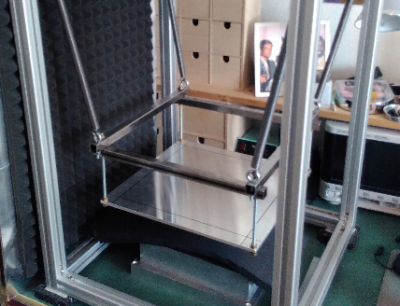
stmNext up is [MatthiasR.] with DIY Scanning tunneling microscope. Open atmosphere scanning tunneling microscopes are popular on Hackaday.io. I covered [Dan Berard]’s creation in Hacklet 103. Inspired by Dan, [Matthias] is building his own STM.

Environmental vibration is a huge problem with high magnification microscopes. [Matthias] is combating this by building a vibration isolation platform using extruded aluminum. He’s currently working on the STM preamplifier, which amplifies and converts the nano amp STM values to voltages which can be read by a digital to analog converter. [Matthias] is using the venerable Analog ADA4530 for this task. With an input bias of 20 femtoamps (!) it should be up to the task.
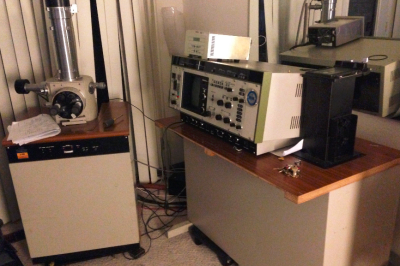
desemNext we have [Jerry Biehler] AKA [macona] with Hitachi S-450 Scanning Electron Microscope. Scanning electron microscopes have to be the top of the microscopy food chain. Jerry got his hands on a 1980’s vintage Hitachi SEM which was no longer working. The problem turned out to be a dodgy repair made years earlier with electrical tape. Fast forward a couple of years of use, and [Jerry] has done quite a lot to his old machine. He’s learned how to make his own filaments from tungsten wire. The slow oil diffusion vacuum pump has been replaced with a turbomolecular pump. The SEM now resides in [Jerry’s] living room, which keeps it at a relatively constant temperature.
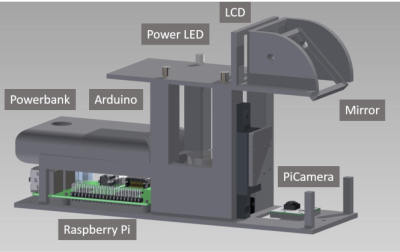
Bild1Finally, we have [beniroquai] with Holoscope – Superresolution Holographic Microscope. Holoscope is a device which increases the resolution of a standard camera by using the physical properties of light to its advantage. Precise tiny shifts of the object being magnified cause minute changes in a reflected image, which is captured by a Raspberry Pi camera. The Pi can then reconstruct a higher resolution image using the phase data. [beniroquai] has put a lot of time into this project, even sacrificing an expensive Sony connected camera to the ESD gods. I’m following along with this one. I can’t wait to see [beniroquai]’s first few images.

If you want to see more advanced microscopy projects, check out our new advanced microscope projects list! If I missed your project, don’t be shy, just drop me a message on Hackaday.io. That’s it for this week’s Hacklet. As always, see you next week. Same hack time, same hack channel, bringing you the best of Hackaday.io!

Hacklet 110 – Optical Microscopy Projects

Humans have always wanted to make small things bigger. To see that which is unseen with the naked eye. The inventor of the original microscope happened sometime in the 1600’s, though the inventor is still contested. Some say it was Cornelis Drebbel, while others say Hans Lippershey. Galileo Galilei’s compound microscope is probably the most well-known ancient magnifier. Regardless of who created the device, hackers, makers, engineers, and scientists have used microscopes to study mysteries of biology, geology, electronics, and just about anything else you can imagine.

This is a fitting topic for this week’s Hacklet at is aligns well with the Citizen Scientist challenge round of the Hackaday Prize which began on Monday. Making quality microscopes more widely available is one of many great starting ideas for an entry. Let’s take a look at some of the best microscopy projects on Hackaday.io!

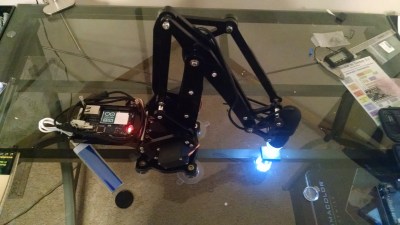
scope1We start with [J. Kha] and Armed Microscope. [J. Kha] was one of the backers of the original uArm over at Kickstarter. He also does quite a bit of work with electronics. After fighting with a cheap USB microscope, he realized he had the perfect platform to control it. Microscopes usually are stationary, with the object being viewed moved on a stage. [J. Kha] turned things upside down by mounting the microscope on his uArm. An Arduino Yun controls the system. The Yun also allows him to stream the microscope’s video over the internet using the mjpg-streamer library. [J. Kha] did have some power issues at first, but he’s got his regulators all sorted out now.

scope2Next we have [andyhull] with Adding a light touch to a “classic” microscope. A lucky dumpster find netted [Andy] a pile of old broken microscopes. From this he was able to build a working classic stereo scope. This was a Gillet & Sibert stereo compound scope. Like most microscopes of its time, the old GS used standard incandescent or halogen lights for illumination. The old bulbs were long gone, and would have been a pain to replace. [Andy] switched his scope over to LED illumination. He ended up using a commercially available LED “bulb” designed to replace type 1157 automotive tail light bulbs. This type of LED is designed to run on 12 volt power which simplifies the wiring. The small LED flashlight in a custom mount also provides a bit of help for opaque subjects.

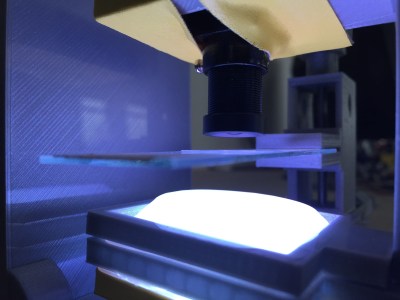
scope3Next up is [Andre Maia Chagas] with Flypi – cheap microscope/experimental setup. Flypi is [Andre’s] entry in the 2106 Hackaday Prize. Flypi is more than just a microscope, it’s a 3D printed data collection and image analysis device for hackers and scientists alike. A Raspberry Pi 2 or 3 controls the show. Images come in through Pi Camera with an M12 lens. The Pi runs some open source Python code allowing it to acquire and analyze images. It also has an Arduino as a co-processor to handle anything a particular experiment may need – like RGB LEDs, heaters, manipulators, you name it. Andre sees Flypi as having uses in everything from fluorescence imaging to optogenetics and thermogenetics.

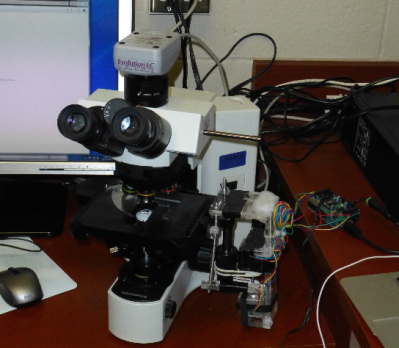
scope5Finally we have [Jarred Heinrich] with Stagmo: Microscope Stage Automator. Positioning samples under high magnification requires a steady hand. Trying to image them makes things even harder. To help with this, microscopes have stages. Fine lead screws manually controlled by knobs allow the user to precisely position any subject. Automated stages are available as well, but they can get quite expensive. [Jarred] recognized that the microscope stage is an X-Y platform like any CNC, laser, or 3D printer. He used an Arduino and a motor shield to control a couple of stepper motors. The motors are coupled to the stage knobs with rubber belts. While the mounting system looks a little wobbly, but it got the job done, and didn’t require any modifications to the microscope itself.

Optical microscopes are just one type of scope you’ll find on Hackaday.io. There are also atomic force microscopes, scanning electron microscopes, and more! I’ll cover those on a future Hacklet. If you want to see more awesome optical microscopy projects, check out our new optical microscope projects list! If I missed your project, don’t be shy, just drop me a message on Hackaday.io. That’s it for this week’s Hacklet. As always, see you next week. Same hack time, same hack channel, bringing you the best of Hackaday.io!

Hacklet 109 – Complex 3D Printed Projects

If you can’t tell, we’re on a roll with 3D printers and printed projects this month. So far, we’ve covered printers, and simple functional 3D prints. This week we’re taking a look at some of the awesome complex 3D printed projects on Hackaday.io.

Complex 3D printed projects are things like robots, quadcopters, satellite tracking systems, and more. So let’s jump in and look at some of the best complex 3D printed projects on Hackaday.io!

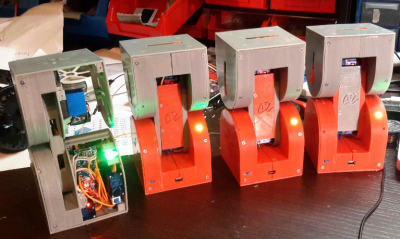
dtto2We start with [Alberto] and Dtto v1.0 Modular Robot. Dtto is [Alberto’s] entry in the 2016 Hackaday Prize. Inspired by Bruce Lee’s famous water quote, Dtto is a modular snake-like robot. Each section of Dtto is a double hinged joint. When two sections come together, magnets help them align. A servo controlled latch solidly docks the sections, which then work in unison. Dtto can connect and separate segments autonomously – no human required. [Alberto] sees applications for a robot like [Dtto] in search and rescue and space operations. Continue reading “Hacklet 109 – Complex 3D Printed Projects”

Hacklet 108 – Simple Functional 3D Prints

We featured 3D printer projects on last week’s Hacklet. This week, we’re looking at a few awesome projects created with those printers. Trying to pick great 3D printed projects on Hackaday.io is a bit like staring at the sun. There are just way too many to choose from. To make things a bit easier, I’ve broken things down into categories. There are artistic prints, complex mechanical or electronic prints, and then there are simple functional prints, which is the topic we’re featuring today. Simple functional prints are designs which perform some function in the world. By simple, I mean they have only a few moving parts or electronic components. Let’s get right to it!

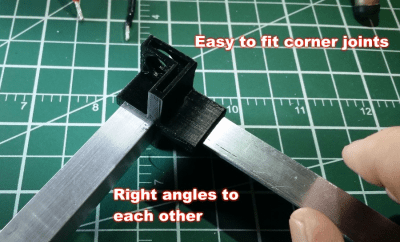
cornersWe start with [Scott] and L Extrusion Endcaps. Every Home Depot, Lowes, or hardware store has a selection of extruded aluminum. Typically there are a few flat bars, and some L brackets. L brackets are great, but they can be a pain to work with. Most of us don’t have the skills or the tools to weld aluminum, so nuts and bolts are the only way to go. [Scott’s] given us another option. He’s designed a set of 3D printable brackets that slip onto the ends of the brackets. The brackets make quick work of building boxes, racks, or anything with 90° or 45° angles.


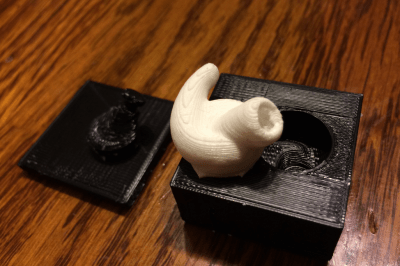
earbudNext up is [Joe M] with 3D Printed Molds: Custom Silicone Earbuds. [Joe] had a set of Bluetooth earbuds he enjoyed, but the rubber tips left a bit to be desired. Not a problem when you have a 3D printer on hand. [Joe] measured the plastic part of his earbuds and the rubber tips from a different set he liked. A bit of CAD magic later, and he had a model for the perfect earbud tip. While he could have directly printed the tip in a flexible filament like NinjaFlex, [Joe] opted for a pure silicone tip. He printed molds, then mixed silicone caulk with cornstarch (as a catalyst). The resulting earbuds sound and feel great!

coil2Next we have [Jetty] with Highly Configurable 3D Printed Helmholtz Coil. Helmholtz coils are used to create uniform magnetic fields. Why would you want to do that? It could be anything from measuring magnets to cancelling out the effect of the earth’s magnetic field on a device being tested. [Jetty’s] wrote an OpenScad program which allows the user to enter parameters for their coil. [Jetty’s] program then calculates the coil’s magnetic properties, and outputs a printable .stl file. Building the coil is as simple as printing it and wrapping some copper wire. [Jetty] found that his coil was within 60nT (nanoTesla) of the expected value. Not bad for a bit of plastic and wire!


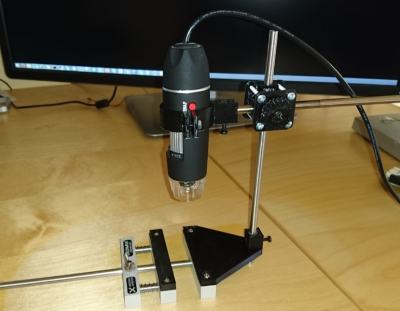
scope1Finally we have StickScope,  [SUF’s] entry in the 2016 Hackaday Prize. Like many of us, [SUF] loves his StickVise. Sometimes you need a bit of magnification to see those tiny 0201 resistors though. [SUF] had a cheap USB microscope on hand, so he designed StickScope, a USB microscope mount designed especially for the StickVise. Two 6mm steel rods are the backbone of the design. 3D printed clamps hold the system together like a miniature boom microscope. This is actually the third revision of the design. [SUF] found that the original design couldn’t be used with parts close to the bar which holds the microscope. A small jaw extender was the perfect tweak.


If you want to see more simple functional 3D printed projects, check out our new simple functional 3D prints list! If I missed your project, don’t be shy, just drop me a message on Hackaday.io. That’s it for this week’s Hacklet. As always, see you next week. Same hack time, same hack channel, bringing you the best of Hackaday.io!
Hacklet 107 – 3D Printing Projects

3D printers have forever changed the hardware hacker movement. From the original RepRap project on up through current commercial offerings, 3D printers have become an indispensable tool for hackers, makers, and engineers. While printers may not have started a desktop manufacturing revolution, they are a desktop prototyping evolution. It’s rare for a day to go by on Hackaday without a project that uses a 3D printed part in some way shape or form. These printers also continue to evolve, with new projects pushing the technology ever forward. This week’s Hacklet is all about some of the best 3D printer projects on Hackaday.io!

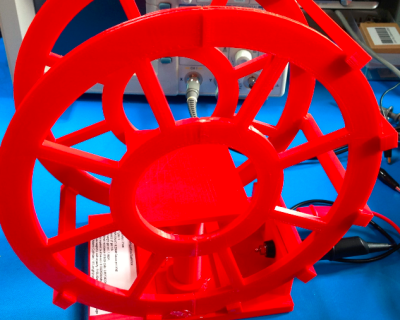
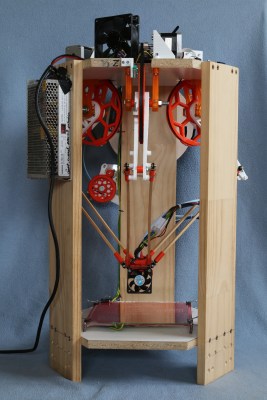
reprapWe start with [TTN] and Icepick Delta. [TTN’s] passion is creating 3D printers as cheaply as possible. The Icepick definitely succeeds at this. Icepick’s frame is made of wood. The motors are commodity steppers. Control is via the long proven Ramps 1.4 board, which can be picked up with drivers and an Arduino Mega clone for under $35 these days. A few ball bearings and metal parts fill out the vitamins of this design. Just about everything else is 3D printed in true RepRap style. The printer is currently running Marlin firmware, but [TTN] plans to move to Repetier in the future.

Even with these humble origins, Icepick manages to print at a very respectable 50 mm/s before frame flex becomes a problem.  Prints at 0.1mm layer height look great, on par with any current commercial printer.

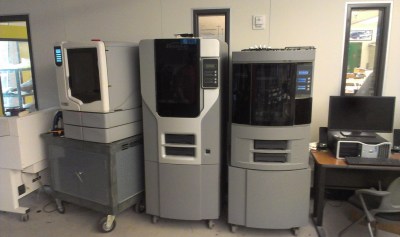
strataNext up is  [Machinist] with 3D printer brain retrofit. Commercial 3D printers have been available for decades now. This means some of the older models are getting a bit long in the tooth. [Machinist] has a very tired 15 year old Stratasys Dimension 768. The mechanics of the Dimension are still in good shape, but the electronics have seen better days. [Machinist] is ditching all the old electronic hardware (and the DRM which goes with it) and setting this machine up with a Smoothieboard 5X. So far the Dimension has been gutted, and [Machinist] has gotten the monster stepper motors playing sweet music with his new control board. I can’t wait to see how this project progresses.

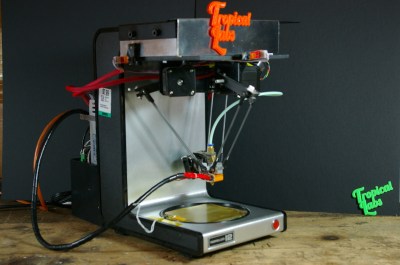
coffeeNext we have [jcchurch’s] Coffee Maker Delta 3D Printer. [jcchurch] has managed to convert an old Norelco coffee maker into a mini sized 3D printer. The warmer plate has even become a heated bed for ABS prints. Unlike Icepick up top, the aim of this design is to use as few 3D printed parts as possible. The idea is that this would be the first printer to build when you don’t have another printer handy. Think of it as a caffeinated RepStrap. According to [jcchurch], this printer has been running strong at Tropical Labs for over a year. You can even pull the delta assembly off and make a pot of coffee! The coffee maker printer is still somewhat of a teaser project. If you see [jcchurch] online, tell him to head over and give us more details!

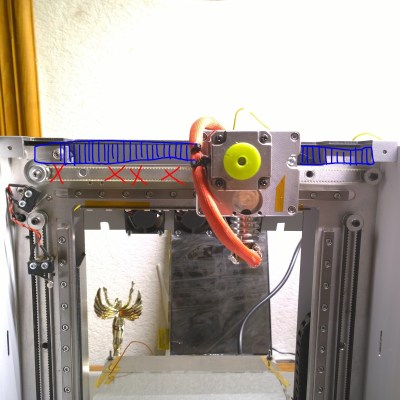
linearFinally, we have [DeepSOIC] with linear stepper motor 3d printer. 3D printers all use good old fashioned rotary stepper motors. [DeepSOIC] is trying to eliminate all that rotary motion, along with the belts and pulleys required to convert to linear motion. Linear stepper motors can be thought of as regular stepper motors, just unrolled. They tend to be very expensive though, so [DeepSOIC] is building DIY versions. His first attempt was to print motor parts using BlackMagic3D’s ferromagnetic filament. This lead to a whole separate project to measure the permeability of the filament. Unfortunately, the filament isn’t permeable enough to act as a motor for a printer. [DeepSOIC] hasn’t given up though. This is the type of project we love – one that might not work out, but really gets people thinking. Check out the comment thread on the project to see Hackaday.io collaboration at work!

If you want to see more 3D printer projects, check out our updated 3D printer list! If I didn’t wake up early enough to catch your project, don’t be shy, just drop me a message on Hackaday.io. That’s it for this week’s Hacklet. As always, see you next week. Same hack time, same hack channel, bringing you the best of Hackaday.io!
Hacklet 106 – Robots That Teach

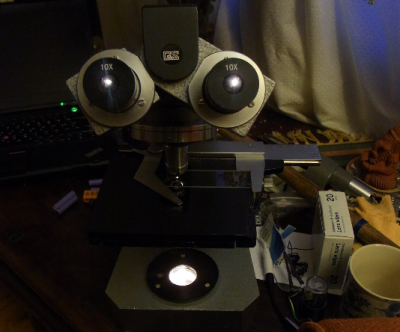
One of the best ways to teach electronics and programming is with hands-on learning. Get the concepts off the computer screen and out into the real world. Students of all ages have been learning with robots for decades. Many older Hackaday readers will remember the turtle robots. These little ‘bots would drive around drawing shapes created in the logo programming language. This week’s Hacklet is all about the next generation of robots that teach electronics, mechanics, programming, and of course, hacking. So let’s check out some of the best educational robot projects on Hackaday.io!

edubotWe start with [Tom Van den Bon] and Edubot Controller (Benny). Buying one or two robots can get expensive. Equipping a classroom full of them can break the bank. [Tom] is hoping to make robots cheaper and more accessible with Edubot, his entry in the 2016 Hackaday prize. Edubot rides on a 3D printed frame with low-cost gear motors for a drive system. Edubot’s brain is an STM32F042, a low-cost ARM processor from ST micro. The micro and motor drives are integrated into a custom board [Tom] designed. He’s has even begun creating lesson plans so students of various ages and skill levels can participate and learn.

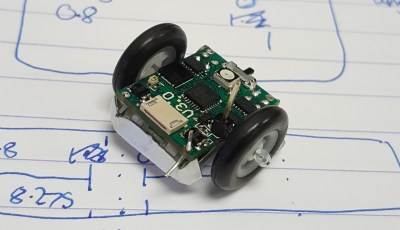
microbotNext up is [Joshua Elsdon] with Micro Robots for Education. Big robots can be intimidating. They can also cause some damage when hardware and software created by budding engineers doesn’t operate as expected. Tiny robots though, are much easier to wrangle. [Joshua ] may have taken tiny to an extreme with these robots. Each robot is under 2 cm square. The goal is for each one to cost less than  £10 to produce. These micro bots have big brains with their ATmega328P micro controllers. [Joshua] is currently trying to figure out a low-cost way to produce wheels for these robots.

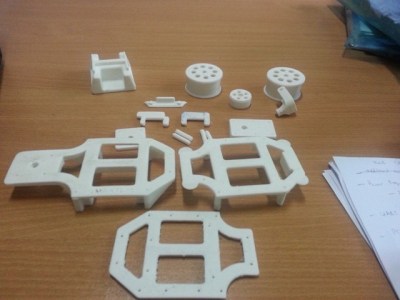
Next we have [shamylmansoor] with 3D printed mobile robot for STEM education. Robots are expensive, and international shipping can make them even more expensive. [Shamyl] is shooting for a robot which can be made locally in Pakistan. 3D printing is the answer. The robot’s chassis can be printed on any FDM printer. Wheels,and tires are low-cost units. Motors are RC servos modified for continuous rotation. The brains of the robot is an Arduino Mega 2560, which should provide plenty of inputs for sensors. [Shamyl] even included a solderless breadboard so students can prototype circuits and sensors right on the robot’s body.


plobotFinally we have [Rodolfo] with Plobot. Plobot is a robot designed for the youngest hackers – those from four to seven years old. [Rodolfo] designed Plobot to be programmed with RFID cards. Each card contains a command such as move forward, turn, start, and reset. Many of the language mechanics are inspired by the Scratch programming language. Plobot’s processor is a Sanguino, running [Rodolfo’s] custom code. An ESP8266 allows Plobot to be connected to the outside world via WiFi. [Rodolfo] has even created a custom over the air update system for Plobot’s firmware. Plobot has already been tested with students, where it made a great showing. We’re hoping both [Rodolfo] and Plobot do well in the 2016 Hackaday Prize!

If you want more mind hacking goodness, check out our brand new educational robot list! Did I miss your project? Don’t be shy, just drop me a message on Hackaday.io. That’s it for this week’s Hacklet, As always, see you next week. Same hack time, same hack channel, bringing you the best of Hackaday.io!
Hacklet 105 – More Mind And Brain Hacks

A mind is a terrible thing to waste – but an awesome thing to hack. We last visited brain hacks back in July of 2015. Things happen fast on Hackaday.io. Miss a couple of days, and you’ll miss a bunch of great new projects, including some awesome new biotech hacks. This week, we’re checking out some of the best new mind and brain hacks on Hackaday.io

We start with [Daniel Felipe Valencia V] and Brainmotic. Brainmotic is [Daniel’s] entry in the 2016 Hackaday Prize. Smart homes and the Internet of Things are huge buzzwords these days. [Daniel’s] project aims to meld this technology with electroencephalogram (EEG). Your mind will be able to control your home. This would be great for anyone, but it’s especially important for the handicapped. Brainmotic’s interface is using the open hardware OpenBCI as the brain interface. [Daniel’s] software and hardware will create a bridge between this interface and the user’s home.


biofeed1Next we have [Angeliki Beyko] with Serial / Wireless Brainwave Biofeedback. EEG used to be very expensive to implement. Things have gotten cheap enough that we now have brain controlled toys on the market. [Angeliki] is hacking these toys into useful biofeedback tools. These tools can be used to visualize, and even control the user’s state of mind. [Angeliki’s] weapon of choice is the MindFlex series of toys. With the help of a PunchThrouch LightBlue Bean she was able to get the EEG headsets talking on Bluetooth. A bit of fancy software on the PC side allows the brainwave signals relieved by the MindFlex to be interpreted as simple graphs. [Angeliki] even went on to create a Mind-Controlled Robotic Xylophone based on this project.

brainhelmetNext is [Stuart Longland] who hopes to protect brains with Improved Helmets. Traumatic Brain Injury (TBI) is in the spotlight of medical technology these days. As bad as it may be, TBI is just one of several types of head and neck injuries one may sustain when in a bicycle or motorcycle accident. Technology exists to reduce injury, and is included with some new helmets. Many of these technologies, such as MIPS, are patented. [Stuart] is working to create a more accurate model of the head within the helmet, and the brain within the skull. From this data he intends to create a license free protection system which can be used with new helmets as well as retrofitted to existing hardware.

mindwaveFinally we have [Tom Meehan], whose entry in the 2016 Hackaday Prize is Train Your Brain with Neurofeedback. [Tom] is hoping to improve quality of life for people suffering from Epilepsy, Autism, ADHD, and other conditions with the use of neurofeedback. Like [Angeliki ] up above, [Tom] is hacking hardware from NeuroSky. In this case it’s the MindWave headset. [Tom’s] current goal is to pull data from the TAGM1 board inside the MindWave. Once he obtains EEG data, a Java application running on the PC side will allow him to display users EEG information. This is a brand new project with updates coming quickly – so it’s definitely one to watch!

If you want more mind hacking goodness, check out our freshly updated brain hacking project list! Did I miss your project? Don’t be shy, just drop me a message on Hackaday.io. That’s it for this week’s Hacklet, As always, see you next week. Same hack time, same hack channel, bringing you the best of Hackaday.io!