Perfect Cheese Every Time With This Temperature Controller

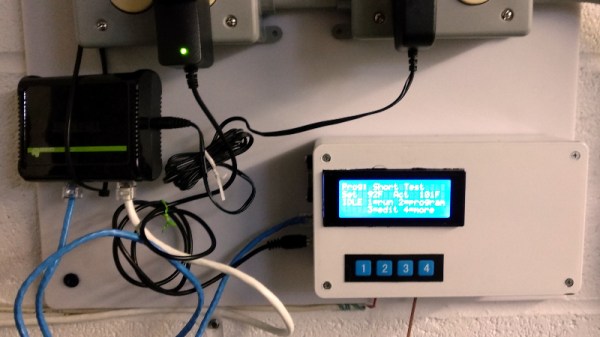
Anyone who is from a background in which cheesemaking is a feature will tell you that it is an exact science in which small differences in parameters can make a huge difference in the resulting cheese, to the extent that entire batches can be rendered inedible. In particular the temperature at which the milk is held can be crucial to the production of individual styles of cheese. A friend of [William Dudley]’s had this problem, as a dairy farmer and artisinal cheesemaker they had to carefully control their vat with a set of profiles depending upon the recipe in use. This was achieved using an Arduino Mega 2650 and a thermocouple to control the heat source for the hot water in the outer wall of the vat.

A cheap K-type thermocouple amplifier proved unsatisfactory, so a Sparkfun item was substituted. A relay, Ethernet adaptor, and LCD display provided power control, access to a web interface, and user feedback respectively. Four buttons to select programs were added, and the whole was neatly boxed up to survive the dairy and put to work. In tests with a saucepan it was configured as a PID controller, but the real vat proved to have a much greater thermal inertia so a simpler bang-bang home thermostat style approach was used. Temperatures are logged in an eeprom for later retrieval via the web interface.

We don’t see the cheeses produced, but we’re sure they must be worth the effort. Blessed may be the cheesemakers, but doubly blessed are they who have a little help from an Arduino.

DIY Tube Oven Brings The Heat To Homebrew Semiconductor Fab

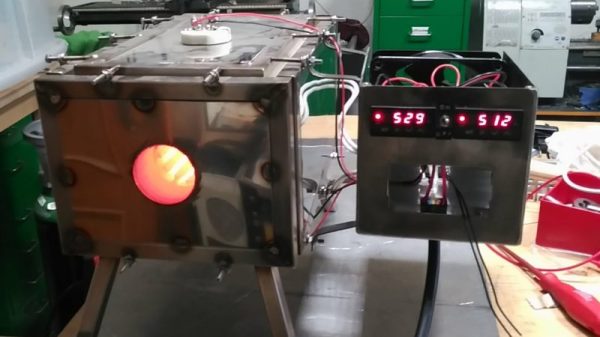
Specialized processes require specialized tools and instruments, and processes don’t get much more specialized than the making of semiconductors. There’s a huge industry devoted to making the equipment needed for semiconductor fabrication plants, but most of it is fabulously expensive and out of reach to the home gamer. Besides, where’s the fun in buying when you can build your own fab lab stuff, like this DIY tube oven?

A tube oven isn’t much more complicated than it sounds — it’s just a tube that gets hot. Really, really hot — [Nixie] is shooting for 1,200 °C. Not just any materials will do for such an oven, of course, and this one is built out of blocks of fused alumina ceramic. The cavity for the tube was machined with a hole saw and a homebrew jig that keeps everything aligned; at first we wondered why he didn’t use his lathe, but then we realized that chucking a brittle block of ceramic would probably not end well. A smaller hole saw was used to make trenches for the Kanthal heating element and the whole thing was put in a custom stainless enclosure. A second post covers the control electronics and test runs up to 1,000°C, which ends up looking a little like the Eye of Sauron.

We’ve been following [Nixie]’s home semiconductor fab buildout for a while now, starting with a sputtering rig for thin-film deposition. It’s been interesting to watch the progress, and we’re eager to see where this all leads.

Homebrew Not A Hakko

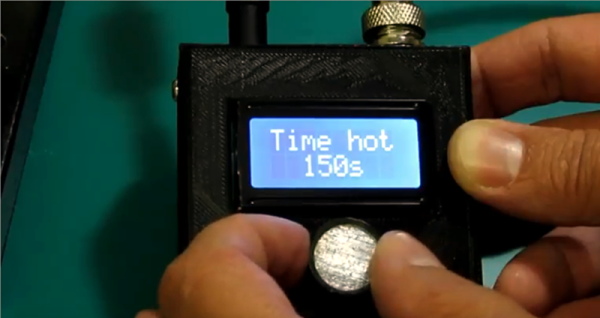
We don’t know if [Marius Taciuc] was thinking about how all Jedi make their own lightsabers as a rite of passage, but he decided that it was time to build his own soldering iron. He used a Hakko T12 tip which has a built-in thermocouple. However, he found that the information on the Internet about the tips was either incomplete or incorrect. Naturally, he figured it out and you can see the completed iron in the video, below.

The problem stems from the thermocouple type. Some sites he found identified it as a type K device. Others said it wasn’t, but didn’t say what kind it was. He took a container of oil and heated it to various temperatures and then measured it with both a commercial soldering iron and the T12 tip. By plotting the data against known thermocouple curves, he concluded the device was actually type C.

Continue reading “Homebrew Not A Hakko”

Thermoelectric Fan Harvests Wood Stove Heat Junkyard Style

Anyone who heats with a wood stove knows that the experience is completely different from typical central heating. It’s not for everyone, though, and it’s certainly not without its trade-offs. One of the chief complaints is getting heat away from the stove and into other areas of the house, and many owners turn on an electric fan to circulate the heated air.

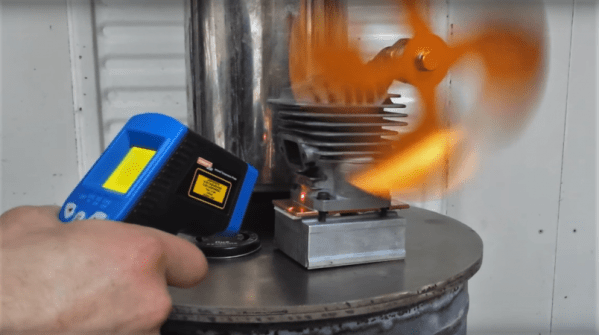
That’s hardly in the green nature of wood heating, though, and fans can be noisy. So something like this heat-powered stove-top fan can come in handy. Such fans, which use Peltier devices to power a small electric motor, are readily available commercially. [bongodrummer] thought that sounded like no fun, though, and created his own mostly from junk. The Peltier module was salvaged from an old travel fridge and mounted to a heat sink from a computer to harvest heat from the stove. The other side of the Peltier needs to have a heat sink to keep it cooler than the hot side, and [bongodrummer] chose an unconventional bit of salvage for the job — the cylinder of a chainsaw engine. The spark plug hole sprouts the mount for the fan motor, and the cooling fins help keep the Peltier cool. And to prevent overheating of the device, he added a surprise — a car cooling system thermostat to physically lift the device off the stove when it gets too hot. Genius!

The video below shows the build, which was not trivial. But we think the end results are worth it, and it reminds us a little of the woodstove generator we featured a while back.

Continue reading “Thermoelectric Fan Harvests Wood Stove Heat Junkyard Style”

Reflow Rig Makes SMD Soldering A Wok In The Park

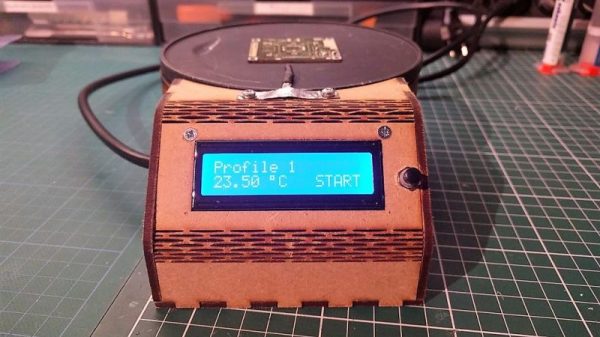
For a DIY reflow setup, most people seem to rely on the trusty thrift store toaster oven as a platform to hack. But there’s something to be said for heating the PCB directly rather than heating the surrounding air, and for that one can cruise the yard sales looking for a hot plate to convert. But an electric wok as a reflow hotplate? Sure, why not?

At the end of the day [ThomasVDD]’s reflow wok is the same as any other reflow build. It has a heat source that can be controlled easily, temperature sensors, and a microcontroller that can run the proportional-integral-derivative (PID) control algorithm needed for precise temperature control. That the heating element he used came from an electric wok was just a happy accident. A laser-cut MDF case complete with kerf-bent joints holds the heating element, the solid-state relay, and the Arduino Nano that runs the show. A MAX6675 thermocouple amp senses the temperature and allows the Nano to cycle the temperature through different profiles for different solders. It’s compact, simple, and [ThomasVDD] now has a spare wok to use on the stove top. What’s not to like?

Reflow doesn’t just mean oven or hotplate, of course. Why not give reflow headlights, a reflow blowtorch, or even a reflow work light a try?

A Compensated Thermocouple Amp, Ready For Arduino

When you want to measure temperature with an Arduino or other microcontrollers, there are a ton of options for sensors. Temperature chips and sensor modules abound, some with humidity sensors built-in and all with easy interfacing and an expansive supporting code library. But dip one of those sensors into, say, molten aluminum, and you’ve got a problem.

If you’re measuring something hot, you need a thermocouple. Trouble is, the signal from a thermocouple is pretty small, and needs amplification and compensation before being fed into the ADC of a typical microcontroller. Unable to find a commercial amp to meet his needs, [MonkHelios] built his own thermocouple amp for microcontrollers. The design is centered around an LTC2053 instrumentation amp, which does the job of converting the K-type thermocouple’s 40.6μV/°C output to a nicely scaled 10mV/°C range, just right for ADC consumption. He also thoughtfully included an LT1025 cold-junction compensator; thermocouple amps are referenced to 0°C, so the compensator measures the actual temperature of the cold end of the junction and scales the output accordingly. The whole amp is nicely laid out on a DIY single-sided PCB with meticulously applied solder mask — this is one of the nicest home-etched boards we’ve seen in a long time.

[Bil Herd] designed a similar thermocouple amp not too long ago himself, so you might check that out too.  Or maybe you need the basics of instrumentation amps? Our “Beyond Measure” series will get you started.

PID Controlled Charcoal BBQ – Put An Arduino On It!

At Maker Faire Milwaukee this past weekend, [basement tech]  was showing off his latest build, a PID controlled charcoal grill. While it hasn’t QUITE been tested yet with real food, it does work in theory.

PID (a feedback loop with some fancy math used to adjust the input to get a consistent output) controlled cooking is commonly used for sous vide, where one heats up a water bath to a controlled temperature to cook food in plastic bags. Maintaining water temperature is fairly easy. Controlling a charcoal barbecue is much more difficult. [basement tech] accomplishes this with controlled venting and fans. With the charcoal hot and the lid on, there are two ways to control temperature; venting to let hot air out, and blowing air on the coals to make them hotter. A thermocouple sensor stuck through the grill gives the reading of the air inside, and an Arduino nearby reads that and adjusts the vents and fans accordingly.

The video goes into extensive detail on the project, and describes some of the challenges he had along the way, such as preventing the electronics and servos from melting.

Continue reading “PID Controlled Charcoal BBQ – Put An Arduino On It!”