Hacker Creates Thermal Probes By Welding With A PC Power Supply

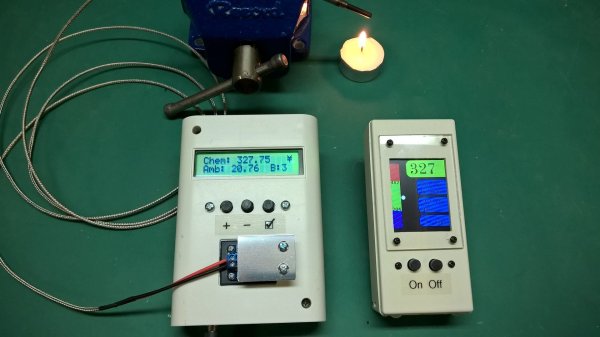
[Illya Tsemenko] decided to build his own thermocouples from bare wire. [Illya] is interested in measuring the temperature of Liquid Nitrogen and for this he needed T-type probes. While you can buy these for about 20 bucks, he felt this was too expensive for what is essentially two pieces of wire and decided to build his own.

Thermocouples use the Seebeck effect, when a piece of metal is hot at one end, and cold at the other the electrons in the hot end will be more energetic and migrate towards the cold end, creating a voltage. While this migration occurs in single metal, it can’t easily be measured (as the voltage will be the same as the measurement point). For that reason thermocouples use two metals in which the migration occurs at different rates. This difference creates an overall migration in one direction, and a voltage can be measured which correlates to the temperature where the metals meet. Thermocouples are extremely common and have many applications.

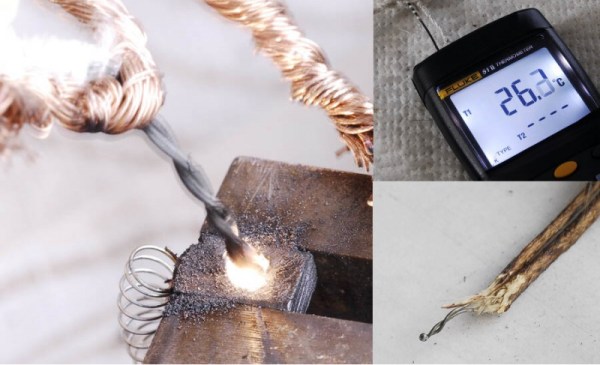
In order to make his thermocouples [Illya] needed to weld the two metals together, and knocked together a quick welding rig using a PC power supply and graphite electrode from a powertool. The graphite electrode is important as it prevents oxidization during the welding process.

The process worked well, and [Illya] was able to make both K and T-type thermocouples and successfully measure temperatures down to -190 degrees C. Awesome work [Illya]!

How To Build A Thermocouple Amplifier

A Thermocouple is a terrific way to measure temperature. The effects of temperature change on dissimilar metals produces a measurable voltage. But to make that measurement you need an amplifier circuit designed for the thermocouple being used.

Linear Technology LTC 1049 Low Power Zero-Drift Operational Amplifier with Internal Capacitors
Linear Technology LTC 1049 Low Power Zero-Drift Operational Amplifier
with Internal Capacitors

While researching “Zero Drift Amplifiers” as a follow-up to my video on Instrumentation Amplifiers I noticed the little schematic the front page of the LTC1049 datasheet which is shown here. I thought it was an ideal example of an analog application where some gain and some “gain helper” were needed to accomplish our useful little application of amplifying a thermocouple probe.

In the video I don’t really talk much about the thermocouples themselves other than the type I see most of the time which is type K. If you’re not already familiar with the construction of these probes you can find an informative write-up on thermocouples and the different types on the Wikipedia page and you might also want to check out the Analog Devices app note if you would like to know more. What I will cover is a reliable and precise way to read from these probes, seen in the video below and the remainder of the post after the break.

Continue reading “How To Build A Thermocouple Amplifier”

Calibrating The MSP430 Digitally Controlled Oscillator

The MSP430 is a popular microcontroller, and on board is a neat little clock source, a digitally controlled oscillator, or DCO. This oscillator can be used for everything from setting baud rates for a UART or for setting the clock for a VGA output.

While the DCO is precise – once you set it, it’ll keep ticking off at the correct rate – it’s not accurate. Without a bit of code, it’s difficult to set the DCO to the rate you want, and the code to set that rate will be different between different chips.

When [Mike] tried to set up a UART between an MSP430 and a Bluetooth module, he ran into a problem. Setting the MSP to the correct baud rate was difficult. Luckily, there’s a way around that.

There’s an easy way to set the DCO on the MSP programatically; just set two timers – one that interrupts every 512 cycles, with its clock source set to the DCO, and another that interrupts every 32768 cycles that gets its clock from a 32.768kHz crystal. The first timer clicks off every second, and by multiplying the first timer by 512, the real speed of the DCO can be deduced.

After playing around with this technique and testing the same code on two different chips, [Mike] found there can be a difference of almost 1MHz between the DCOs from chip to chip. That’s something that would have been helpful to know when he was playing around with VGA on the ‘430. Back then he just used a crystal.

The Network Of 1-Wire Devices

teensynet

[jimmayhugh] is a homebrewer and has multiple fermentation chambers and storage coolers scattered around his home. Lucky him. Nevertheless, multiple ways of making and storing beer requires some way to tell the temperature of his coolers and fermenters. There aren’t many temperature controllers that will monitor more than two digital thermometers or thermocouples, so he came up with his own. It’s called TeensyNet, and it’s able to monitor and control up to 36 1-wire devices and ties everything into his home network.

Everything in this system uses the 1-Wire protocol, a bus designed by Dallas Semiconductor that can connect devices with only two wires; data and ground. (To be a fly on the wall during that marketing meeting…) [jimmay] is using temperature sensors, digital switches, thermocouples, and even a graphic LCD with his 1-wire system, with everything controlled by a Teensy 3.1 and Ethernet module to push everything up to his network.

With everything connected to the network, [jimmay] can get on his personal TeensyNet webpage and check out the status of all the devices connected to any of his network controllers. This is something the engineers at Dallas probably never dreamed of, and it’s an interesting look at what the future of Home Automation will be, if not for a network connected relay.

Controlling A Hot Plate’s Temperature For The Lab

When you need precise heating — like for the acetone polishing shown above — the control hardware is everything. Buying a commercial, programmable, controller unit can cost a pretty penny. Instead of purchasing one, try creating one from scratch like [BrittLiv] did.

[BrittLiv] is a Chemical and Biological Engineer who wanted something that performs well enough to be relied upon as a lab tool. Her design utilizes a plain, old hot plate and with some temperature feedback to run custom temperature ramps from programs stored on an SD card.

The system she developed was dealing directly with temperatures up to 338°F. The heating element is driven from mains, using an SSR for control but there is also a mechanical switch in there if you need to manually kill the element for some reason. An ATmega328 monitors the heating process via an MAX6675 thermocouple interface board. This control circuitry is powered from a transformer and bridge rectifier inside the case (but populated on a different circuit board).

She didn’t stop after getting the circuit working. The project includes a nice case and user interface that will have visitors to your lab oohing and aahing.

PID Controlled Glue Gun

Internals of a glue gun controlled with a PID controller

Hot glue falls into the same category of duct tape and zip ties as a versatile material for fixing anything that needs to be stuck together. [Ed]’s Bosch glue gun served him well, but after a couple of years the temperature regulation stopped working. Rather than buying a new one, he decided to rip it apart.

With the old temperature regulation circuit cooked, [Ed] looked around for something better on eBay. He came across a cheap PID temperature controller, and the Frankengluegun was born.

A thermocouple, affixed with some kapton tape and thermal paste, was used to measure the temperature of the barrel. Power for the glue gun was routed through the PID controller, which uses PWM to accurately controller the temperature. All the wiring could even be routed through the original cord grips for a clean build.

Quality glue guns with accurate temperature control are quite pricey. This solution can be added on to a glue gun for less than $30, and the final product looks just as good.

Improved Thermocouples On A Microcontroller

ktype

If you’re reading a thermocouple with one of those fancy schmancy SPI thermocouple amplifiers, this one isn’t for you. If, however, you’re still going through those old-school analog thermocouple amplifiers like the AD595, [miceuz] has just the thing for you. He’s come up with a library for embedded devices that reads the temperature of a k-type thermocouple with +- 0.03°C of accuracy.

As with anything dealing with natural phenomena, the voltage generate by the bimetallic junction of a thermocouple probe is decidedly non-linear. This is a problem when dealing with embedded devices, as that would mean using floating point arithmetic, greatly increasing the amount of code. [micuez] found the NIST tables for a K-type thermocouple and interpolates the actual temperature of the thermocouple probe from the NIST data. The usual way of measuring thermocouples – a polynomial unction of some sort – has an error of about 0.06°C. [miceuz]’s library has an error of less than half that, all while using less code.

The library doesn’t support temperatures below zero, but this is still a work in progress. Still, if you’re looking for a very accurate library for a forge, crock pot sous vide build, or a toaster  oven reflow controller, you can’t do better than [miceuz]’s work.