Connecting An Old Scope To A Computer

Scope

A friend of [Michael]’s said his company was getting rid of some old lab equipment and asked him if he wanted a very large and very old digital storage oscilloscope. A ‘hell yes’ and we’re sure a few beers later, [Michael] found an old Gould 200 MHz four-channel scope on his bench. Even 20 years after its production it’s still a capable tool, but the serial ports on the back got [Michael] wondering – would it be possible to plot the screen of the scope on his computer?

The scope has three ports on the back – GPIB, miscellaneous I/O, and RS423. The latter of those ports is similar enough to RS232 that a USB to Serial converter just might work, and with the help of a null modem cable and a terminal, [Michael] was able to connect to this ancient scope.

In the manual, [Michael] found a the serial commands for this scope. The most useful of these is a command that prints out the contents of the scope’s trace memory as a series of 1-byte integers. With a short bit of PERL programming, [Michael] can create a PDF plot of whatever is on the scope’s screen. It’s formatted perfectly for Gnuplot, MATLAB, or even Excel.

Awesome work, and especially useful given these old scopes are slowly making their way to a technological boneyard somewhere.

Upgrading A Hackerspace’s Shelving

shelving

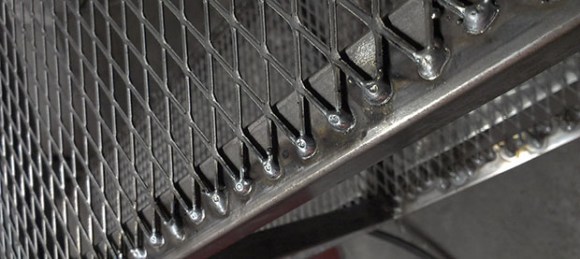
Shelving is probably one of the most underappreciated items in the shop. Think about it; would you rather have a place to store boxes, or a fancy new thickness planer, laser cutter, or pick and place machine. The folks over at the 23B hackerspace were growing tired of their disintegrating Ikea shelving unit and decided to make some shelves. They didn’t phone this one in, either: these shelves will be around far longer than you or I.

[Chris], the creator of these wonderfully useful pieces of metal, was inspired by a video featuring [Jamie Hyneman] of Mythbusters fame. An entire 80 foot section of M5 Industries, [Jamie]’s shop, is covered in shelving units constructed out of square steel tubing, put together in a way that’s easy to construct and able to handle amazing amounts of random stuff.

The new shelves for the 23B shop follow a similar design as the shelves over at M5, only a bit smaller in scale. It’s a wonderful beginner’s project for a welding and fabrication class, and more than sturdy enough to handle a few pull-ups.

Fixing Tools With 3D Printers

saw

Over at the Manchester Hackerspace, [Bob] has been busy getting a 30-year-old bandsaw up and running. The saw worked great, but it was missing a fence, making straight cuts difficult to say the least.  The solution, of course, was to build a new fence, and [Bob] decided to capitalize on his hackerspace’s workshop by making a new fence with a 3d printer.

[Bob] began by taking careful measurements of the saw’s table and the channel running down the length of it. These measurements were plugged into OpenSCAD, and after a few iterations, [Bob] had an extremely well-fitting profile a fence could be attached to.

With the profile down, [Bob] created a new part in OpenSCAD that would hold an aluminum angle piece. This was attached to the plastic parts with screws, and the entire assembly clamps down to the saw with the help of a few 5mm bolts. For a machine that is usually dedicated to making 3D printer parts and Yoda heads, [Bob] did a great job making good use of his 3D printer.

Testing Caps With A DIY ESR Meter

There’s a problem with collecting old tube amps and vintage electronics – eventually the capacitors in these machines will die. It’s not an issue of a capacitor plague that causes new electronics to die after a few years; with time, just about every capacitor will dry out, rendering antique electronics defective. The solution to getting old gear up and running is replacing the capacitors, but how do you know which ones are good and which are bad? With [Paulo]’s DIY ESR meter, of course.

An ideal capacitor has a zero equivalent series resistance, and failure of a capacitor can be seen as an increase in its ESR. Commercial ESR meters are relatively cheap, but [Paulo] was able to build one out of a 555 chip, a small transformer, and a few other miscellaneous components.

The entire circuit is built on stripboard, and if you’re lucky enough to find the right parts in your random parts bin, you should be able to build this ESR meter with components just laying around.

copper-islands

Cutting Islands Into Copper-clad PCBs With A Drill

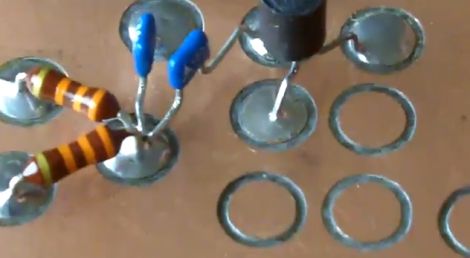
If you’re looking to build some small radio circuits, or if you are simply seeking a new look for your PCBs, you might want to check out what YouTube user [AndyDaviesByTheSea] has been working on lately. He has been building RF circuits as of late and was searching for a better way to create islands or “lands” on copper-clad PCBs.

He says that these sorts of islands are traditionally cut into the PCB with a scalpel or file – hardly an efficient process. [Andy] did a little experimenting and found a great way to quickly and precisely cut lands with a drill. Borrowing a bit of metal from an old VHS tape, he crafted a circular land cutter with a metal file. When mounted as a drill bit, his cutter produces clean, shallow cuts which create perfect lands on which to solder his components.

The only drawback to this method is that [Andy] found his bits were being dulled by the fiberglass boards pretty quickly. His solution was to carefully grind a broken heavy duty drill bit to do the task, which he says works even better than his original cutter.

From The Readers: Low Battery Cutoff Solutions

We got a lot of really great feedback about low battery cutoff options in the comments section of Monday’s replacement battery post. To refresh your memory, some power tool batteries were replaced by Lithium Polymer units which can be damaged if drained too low before recharging. We had thought that many Lithium cells had cutoff circuitry these days. The consensus is that these batteries didn’t because they’re for RC applications where weight is an issue. But we did get a ton of people sending in commercially available drop-in solutions, mostly from RC hobby outlets, so search around for those if you’re interested.

[Christopher] sent us a link to the cutoff circuit he built for his bike light. You can see the schematic for it above (direct link). He sourced an ATtiny45 to drive a MOSFET which disconnects the battery when it gets too low. This would be easy to adapt to other uses, but note that there’s a voltage regulator involved as well as a few other passives… not a difficult solution but also not all that simple.

This same concept can be adapted. A few commentors mentioned using a transistor (or MOSFET) with the base driven by a voltage divider including a zener diode. This way the voltage rating of the diode would effectively shut off the gate when that threshold was reached.

We also enjoyed reading about [Bill’s] human-controlled cutoff circuit. It also uses a zener diode, but this time in series with a resistor and and LED patched into the trigger of the tool. The LED will shine brightly when the battery is in good shape. It will dim near the end, and fail to light when the critical limit has been reached. Just make sure you’re paying attention and you’re in good shape.

Ohm Sense Makes Sense Of Resistor Color Bands

[Alex Busman]’s first foray in iOS programming looks like a pretty useful tool. He came up with Ohm Sense, an iPhone app that will take a picture of a resistor and calculate the value based on the color bands. It’s a great tool that we wish we had when we were starting out. At 99 cents, the app is also much cheaper than the emotional cost of our relationship with Violet.

Continue reading “Ohm Sense Makes Sense Of Resistor Color Bands”