Full-color 3D printing is something of a holy grail, if nothing else, just because of how much it impresses the normies. We’ve seen a lot of multi-material units in the past few years, and with Snapmaker’s U1 and the Prusa XL, it looks like tool changers are coming back into vogue. Just in time, [Ratdoux] has a fork of OrcaSlicer called FullSpectrum that brings HueForge-like color mixing to tool-changing printers.
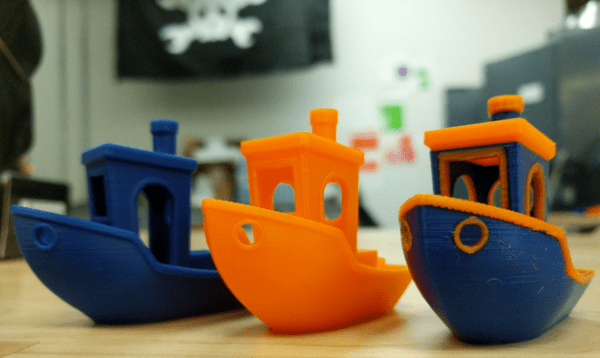
The hook behind FullSpectrum is very simple: stacking thin layers of colors, preferably with semi-translucent filament, allows for a surprising degree of mixing. The towers in the image above have only three colors: red, blue, and yellow. It’s not literally full-spectrum, but you can generate surprisingly large palettes this way. You aren’t limited to single-layer mixes, either: A-A-B repeats, and even arbitrary patterns of four colors are possible, assuming you have a four-head tool-changing printer like the Snapmaker U1 this is being developed for.
FullSpectrum is, in fact, a fork of Snapmaker’s fork of OrcaSlicer, which is itself forked from Bambu Slicer, which forked off of PrusaSlicer, which originated as a fork of Slic3r. Some complain about the open-source chaos of endless forking, but you can see in that chain how much innovation it gets us — including this technique of color mixing by alternating layers.
Continue reading “FullSpectrum Is Like HueForge For 3D Models, But Bring Your Toolchanger”


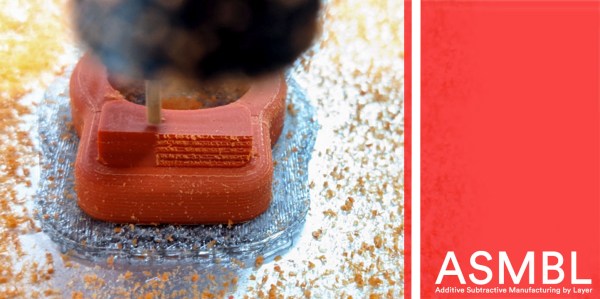
 Dubbed ASMBL (Additive/Subtractive Machining By Layer), the process is actually the merging of two complimentary processes combined into one workflow to produce a single part. Here, vanilla 3D printing does the work of producing the part’s overall shape. But at the end of every layer, an endmill enters the workspace and trims down the imperfections of the perimeter with a light finishing pass while local suction pulls away the debris. This concept of mixing og coarse and fine manufacturing processes to produce parts quickly is a re-imagining of a tried-and-true industrial process called near-net-shape manufacturing. However, unlike the industrial process, which happens across separate machines on a large manufacturing facility, E3D’s ASMBL takes place in a single machine that can change tools automatically. The result is that you can kick off a process and then wander back a few hours (and a few hundred tool changes) later to a finished part with machined tolerances.