Arduino-controlled MIDI Sequencer

am808vx3-arduino-synth

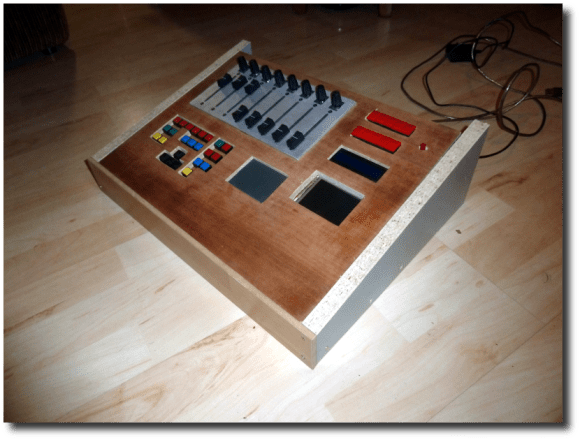
[Christian] wrote in to tell us about his third-generation Arduino MIDI sequencer (translated) called the AM808 VX3. He had already laid a strong base for the project in his previous versions. But the user interface was still frustrating at times and that’s where this version comes in. it features a nice clean dashboard like interface, but also includes a configurable virtual interface.

The obvious components seen above include the slider and potentiometer band, as well as the repository of buttons mounted below that. But in the center of the board is a touchpad which [Christian] pulled out of an old Laptop. It interfaces as a PS2 device which makes it pretty simple to use in conjunction with the Arduino. But that’s not the only touch-enabled input device. The rectangle to the right of the touch pad is an LCD screen with a touch overlay. As you can see (and hear) in the clip after the break, the touch screen made it possible for him to rework the controls until they became simple and intuitive.

Continue reading “Arduino-controlled MIDI Sequencer”

Developing With EBay-sourced ARM + LCD Dev Boards

eBay isn’t only about counterfeit designer handbags and boxes of all-marshmallow Lucky Charms, sometimes there’s actually something useful for sale. [Matt] found a bunch of Chinese-made ARM development boards with integrated LCD displays on the ‘bay, but without a reliable toolchain, these boards – as cool as they are – are nearly useless. Thankfully, he figured out how to do something with these boards, and neatly packaged everything into a VirtualBox image.

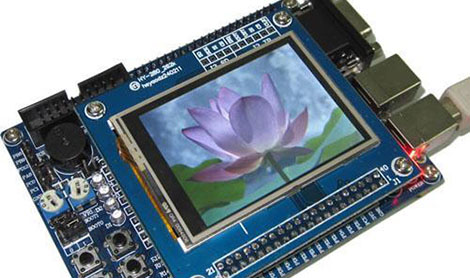
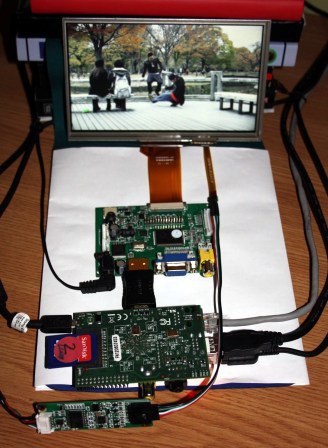
The boards in question usually include a 2.4″ or 3.2″ touch panel LCD, an STM32F103 ARM Cortex-M3 CPU, a microSD card connector, and sometimes a few other goodies like 16MB of Flash memory and an RS-232 port. An amazing amount of computational capability packaged into an easy-to-use form factor made even more awesome by their $40 price point.

Because these boards offer so much more than a common Arduino, a proper OS is in order. [Matt] looked over FreeRTOS and included a few demo programs for his Ubuntu-based VirtualBox image (available for download on [Matt]’s site, it’s a dropbox, email us if you need some hosting, [Matt]) Never mind, see below.

Programming these boards can be done over a serial interface, but a JTAG programmer such as a Bus Blaster makes things very, very easy.

You can check out a few demos [Matt] put together after the break. It’s a very cool development that is much more suited for being integrated into an electronics project than a Raspberry Pi or other such high-power ARM board, and something we hope to see more of in the future.

EDIT: You know what’s really good for hosting Linux distros? Torrents. That’s [Matt]’s distro and the HaD crew is seeding. Please seed.

Continue reading “Developing With EBay-sourced ARM + LCD Dev Boards”

Digital Marker Communicates With Touch Screen

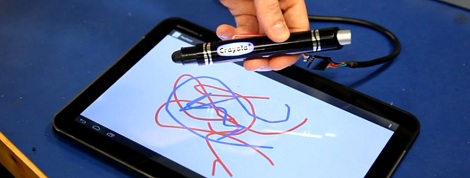
In an effort to be more relevant to children that just aren’t impressed with crayons and markers anymore, Crayola released the ColorStudio HD pen. Instead of ink, this pen is filled with electronics that communicate with a tablet to draw different colors in the Crayola ColorStudio app.

[Rob Hemsley] had done some work with capacitive touch screens before, so when he heard the clicking of a tiny relay inside the pen, he automatically knew how it worked. Of course this meant tearing apart the Crayola marker to look at the electronics, but [Rob] also went so far as to replace the microcontroller, allowing you to craft your own ColorStudio HD pen.

The digital Crayola marker communicates with the app by switching a relay on and off very quickly. This completes a circuit between the user’s hand and the touch screen, allowing the tablet to interpret the desired color by measuring how many touches are received per second.

Inside the pen, [Rob] found an RGB LED, a relay, and a PIC microcontroller. Not having any experience with PICs, [Rob] changed out the ‘micro to an ATtiny44 and started writing some firmware with the help of the Arduino IDE.

[Rob]’s updated version functions exactly like the stock version, communicating with the Crayola app by pulsing the relay to indicate the selected color. Even though the Crayola app only has three possible colors, [Rob] says it’s feasible to program the digital pen to send an RGB color value to a tablet, allowing you to choose what color to draw with on the pen.

You can see a video of [Rob]’s updated pen after the break.

Continue reading “Digital Marker Communicates With Touch Screen”

Shakey Robot Plays Angry Birds

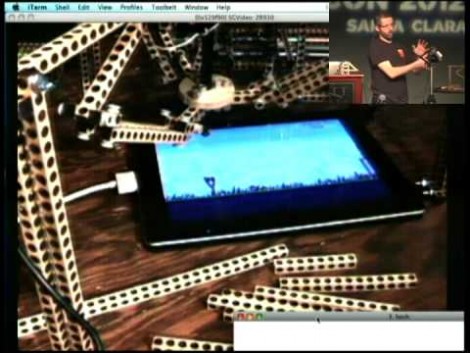
At this year’s Pycon [Jason Huggins] gave a talk about his Angry Birds playing robot. He built a delta robot which includes a pen actuator for controlling a capacitive touch screen. The video after the break starts with a demo of the bot beating a level of Angry Birds on the iPad.

The idea behind the build is that robots like this could be used for app testing. I this case [Jason] has tweaked the servo commands manually to achieve the results. But during the talk he does demonstrate some machine vision to analyze and win a game of tic-tac-toe.

We do enjoy seeing the robot, but we’re not sold on the thought that testing will use robots. Perhaps there is a niche need for this type of thing, but we assume the majority of automated testing can be done in the emulator for the device on which you are developing. What we really want to know is how the capacitive stylus works. We didn’t catch him talking about it at all. We want a reliable, yet simple way to electronically trigger touchscreen inputs (along the lines of this project). If you know how [Jason’s] stylus is working please share your thoughts in the comments section.

Continue reading “Shakey Robot Plays Angry Birds”

IPhone Wielding Guitar Adds Tip Of Your Finger Or Tip The Instrument Control

[Rob Morris] has been hard at working improving his guitar augmentation techniques. Here he’s demonstrating the use of an iPhone to control the effects while he plays. This builds on the work he shared a few years ago where he strapped a Wii remote to the body of his ax.

Just like the Wii remote, the iPhone includes an accelerometer. As you would expect the best parts of the older hack made it into this one, but the inclusion of the touch screen adds a lot more. In the clip after the break he starts by showing off the screen controlling a whammy bar functionality. But we really love the octave offset feature that comes next. This kind of sound manipulation simply can’t be done using a purely physical method (like the whammy bar can). But he’s not done yet. The demo finishes with a Theremin feature. You’ll notice he plucks a string but no sound comes out until he starts touching the screen. This turns it into an entirely different type of instrument.

The only info we have about putting this together is the list of packages he’s using:  TouchOSC, Max/Msp, and GuitarRig

Continue reading “IPhone Wielding Guitar Adds Tip Of Your Finger Or Tip The Instrument Control”

Reaching Out To A Touch Screen With A Microcontroller

We love capacitive touch screens. They’re much more robust than resistive touch screens and if the UI is programmed well they produce a great user experience. But getting your electronics project to interact with one is a bit tough. [RobB] has been experimenting in that area, and managed to build a simple touchscreen actuator for microcontroller use.

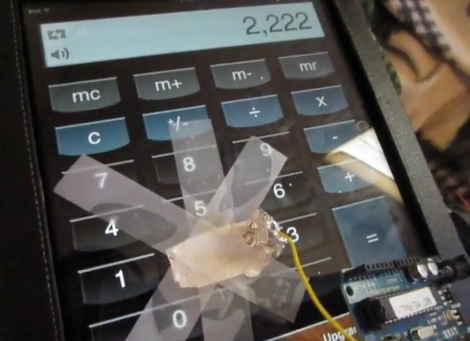
In the video after the break you can see his proof of concept. He’s using an Arduino to enter the number 2 on an Android  iOS calculator app once every second. It doesn’t take much to pull off this trick, [RopB] just taped a piece of tin foil to the screen and connected it to the Arduino with a jumper wire. The pin is left floating until a screen tap is needed, at which point it is pulled to ground.

A custom app operating at slow speeds could use this as an input technique. Two pieces of foil (one acting as clock, the other data) would provide a rudimentary serial transfer system.

Continue reading “Reaching Out To A Touch Screen With A Microcontroller”

Machine Learning Lets Micro Decode Your Handwriting

This rig will take the letters you write on the touchpad using a stylus and turn them into digital characters. The system is very fast and displays near-perfect recognition. This is all thanks to a large data set that was gathered through machine learning.

The ATmega644 that powers the system just doesn’t have the speed and horsepower necessary to reliably recognize handwriting on its own. But provide it with a dataset to compare against and you’re in business. [Justin] and [Stephen] designed a neural network algorithm that took a large volume of character handwriting samples, and boiled them down into a set of correlations that can be referenced when encountering a new entry. This set is about 88 kilobytes, too much to store in the microprocessor, but easy to reference from an external flash memory device.

There’s plenty of gritty details in the write up linked above, but you may want to start with the video overview found after the break.

Continue reading “Machine Learning Lets Micro Decode Your Handwriting”