If you’ve been holding off on upgrading your kindle, this project might inspire you to finally bite the bullet. [WarriorRocker] recently saved quite a few dollars on his Kindle upgrade by using a demo unit. Of course, it’s not as simple as just finding a demo unit and booting it up. There’s some hacking involved.
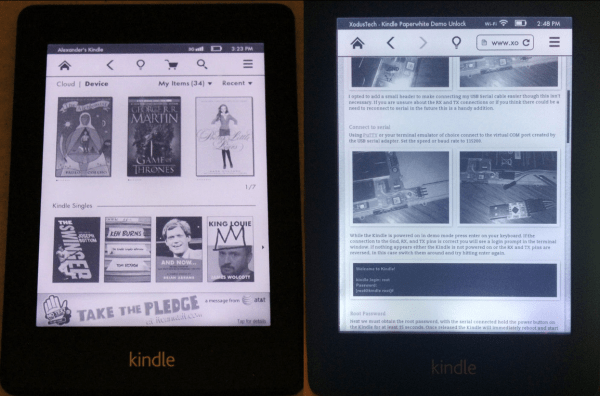
[WarriorRocker] found his Kindle Paperwhite demo unit on an online auction site for just $20. Kindles are great for reading but also make popular displays for your own projects. This used display model was much less expensive than a new unit, which makes sense considering it had probably received its share of abuse from the consumers of some retail store. The problem with a demo unit is that the firmware that comes with it is very limited, and can’t be used to sync up with your Amazon account. That’s where the hacking comes in.
 The first step was to crack open the case and locate the serial port. [WarriorRocker] soldered a small three pin header to the pads to make it easier to work on his device as needed. He then connected the Kindle to his PC using a small serial to USB adapter. Pulling up the command prompt was as simple as running Putty and connecting to the correct COM port. If the wires are hooked up correctly, then it just takes a press of the enter key to pull up the login prompt.
The next step requires root access. The root password for each unit is related to the unit’s serial number. [WarriorRocker] obtained the serial number by rebooting the Kindle while the Serial connection was still open. The boot sequence will spit out the number. This number can then be entered in to an online tool to generate possible root passwords. The tool is available on [WarriorRocker’s] project page linked above.
Next, the Kindle needs to be rebooted into diagnostic mode. This is because root logins are not allowed while the device is booted to the system partition. To enter diagnostic mode, [WarriorRocker] had to press enter over and over during the boot sequence in order to kill the automatic boot process. Then he checked some environment variables to locate the memory address where the diagnostic mode is stored. One more command tells the system to boot to that address and into diagnostic mode.
The last step of the process begins by mounting the Kindle as a USB storage device and copying over the stock Kindle firmware image. Next [WarriorRocker] had to exit the diagnostic menu and return to a root command prompt. Finally, he used the dd command to copy the image to the Kindle’s partition bit by bit. Fifteen minutes and one reboot later and the Kindle was working just as it should. [WarriorRocker] even notes that the 3G connection still works. Not bad for $20 and an hour or two of work.