Beautiful Weather Station Uses Acrylic, RGB LED, And And ESP8266

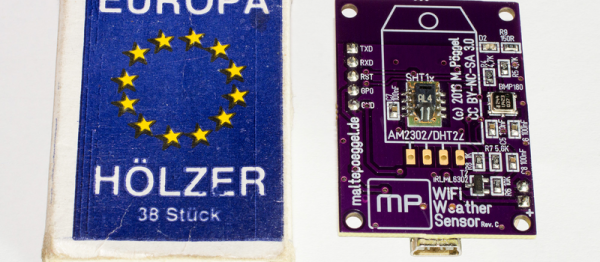
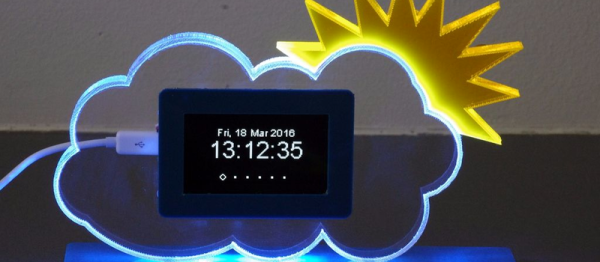
Everyone knows there’s form and there’s function. It isn’t fair, but people do judge on appearance, sometimes even overriding all other concerns. So while your Makerspace buddies might be impressed by your weather station built on a breadboard, your significant other probably isn’t. [Dennisv15] took an ordinary looking weather station design with a 0.96″ display and turned into an attractive desk piece with a much larger display and an artistic–and functional–enclosure.

The acrylic cloud lights up thanks to an RGB LED Neopixel strip and can indicate weather trends at a glance: red for warmer, blue for colder, flashing for inclement weather. The project was truly multidisciplinary, using a laser cutter to produce the body and the stand, a 3D-printed display bezel, and a PCB to make it easy to build.

Continue reading “Beautiful Weather Station Uses Acrylic, RGB LED, And And ESP8266”

Raspberry Pi Wind Measurement

A well organized approach to a project is a delight to see. [Pavel Gesyuk] takes just that approach with the experiments on his blog. Experiment 13 is a multi-part series using a Raspberry Pi as the heart of a weather station. [Pavel] is looking at wind speed and direction, and temperature measurement, plus solar power for the station. One of his videos, there are many, is after the break.

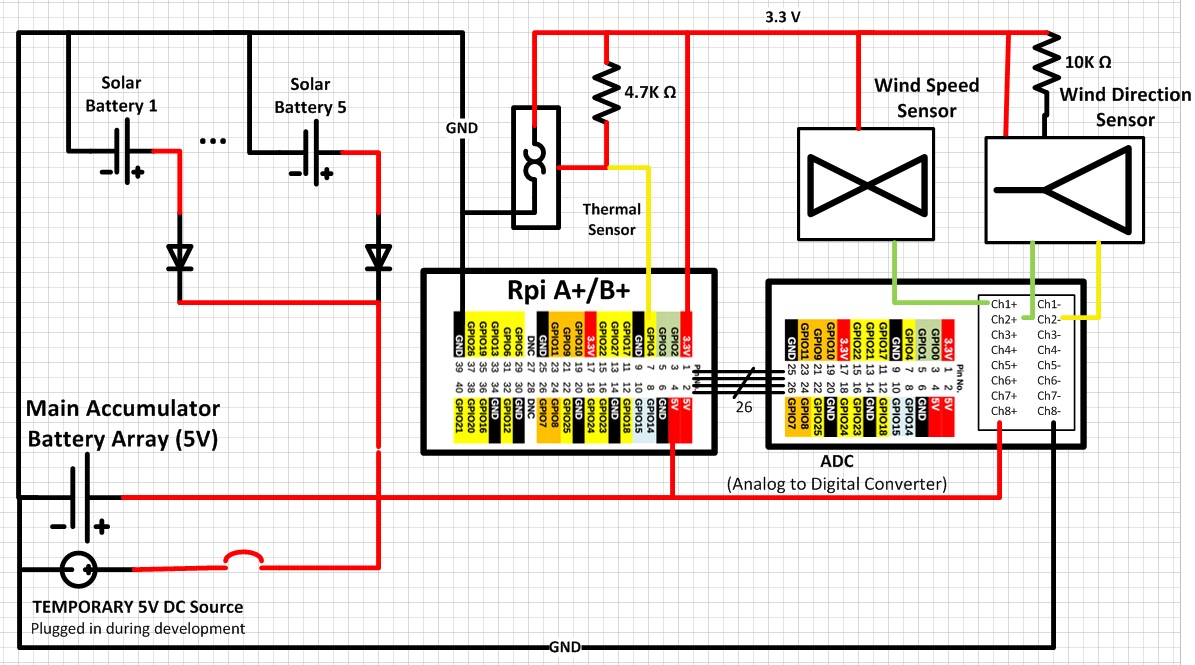
electrical_02_tThe anemometer and direction sensors are stock units wired to a Raspberry Pi A+ using an analog to digital daughter board. The data from the temperature sensor is acquired using I2C. During one part of the experiment he uses an EDIMAX WiFi adapter for collecting the data.
Python is [Pavel’s’ language of choice for development and freely shares his code for others to see. The code collects the data and displays it on a monitor connected to the Pi. The experiment also attempts to use solar power to charge batteries so the station is not dependent on mains power.

The mechanical assembly shows attention to detail commensurate with his project presentation and we respect how well organized the work is.

Continue reading “Raspberry Pi Wind Measurement”

Hackaday Prize Entry: 20,000 Weather Stations

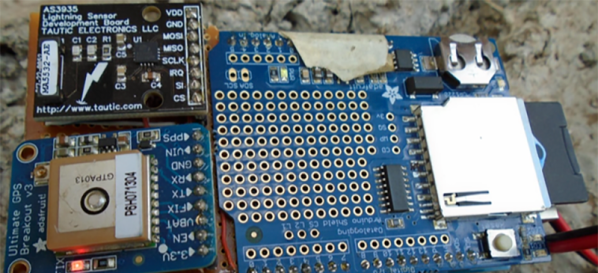
Team Tahmo has a plan to put a network of 20,000 weather stations across sub-Saharan Africa. That’s an impressive goal, and already they have pilot stations in Senegal, Chad, Nigeria, Uganda, and South Africa. For their Hackaday Prize entry, they thought it would make sense to add more advanced sensors to their weather stations, and came up with GPS, lightning, and large scale soil moisture sensors.

The sensors already deployed have the usual complement of meteorological equipment – thermometers, anemometers, barometers, and rain gauges. These stations are connected to a school’s Internet connection where students can monitor the local weather patterns and upload the data. Team Tahmo is building a small add-on board for their Prize entry using an AS3935 Franklin Lightning sensor and a GPS module.

In the interests of rapid design cycles, the team is using off-the-shelf modules for the lightning detector and GPS module. They hit up the Hackaday Prize Collabratorium for some advice on PCB design and have everything pretty much nailed down thanks to a few helpful hackers.

It’s a great project for one of the most ambitious crowdsourced data gathering projects ever conceived, and something that would vastly improve weather predictions across the African continent. Even if their entry does just monitor lightning strikes, it’s still an admirable goal and one of the most useful projects for this year’s Hackaday Prize.

The 2015 Hackaday Prize is sponsored by:

Wireless Weather Station

High schooler [Vlad] spent about a year building up his battery-operated, wireless weather station. Along the way, not only has he learnt a lot and picked up useful skills, but also managed to blog his progress.

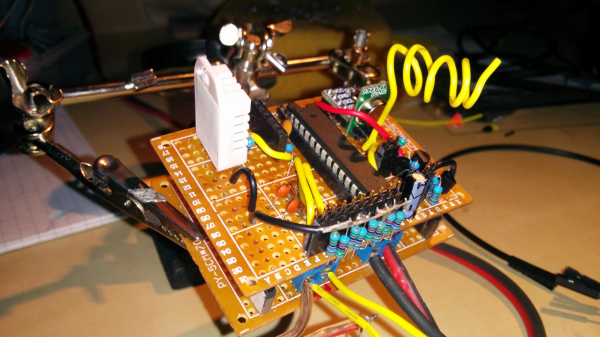
The station measures temperature, humidity, pressure and battery voltage, and he plans to add sensors for wind speed, wind direction and rainfall soon. It is powered via a solar panel and can run on a charged battery for a full month. The sensor module transmits data to a remote receiver connected to a computer from where it is published to the internet. Barometric pressure is measured using the BMP180 and the DHT22 provides temperature and humidity values. The link between the transmit and receive sections uses a 433MHz Superhetrodyne RF Kit which gives [Vlad] a range of 50m. There’s an ATMega328 on the transmitter and receiver side. He’s taking measurements once every 12 minutes, and putting the micro controller in low power mode using the Rocket Scream Low Power Library. A 5W, 12V solar panel charges the 6V Lead Acid battery via a LM317 based charge circuit. This ensures the battery gets charged even when the solar panel is not receiving optimal radiation. One hour of sunlight provides enough charge to keep it going for 2 days. And a fully charged battery will keep it running for a full month even when there’s no sunlight.

The server software consists of two parts. The first pushes serial data to a mySQL database. This is written in Visual Studio C# using help from Oracle mySQL connector. The second part publishes the entries in the mySQL database to the web server. This is written in php, and uses  Libchart for graphing. He’s got the code, schematics, parts list and a lot of other information available for download on his blog. There’s a couple of items pending on his to-do list, so if you have any tips to offer post your comments below.

Cracking Weather Station Checksum

[BaronVonSchnowzer] is spinning up some home automation and settled on an inexpensive ambient temperature sensor which is sold to augment the data a home weather station collects. He found that the RF protocol had been reverse engineered and will use this information to harvest data from a sensor in each room. In true hacker fashion, he rolled his own advances out to the Internet so that others may benefit. Specifically, he reverse engineered the checksum used by the Ambient F007TH.

He got onto this track after trying out the Arduino sketch written to receive the sensor’s RF communications. One peculiar part of the code turned out to be a filter for corrupt messages as the protocol’s checksum hadn’t yet been worked out. Figuring out how the checksum byte owrks wasn’t an easy process. The adventure led him to dump 13k samples into a spreadsheet to see if sorting similar sets of 5-byte message and 1-byte checksum would shed some light on the situation. The rest of the story is some impressive pattern matching that led to the final algorithm. Now [BaronVonSchnowzer] and anyone else using these modules can filter out corrupt data in the most efficient way possible.

The Phidgets Solar Powered Weather Station

weather

Yes, it’s a weather station, one of those things that records data from a suite of sensors for a compact and robust way of logging atmospheric conditions. We’ve seen a few of these built around Raspberry Pis and Arduinos, but not one built with a Phidget SBC, and rarely one that has this much thought put in to a weather logging station.

This weather station is designed to be autonomous, logging data for a week or so until the USB thumb drive containing all the data is taken back to the lab and replaced with a new one. It’s designed to operate in the middle of nowhere, and that means no power. Solar it is, but how big of a solar panel do you need?

That question must be answered by carefully calculating the power budget of the entire station and the battery, the size of the battery, and the worst case scenario for clouds and low light conditions. An amorphous solar cell was chosen for its ability to generate power from low and indirect light sources. This is connected to a 12 Volt, 110 amp hour battery. Heavy and expensive, but overkill is better than being unable to do the job.

Sensors, including temperature, humidity, and an IR temperature sensor were wired up to a Phidgets SBC3 and the coding began. The data are recorded onto a USB thumb drive plugged into the Phidgets board, and the station was visited once a week to retrieve data. This is a far, far simpler solution than figuring out a wireless networking solution, and much better on the power budget.

Via embedded lab

Recycled Foam Box Is Now A Weather Station

Raspberry pi in foam box

When [Ioannis] received some high resolution LCD’s in a tattered foam box, he posed to himself a most interesting question – Should he throw the foam box away, or use it as a container for a project? Fortunately for us, he decided on the latter and threw together a very capable weather station!

Having only an hour to spare, [Ioannis] grabbed a Raspberry Pi, WiFi USB stick and a camera module and went to work. He mounted the camera module to the foam lid using a highly advanced technique, and soldered a cable that would power the device directly to D17 – a Zener diode that sits on the bottom of the board.

For the weather data, he’s using another design of his – the Sensor Stick. This nifty device — which we featured over the weekend — is about the size of a stick of chewing gum, and sports an array of sensors including the popular BMP085, which can measure pressure and temperature .

He wraps up everything using open source software to get the data from the weather station. Pretty impressive for an old foam box and an hours time! This would be an interesting start to a home automation system. Connect it to motorized windows and/or a sprinkler system and he’s on his way to claiming The Hackaday Prize.