A Mobile Terminal For Guerrilla Communications

We use the Internet to do everything from filing our taxes to finding good pizza, but most critically it fulfills nearly all of our communication needs. Unfortunately, this reliance can be exploited by those pulling the strings; if your government is trying to do something shady, the first step is likely to be effecting how you can communicate with the outside world. The Internet is heavily censored and monitored in China, and in North Korea the entire country is effectively running on an intranet that’s cutoff from the wider Internet. The need for decentralized information services and communication is very real.

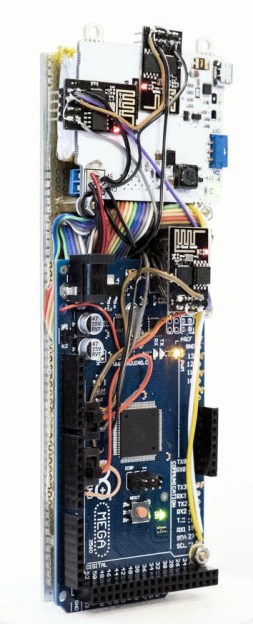
While it might not solve all the world’s communication problems, [::vtol::] writes in to tell us about a very interesting communication device he’s been working on that he calls “Hot Ninja”. Operating on the principle that users might be searching for accessible Wi-Fi networks in a situation where the Internet has been taken down, Hot Ninja allows the user to send simple messages through Wi-Fi SSIDs.

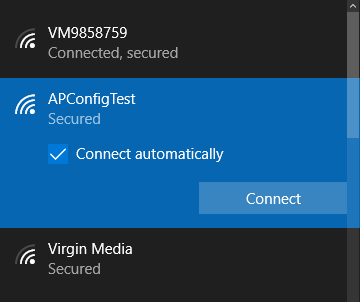
We’ve all seen creatively named Wi-Fi networks before, and the idea here is very much the same. Hot Ninja creates a Wi-Fi network with the user’s message as the SSID in hopes that somebody on a mobile device will see it. The SSID alone could be enough depending on the situation, but Hot Ninja is also able to serve up a basic web page to devices which actually connect. In the video after the break, [::vtol::] even demonstrates some rudimentary BBS-style functionality by presenting the client devices with a text field, the contents of which are saved to a log file.

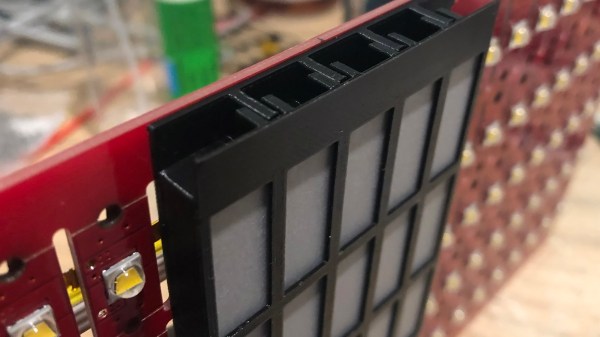
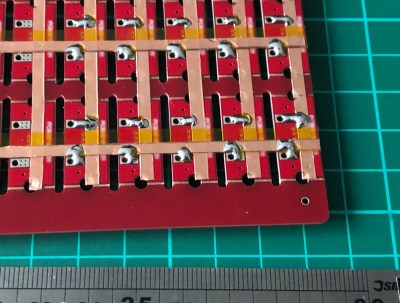
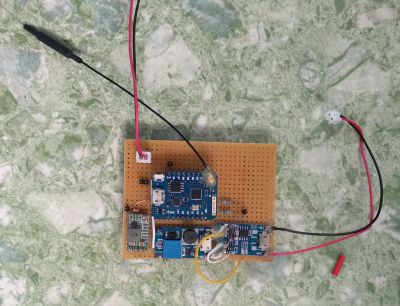
In terms of hardware, Hot Ninja is made up of an Arduino Mega coupled to three ESP8266 boards, and a battery to keep it all running for up to eight hours so you can subvert a dictatorship while on the move. The user interface is provided by a small OLED screen and a keyboard made entirely of through-hole tactile switches, further reinforcing the trope that touch-typing will be a must have skill in the dystopian future. It might not be the most ergonomic device we’ve ever seen, but the fact it looks like something out of a Neal Stephenson novel more than makes up for it in our book.

This is not the first time we’ve seen Wi-Fi SSIDs used as a method of communication, thanks largely to how easy the ESP8266 makes it. For his part, [::vtol::] has previously experimented with using them to culturally enrich the masses.

Continue reading “A Mobile Terminal For Guerrilla Communications”

Old Modem, New Internet.

Do you remember the screeching of a dial-up modem as it connected to the internet? Do you miss it? Probably not, but [Erick Truter] — inspired by a forum post and a few suggestions later — turned a classic modem into a 3G Wi-Fi hotspot with the ubiquitous Raspberry Pi Zero.

Sourcing an old USRobotics USB modem — allegedly in ‘working’ condition — he proceeded to strip the modem board of many of its components to make room for the new electronic guts. [Truter] found that for him the Raspberry Pi Zero W struggled to maintain a reliable network, and so went with a standard Pi Zero and a USB  Wi-Fi dongle dongle. He also dismantled a USB hub to compensate for the Zero’s single port. Now,  to rebuild the modem — better, faster, and for the 21st century.

Continue reading “Old Modem, New Internet.”

Turn That Pi Zero Into A Streaming Camera, Step-by-Step

What makes [mwagner1]’s Raspberry Pi Zero-based WiFi camera project noteworthy isn’t so much the fact that he’s used the hardware to make a streaming camera, but that he’s taken care to document every step in the process from soldering to software installation. Having everything in one place makes it easier for curious hobbyists to get those Pi units out of a drawer and into a project. In fact, with the release of the Pi Zero W, [mwagner1]’s guide has become even simpler since the Pi Zero W now includes WiFi.

Using a Raspberry Pi as the basis for a WiFi camera isn’t new, but it is a project that combines many different areas of knowledge that can be easy for more experienced people to take for granted. That’s what makes it a good candidate for a step-by-step guide; a hobbyist looking to use their Pi Zero in a project may have incomplete knowledge of any number of the different elements involved in embedding a Pi such as basic soldering, how to provide appropriate battery power, or how to install and configure the required software. [mwagner1] plans to use the camera as part of a home security system, so stay tuned.

If Pi Zero camera projects catch your interest but you want something more involved, be sure to check out the PolaPi project for a fun, well-designed take on a Pi Zero based Polaroid-inspired camera.

Press Button, Receive Hackspace WiFi Code

When you are running a hackspace, network security presents a particular problem. All your users will expect a wireless network, but given the people your space will attract, some of them are inevitably going to be curious enough to push at its edges. Simply plugging in a home WiFi router isn’t going to cut it.

At Santa Barbara Hackerspace they use Unifi access points on their wireless network, and their guest network has a system of single-use codes to grant a user 24-hour access. The system has the ability to print a full sheet of codes that can be cut individually, but it’s inconvenient and messy. So the enterprising hackspace members have used a Raspberry Pi and a receipt printer to deliver a single code on-demand at the press of a button.

The hardware is simple enough, just a pull-up and a button to a GPIO on the Pi. Meanwhile the software side of the equation has a component on both client and server. At the server end is a Python script that accesses the Unifi MongoDB database and extracts a single code, while at the client end is another Python script that reacts to a button press by calling the server script and printing the result.  It’s a simple arrangement that was put together in an evening, but it’s an effective solution to their one-time WiFi access needs.

It’s a temptation as a hackspace to view all of your problems as solvable in one go with the One Piece Of Software To Rule Them All, and as a result some spaces spend a lot of time trying to hack another space’s effort to fit their needs or even to write their own. But in reality it is the small things like this one that make things work for members, and in a hackspace that’s important.

Does your space have any quick and simple projects that have automated a hackspace process? Let us know in the comments.

Thanks [Swiss] for the tip.

A Simple Yagi Antenna For Your Wi-Fi Router

When we take a new Wi-Fi router from its box, the stock antenna is a short plastic stub with a reverse SMA plug on one end. More recent and more fancy routers have more than one such antenna for clever tricks to extend their range or bandwidth, but even if the manufacturer has encased it in mean-looking plastic the antenna inside is the same. It’s a sleeve dipole, think of it as a vertical dipole antenna in which the lower radiator is hollow, and through which the feeder is routed.

These antennas do a reasonable job of covering a typical home, because a vertical sleeve dipole is omnidirectional. It radiates in all horizontal directions, or if you are a pessimist you might say it radiates equally badly in all horizontal directions. [Brian Beezley, K6STI] has an interesting modification which changes that, he’s made a simple Yagi beam antenna from copper wire and part of a plastic yoghurt container, and slotted it over the sleeve dipole to make it directional and improve its gain and throughput in that direction.

Though its construction may look rough and ready it has been carefully simulated, so it’s as good a design as it can be in the circumstances. The simulation predicts 8.6 dB of gain, though as any radio amateur will tell you, always take antenna gain figures with a pinch of salt. It does however provide a significant improvement in range, which for the investment put in you certainly can’t complain at. Give it a try, and bring connectivity back to far-flung corners of your home!

We’ve covered quite a few WiFi Yagis here over the years, such as this rather extreme wardriving tool. But few have been this cheap.

Thanks to London Hackspace Radio Club for the tip.

Track Wi-Fi Devices In Your Home

How do you audit your home Wi-Fi network? Perhaps you log into your router and have a look at the connected devices. Sometimes you’ll find an unexpected guest, but a bit of detective work will usually lead you to the younger nephew’s game console or that forgotten ESP8266 on your bench.

Wouldn’t it be useful if your router could tell you where all the devices connected to it are? If you are [Zack Scholl], you can do all this and more, for his FIND-LF system logs Wi-Fi probe requests from all Wi-Fi devices within its range even if they are not connected, and triangulates their position from their relative signal strengths across several sniffing receivers. These receivers are a network of Raspberry Pis with their own FIND-LF server, and any probe requests they pick up are forwarded to [Zack]’s FIND server (another of his projects) which does the work of collating the locations of devices.

It’s an impressive piece of work, though with a Raspberry Pi at each receiver it could get a little pricey. [Zack] has done other work in this field aside from the two projects mentioned here, his other work includes an implementation of the [Harry Potter] Marauder’s Map.

This is by no means the only indoor location system we’ve seen over the years. One that uses ESP8266 modules for example, or this commercial product that is similar to the project shown here.

FCC Reaches Agreement With Router Manufacturers

Last year, the Federal Communications Commission proposed a rule governing the certification of RF equipment, specifically wireless routers. This proposed rule required router manufacturers to implement security on the radio module inside these routers. Although this rule is fairly limited in scope – the regulation only covers the 5GHz U-NII bands, and only applies to the radio subsystem of a router, the law of unintended consequences reared its ugly head. The simplest way to lock down a radio module is to lock down the entire router, and this is exactly what a few large router manufacturers did. Under this rule, open source, third-party firmwares such as OpenWRT are impossible.

Now, router manufacturer TP-Link has reached an agreement with the FCC to allow third-party firmware. Under the agreement, TP-Link will pay a $200,000 fine for shipping routers that could be configured to run above the permitted power limits.

This agreement is in stark contrast to TP-Link’s earlier policy of shipping routers with signed, locked firmware, in keeping with the FCC’s rule.

This is a huge success for the entire open source movement. Instead of doing the easy thing – locking down a router’s firmware and sending it out the door – TP-Link has chosen to take a hit to their pocketbook. That’s great news for any of the dozens of projects experimenting with mesh networking, amateur radio, or any other wireless networking protocol, and imparts a massive amount of goodwill onto TP-Link.

Thanks [Maave] for the tip.