Wiimote-based Whiteboard Lets You Write On Any Surface

propeller_whiteboard

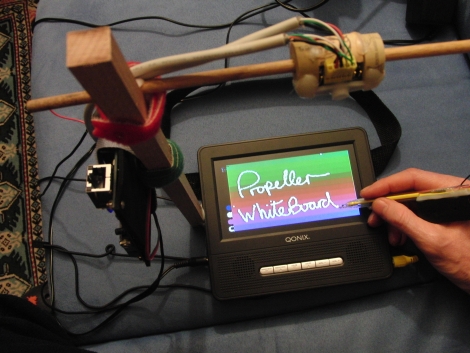
The Wiimote is a fantastic tool for hackers, given their affordability and how easy they are to work with. [Gareth] had a “eureka” moment while working on another Wiimote-based project, and with some alterations, converted it into an electronic whiteboard.

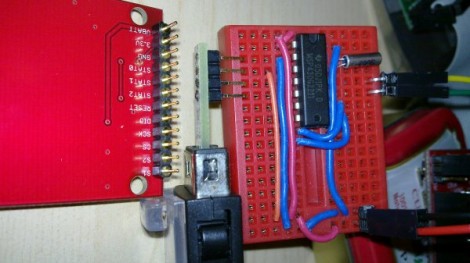
The whiteboard was built using the IR sensor he extracted from a Wiimote, which is wired to an EasyProp board to process the input. The Wiimote is aimed at a LCD screen, which can be “drawn” upon using a light pen he constructed from an IR led and a few batteries. Any movement of the pen is tracked by the Wiimote’s IR sensor and converted to an XY coordinate, which is then painted on the screen. The sensor has the ability to track up to four points at a time, so you can theoretically use up to four pens simultaneously.

[Gareth] points out that the sensor is not limited to tracking small displays, as the white board can be easily scaled up in size using any kind of rear projection device.

Continue reading to see a video of his whiteboard in action.

Continue reading “Wiimote-based Whiteboard Lets You Write On Any Surface”

wireless_nunchuck

Bluetooth-enabled Wii Nunchuck

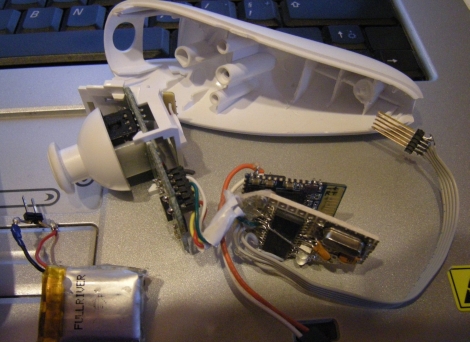
The wireless controller for the Nintendo Wii has been used in many a hack due to its simple to use Bluetooth interface. The nunchuck portion of the controller however, has always required a physical tether to the wireless controller, or an aftermarket wireless dongle. [Rousselmanu] is looking to change that with his Bluetooth-enabled wireless Wii nunchuck. He is able to retrieve a slew of data from the nunchuck, including information from all of the accelerometers, buttons, as well as the joystick. The data is read into a PIC MCU and relayed via serial to a Bluetooth module he purchased online.

The Bluetooth module looks fairly easy to interface in Linux, and [Rousselmanu] has a video showing off how well the nunchuck can be used to interact with 3D models. He admits that the controller is a bit ugly at the moment as all the components don’t quite fit so well, but future revisions will surely remedy that.

Keep reading to see a video of the nunchuck in action.

Continue reading “Bluetooth-enabled Wii Nunchuck”

Nokia LCD, Nunchuck, And MSP430 Join Forces

[JB’s] driving a Nokia 6100 LCD using an MSP430 with input from a Wii Nunchuck. He’s using the G2211 microprocessor that came with the Launchpad, and developing his code with MSP-GCC. As you can see in the video after the break, this works but there’s some room for improvement. That’s being said, he is bumping up against the code memory limit, with just around 500 bytes left to work with. The LCD screen is SPI and currently it’s hogging the pins that are used for the hardware i2c. Since he needs an i2c bus to talk to the nunchuck he had to go with software i2c which explains part of his program memory troubles.

We’re in no way experts on this, but it seems like he could save space (and improve the input responsiveness) by rewriting his LCD drivers in order to remap the pins. Then again, it might just be better to move up to a larger MSP430. If you’ve got some advice, make sure to share it by leaving a comment.

Continue reading “Nokia LCD, Nunchuck, And MSP430 Join Forces”

SD Activity Indicator For Wii

[DeadlyFoez] wanted to know when the SD card in his Nintendo Wii was in use. He built and indicator LED using a PICAXE 08M and added it next to the SD slot. He uses one pin of the microcontroller to monitor the voltage on one pin of the SD card slot. That pin has a specific value when the card is idle, which rises when it’s in use. He didn’t share the details of which pin he’s sampling, or what the magic number from his source code actually represents. But the concept should be enough of a start if you want to do this one yourself. Watch it go blink-ity-blink in the clip after the break.

Continue reading “SD Activity Indicator For Wii”

Halloween Prop: Mario Bros. With Full Sound Effects

Creativity abounds in putting together this pair of Super Mario Bros. costumes. [Rob] and his wife didn’t stop with a well-assembled troupe of familiar wardrobe items, but decided to go for authentic sound effects as well. It started by finding a few of his favorite Mario sounds on the Internet. From there he grabbed a greeting card that allows you to record several message. He recorded each of the sounds and removed the electronics from the card. From there an Arduino mini was connected to the playback buttons and to a Wii nunchuck. After the break you can see that when the kids press a button, the card plays back the sound of jumping, shooting fireballs, etc. So far it’s the best use of an audio greeting card that we think eclipses its intended use.

Continue reading “Halloween Prop: Mario Bros. With Full Sound Effects”

Wii Sensor Bar Projector

Having experienced quite a bit of trouble getting the Nintendo Wii remotes to work reliably with his home theater projector, [Sprite_TM] designed his own sensor bar replacement. If you’re not familiar, the Wii remotes have an infrared camera in the tip that sense two IR LEDs in the sensor bar that resides above or below your television. The problem is that if you’re too far away, the points of light are not where the remote expects them to be and the cursor will not perform as expected. Since this is a huge projected display it’s no surprise that the player is further away from the screen than the system was designed for.

[Sprite_TM’s] solution was to build a projection system for the two IR points. The unit in the picture above is a driver circuit with two IR emitters mounted on a heat sink, each with its own reflector. The reflected beams are shined through a Fresnel lens and projected on the same wall as the TV image. The viewer will not be able to see this light as it’s in a longer wavelength than the visible spectrum. But the Wii remote performs beautifully now and the replacement sensor bar is happily mounted out of sight above the projector.

LEGO Host For All Of Your Prototyping Projects

[Deadbird] decided to use a LEGO 8880 Super Car as a host for all of his electronic tinkering. Throughout his blog (translated) you’ll find the vehicle with an Arduino MEGA interfacing various prototyping bits. It starts with the motors for locomotion, closely followed by a servo for steering. From there we see the addition of a breadboard and graphic LCD screen. So far he’s worked out the use of a PS2 keyboard as a controller and, most recently he’s interfaced a Wii Nunchuck.

We’re more used to seeing NXT kits adapted for wider use, but if you’ve got a nice kit like this one it makes a great base onto which you can add your own robotic elements.