PixelBrite Is An LED Wall/coffee Table Done Right

pixelbrite

The scope of this project is almost as jaw-dropping as the cost of the parts. [LeoneLabs] calls the project PixelBrite. It’s a highly-polished modular RGB LED panel system, and he’s not keeping it a secret. We think it’s reasonable to call the build documentation mammoth. If you’re a fan of fast-motion assembly videos he’s got you covered there as well.

It’s interesting to compare this build to some of the Daft Punk tables from years back. It shows how economies of scale in the hobby electronics industry have helped new and affordable products to emerge. For instance, this offering is a 10×10 grid which is outside of the normal 8 pixel wide orientation dictated by 8-bit microcontrollers. The reason for the change is that this doesn’t use a matrix built with point-to-point soldering. It uses a string of RGB pixels (WS2801).

The enclosure is also a thing of beauty. The dividers that make up each cell are laser cut foam board. This makes the joints very tight to prevent light from leaking into the next cell. The housing is acrylic held in place by an aluminum rail system. Need more than one panel? No problem, a single connector chains one panel to the next. But we did mentioned the cost of materials. Unassembled you can expect to drop over five hundred bones for the pleasure of seeing this thing blink.

Continue reading “PixelBrite Is An LED Wall/coffee Table Done Right”

Web Based Automation Courtesy Of Raspberry Pi

web-based-automation-via-rpi

This project is a great example of the Raspberry Pi’s ability to eclipse Arduino when it comes to interaction. [Fall Deaf] mentions that he used to use an Arduino board with an Ethernet shield to add extensible interactivity to his project. But this one, which is a home automation lamp project, uses a Raspberry Pi instead. The concepts end up being very similar. But the cost of the hardware is less and the coding work is arguably orders of magnitude easier.

Don’t get us wrong, the hardware is fundamentally different. When you move from Arduino to RPi you lose some I/O pins and the low level control of them isn’t quite as straight-forward. But you also don’t have to program the thing in C. The Linux kernel handles the low level control which means you can write your scripts using Python. Because Python is an interpreted language the testing and debugging is much faster — no need to flash new code, just run the script again.

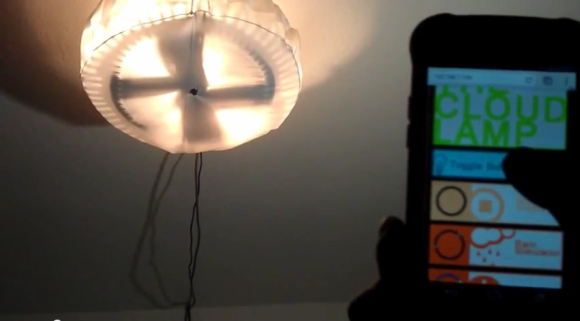
This project used the RPi GPIO to drive a strip of LEDs which use the WS2801 protocol. The board includes a NIC which makes it a snap to use as a web server. The smart phone controls seen above are served up from the Pi using jQuery. Right now there’s a cord running out of the lamp. But there should be plenty of room to use a screw-in outlet adapter and to hide the RPi and its PSU inside.

The board still has enough juice to drive other automation features too, like acting as a web radio server.

Continue reading “Web Based Automation Courtesy Of Raspberry Pi”

LED Strip Pong As An Arduino Shield

led-pong-strip

[Schuyler Sowa] has been hard at work on his own version of LED strip Pong. We’d say his work has really paid off. The game is robust and full of features.

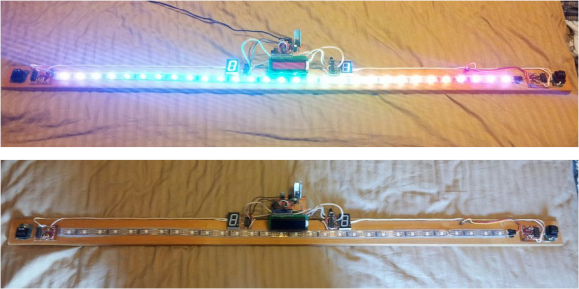
Unlike the original Pong video game LED pong only has one axis on which the ball travels. The ball will bounce back if the button at the end of the strip is pressed when either of the last two LED pixels are illuminated. To add in a difficulty adjustment [Schuyler] included a poteniometer which alters the speed.

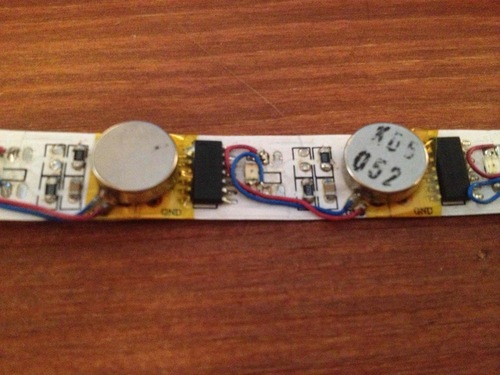
The game board is one meter of LED strip with individually addressable pixels. It cost a whopping $28 and was the second kind he tried after having trouble with the WS2801 based version (which often come as strings of lights). An Arduino board controls the game, with a shield made from protoboard to connect the components. In addition to the two user buttons — which were hacked out of a computer keyboard — you’ll notice a pair of seven segment displays acting as a scoreboard and an HD44780 character LCD rounding out the user interface.

Continue reading “LED Strip Pong As An Arduino Shield”

Ambilight Clone Has Meaningful Amount Of Resolution

james-bond-ambilight-clone

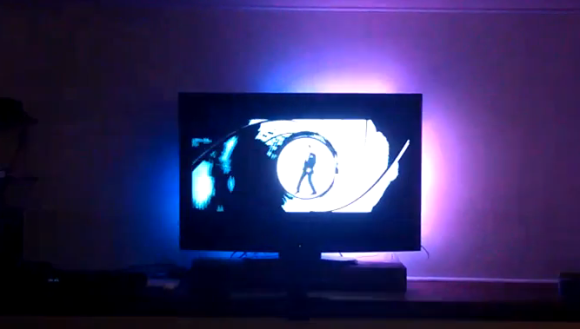
We don’t have an Ambilight clone on our own home theater, but seeing this one in action makes us wonder if we shouldn’t add it to the ever-growing list of projects we need to tackle (right below that POV display we’ve been putting off for years). [Falldeaf] built the colored light augmentation system using a set of WS2801 controlled LED pixels. There are a lot of them, and this results in the ‘meaningful resolution’ we mentioned in the title. The image on the screen is the opening to a James Bond film. You’ll remember that the camera shot down a rifle barrel follows him as he walks across the screen. There’s enough LEDs here to have to the light follow him across the screen as well. This is a nice touch that we don’t see in every Ambilight clone project.

A frame of fake-wood angle bracket holds each LED pixel in place. The entire assembly attaches to the VESA mounting holes on the back of the television. An Arduino addresses the lights while the Boblight package processes the video to acquire the lighting instructions. We think the hue is a bit off, but otherwise it’s a solid offering.

We’re still hoping the Microsoft IllumiRoom becomes a thing.

Continue reading “Ambilight Clone Has Meaningful Amount Of Resolution”

A Clock That Uses Sixty RGB Pixels

OLYMPUS DIGITAL CAMERA

Here’s a project inspired by a highly polished art piece. [Tobias] has been working on his own RGB LED clock which uses one light for each minute in an hour. He was inspired to start the project after seeing the Equinox clock. That one used a little PCB for each LED, and included an acrylic bezel and diffusers for each light. With the advent of LED pixel strings assembling one of these for yourself has become quite a bit easier.

The key part of the project is the laser-cut plywood frame which has a finger between each digit in order to perfectly space the lights. Each pixel is hot glued in place, with the Arduino board which drives them at the center of the frame. These lights are super bright, so [Tobias] also included a light dependent resistor which allows the system to measure ambient light and modulate the pixel brightness accordingly.

There are four parts to his project post so make sure you take some time to click around in order to get all the gritty details.

Brake Light Backpack Overpowered With LED Pixels

led-motorcycle-backpack

Here’s another Flora Arduino based project from [Becky Stern]. It’s a backpack with brake lights and turn signals for use when motorcycling, but it should work just as well for bicyclists. From this view the project looks pretty normal, but things get downright crazy when she decided to use the WS2801 pixels for the LEDs. Sure they take all the work out of driving an array of LEDs, and they offer full color and dimming levels. But when you see the bulk of cabling and PCBs this adds to the project (shown in the video after the break) we think you’ll agree that this was an interesting choice.

That issue aside the project is a lot of fun. The system doesn’t patch into the motorcycle’s electronics. Instead, it uses an accelerometer to detect when the brakes are applied and light the LEDs according. The turn signals are switched with an RF remote control that can be mounted on the handlebars.

Anyone looking to hack outerwear with electronics can learn form the fabrication techniques used here. [Becky] details how to make holes in the bag and sew parts to them, as well as using Sugru to waterproof vulnerable components.

Continue reading “Brake Light Backpack Overpowered With LED Pixels”