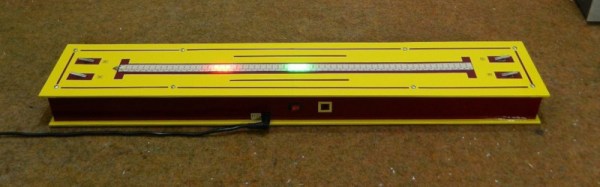
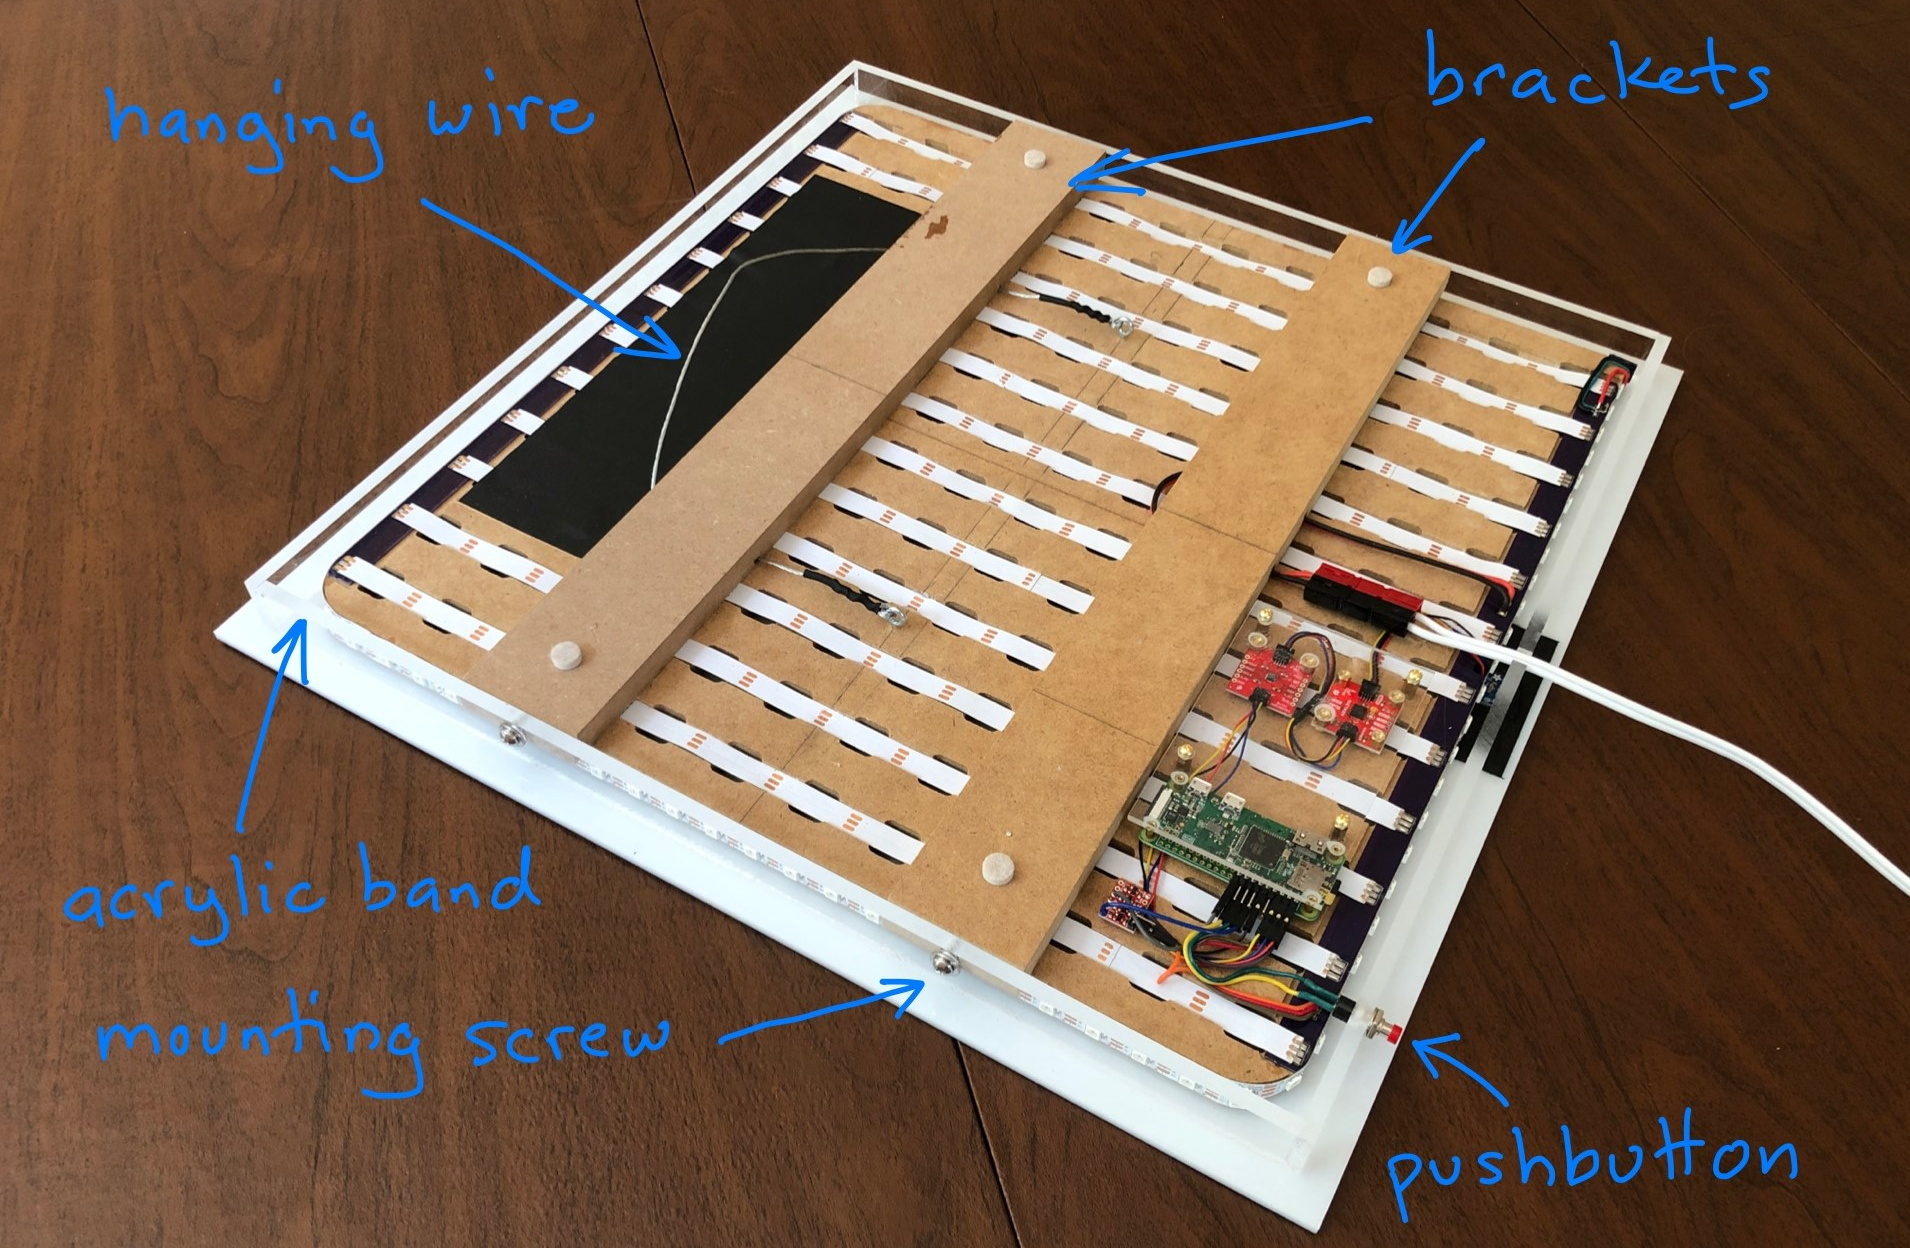
Sure modern video games are impressive, but you certainly don’t need a 4K display or high speed Internet connection to have a good time. For a perfect example, take a look at this unique one-dimensional racing game put together by [mircemk]. This variation of [Gerardo Barbarov Rostan]’s Open LED Race project has been scaled down so it can be transported easily, though at least for now, you’ll still need to plug it into an external power supply.
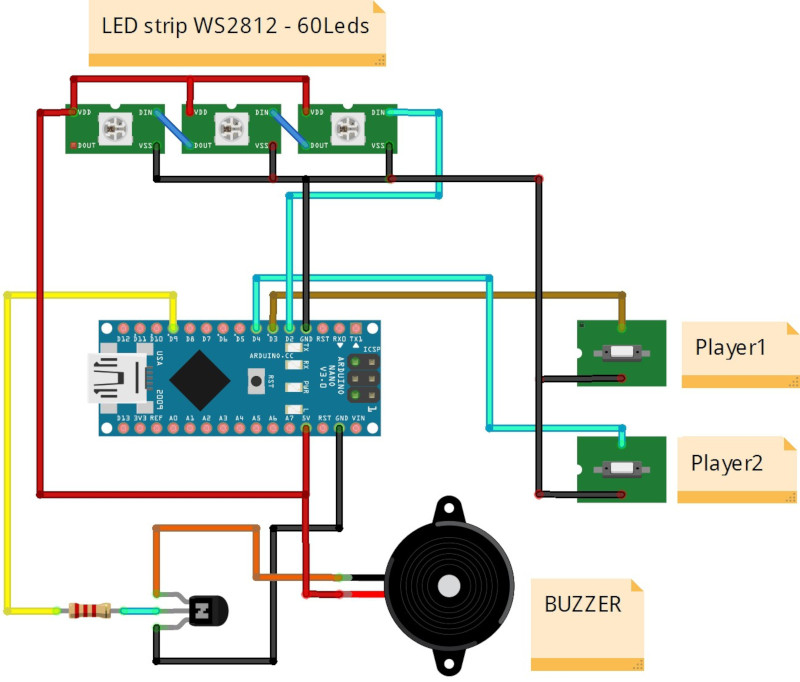
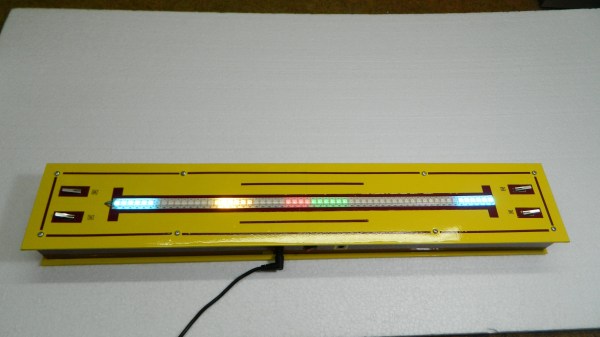
The game is pretty straightforward. By rapidly pressing their respective buttons, players race their virtual vehicles on a linear “track” made of 60 WS2812 RGB LEDs. In the most basic of terms, the faster they press their button, the faster the red or green illuminated LED that represents their car moves.
 But in practice, things are made a bit more interesting with the addition of simulated gravity for the “hills” the racers will encounter. The cars also have a bit of inertia, and will coast along even when you aren’t mashing the button. There are even optional engine sounds, though as with the visual representation of the cars, a certain degree of imagination is required for the desired effect.
The hardware requirements for this game are minimal, and can easily be adapted to what you have in the parts bin. Beyond the strip of WS2812 LEDs, all you really need is a microcontroller and two buttons. Here [mircemk] is using an Arduino Nano, but you could press pretty much any MCU into service. To make this version as portable as possible, the buttons are built right into the PVC sheet enclosure, but putting them in some wired remotes would make for a bit more comfortable gameplay.
We’ve covered several projects that have aimed to turn the humble string of RGB LEDs into an interactive electronic game over the years. As long as you’ve got an open mind, you can find a whole world hidden inside some blinking lights.
Continue reading “Virtual Racers Battle It Out On Portable WS2812 Track”


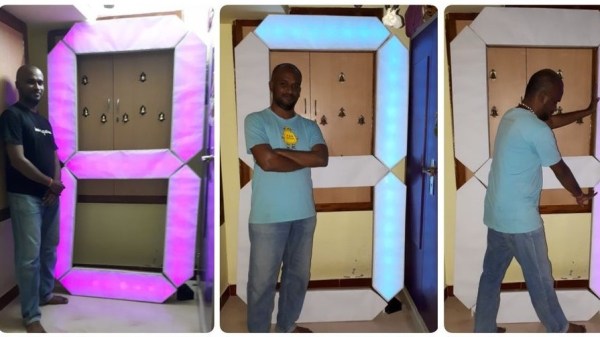
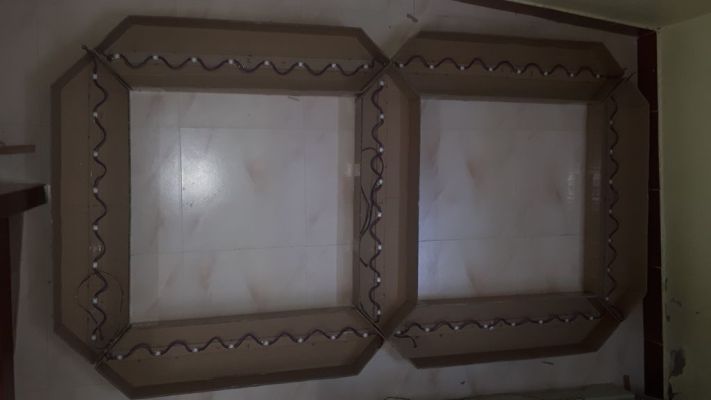 Apparently, the plan is to build a giant clock so he started off by making the first digit. To keep it cheap and simple the segments are made from corrugated cardboard which was carefully cut, folded, and then glued together. The light-diffusing lid is simply made from white paper. He used the ubiquitous WS2812B strips to light up the segments, but things turned out to be more complicated as he was not able to get enough strips to fill up all the segments. This forced him to cut up the strip into individual pieces and space them out by reconnecting the LEDs with wires. Cutting, stripping, and soldering 186 wires took him almost 10 hours. An Arduino Uno serves as the brains of the device and there is a nice Android app to control it via Bluetooth.


