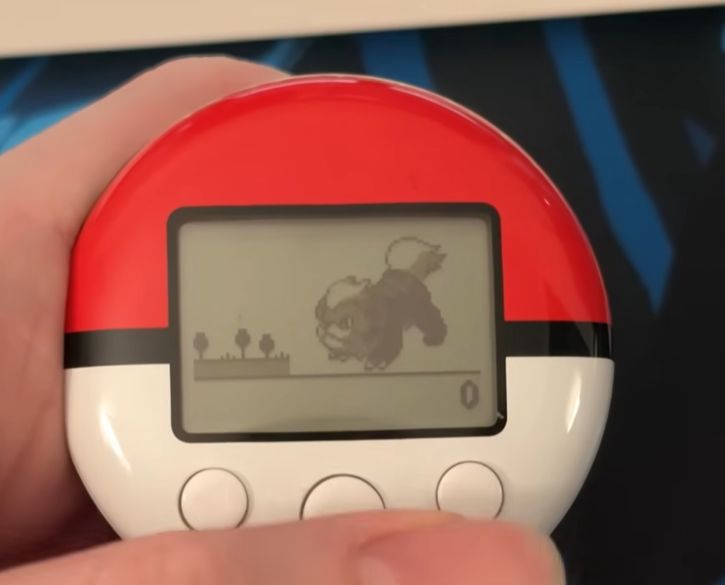
Frog Boy Color Reimagines The Game Boy Color Hardware From The Ground Up

Sales figures suggest Nintendo did pretty well with the Game Boy Color during its original run, even if the hardware and visuals feel a tad archaic and limited today. [Chris Hackmann] has taken the Game Boy Color design and reworked it from the ground up as the Frog Boy Color, kitting it out with modern upgrades in a GBA-like form factor while retaining the original hardware underneath.

[Chris] went to the wide-style GBA layout for comfort, which he considers superior to the original rectangular Game Boy format. He iterated through over 50 3D-printed enclosure designs to get the design to work, ensuring that the final housing could be CNC machined. He then set out to trim down the original Game Boy Color circuit layout to cut out hardware he considered unnecessary. The original LCD driver could go, since the Q5 replacement LCD he intended to use didn’t need it, and he also considered the IR port to be surplus to requirements. He also set out to replace the original audio amp with his own stereo design.

The result is a wide-format Game Boy Color with a gorgeous modern LCD, USB-C charging, and excellent compatibility with original games and accessories. Files are on Github if you want to build one yourself. Of course, he’s not the only person working on building the best Game Boy ever, but we always love seeing new work in this space. Video after the break.

Continue reading “Frog Boy Color Reimagines The Game Boy Color Hardware From The Ground Up”

Photoshop image of the NES game Metroid on a Super Nintendo cartridge.

NES Classic Metroid Ported To Equally Classic Super Nintendo

There was a time early in the development of the Super Nintendo (SNES) where the new console was to feature backwards compatibility with NES games. The solution would have required a cumbersome cartridge adapter and a hard switch on every console to flip the CPU into 8-bit mode. Unfortunately, it was not meant to be — outside of the first public demo of the console, little evidence exists to suggest the gamers would have been able to supercharge their old NES carts on their Super Nintendo.

But thanks to the impressive port of Metroid to the SNES by [infidelity], we can imagine what such a capability might have been like. There’s more on offer here than reduced sprite flicker. There are additional frames of animation compared to the original, so now Samus’ arm cannon stays consistent rather than magically switching arms when turning around. A complete save game system from the Famicom Disk System version has also been implemented as well, with the traditional three slots. Although purists can still utilize the password system if they so choose.

Ultimately the most impressive inclusion of [infidelity]’s work is the MSU-1 enhancement chip implementation. Fun video intro sequences lead into the main menu where players can select the accompanying soundtrack. There’s the original 8-bit music remapped onto the SNES sound chip, the expanded 8-bit version from the Famicom Disk System, the reimagined sound of Metroid Zero Mission, or a full orchestral score. It really is the sort of situation where there are no wrong answers.

While you’re here, check out this post about bringing Poke’mon ROM hacks into physical cartridge form.

Continue reading “NES Classic Metroid Ported To Equally Classic Super Nintendo”

The Nintendo Switch CPU Exposed

Ever wonder what’s inside a Nintendo Switch? Well, the chip is an Nvidia Tegra X1. However, if you peel back a layer, there are four ARM CPU cores inside — specifically Cortex A57 cores, which take up about two square millimeters of space on the die. The whole cluster, including some cache memory, takes up just over 13 square millimeters. [ClamChowder] takes us inside the Cortex A57 inside the Nintendo Switch in a recent post.

Interestingly, the X1 also has four A53 cores, which are more power efficient, but according to the post, Nintendo doesn’t use them. The 4 GB of DRAM is LPDDR4 memory with a theoretical bandwidth of 25.6 GB/s.

The post details the out-of-order execution and branch prediction used to improve performance. We can’t help but marvel that in our lifetime, we’ve seen computers go from giant, expensive machines to the point where a game console has 8 CPU cores and advanced things like out-of-order execution. Still, [ClamChowder] makes the point that the Switch’s processor is anemic by today’s standards, and can’t even compare with an outdated desktop CPU.

Want to program the ARM in assembly language? We can help you get started. You can even do it on a breadboard, though the LPC1114 is a pretty far cry from what even the Switch is packing under the hood.

Resurrecting A Bricked Wii U With A Raspberry Pi Pico

There are reports that some Nintendo Wii U systems out in the wild are falling victim to mysterious failures. As is so often the case, certain error codes have been found in common across failed units out in the community, and [Voultar] decided to investigate to see if he could fix this problem with a little hacking.

[Voultar] wasn’t able to source a Wii U with the much-discussed NAND failure mode, but he was able to source a number of supposedly bricked Wii U systems displaying the error codes 160-0101 and 160-0103. The hack is achieved with an exploit in the Wii U’s USB Host Stack descriptor parsing module, developed by [GaryOderNichts]. It allows the injection of a payload that lets one run unsigned code on the Wii U, achieved via a Raspberry Pi Pico. The Pico is ultimately used to boot off an SD card running a recovery program for the Wii U. By resetting the Wii U’s “coldboot title ID”, it solves the error and gets the console booting properly, as per normal.

[Voultar] was able to fix five consoles displaying the common error messages, which we’d call a win. It’s not going to be a fix for every failed Wii U out there, but if you’ve got the dreaded 160-0101 or -0103 errors, it might be worth a shot.

Continue reading “Resurrecting A Bricked Wii U With A Raspberry Pi Pico”

Why Game Boy IPS Screens Flicker

The Nintendo Game Boy was a very popular handheld in its time, but its display technology has not aged gracefully. Ripping out the original screen and dropping in a modern IPS LCD is a popular mod, but that often comes with a weird flicker now and then. [makho] is here to explain why.

The problem was that the Game Boy didn’t have any way to do transparency in the original hardware. Instead, sprites that were supposed to be a little bit transparent were instead flickered on and off rapidly. The original LCD was so slow that this flicker would be largely hidden, with the sprites in question looking suitably transparent. However, switch to a modern IPS LCD with its faster refresh rate, and the flickering will be readily visible. So it’s not a bug — it’s something that was intentionally done by developers that were designing for the screen technology of the 1980s, not the 2020s.

IPS screens have become the must-have upgrade for modern Game Boy users. Most would tell you the improved image quality and rich color is worth a little flicker here and there.

Continue reading “Why Game Boy IPS Screens Flicker”

Reverse-Engineered GBA Board Could Come In Handy

Retro gear is beloved, both for what it can do, and what it reminds us of. Nostalgia is a powerful thing, after all. But then, so is corrosion — and the latter has a habit of killing hardware and driving up prices for remaining units. Thankfully, hard workers like [NatalieTheNerd] are out there, creating reproduction PCBs to keep old hardware alive. Her Game Boy Advance (GBA) reproduction PCB is a great tool for the restoration and modding communities.

The board was reverse engineered, with [Natalie] sharing various scans and schematics of the GBA’s motherboard on the Modded Game Boy Club website. The project recreates the AGB-CPU-03 version of the GBA, and is designed to be produced on a 1 mm board with an ENIG process. You can combine the PCB with some salvaged parts and a new shell and build yourself a remarkably fresh GBA, if you so desire.

Beyond it’s intended use, [Natalie] points out the board outlines could be used as a basis for RetroPie or ESP32 projects that fit into a standard Game Boy Advance form factor. We love that idea. We’ve seen [Natalie’s] work before too, in the form of this neat little macropad. Nifty as always!

Game Graphics: Racing The Beam

Have you ever wondered how the graphics in your favorite video games worked? This is the start of a series on game graphics, and what better place to start than how exactly the original Mario Bros. got those glorious pixely pixels onto the screen. Buckle in, because we’re “racing the beam” with systems like the NES, Commodore 64, and many other classics from the 1980s.

And to understand the 1980’s, it’s important to understand how the televisions of the time worked. Cathode Ray Tube (CRT) televisions work by precisely bombarding a phosphor layer with electrons, which excites the phosphor, which then releases visible light. The beam scans from left to right then top to bottom, giving each pixel a small fraction of a second of time. All of this effectively means that pixel data needs be sent at the same time as when the pixels are being lit up, which is why this type of graphics is often dubbed “racing the beam”.

Continue reading “Game Graphics: Racing The Beam”