So it turns out that walking around with $4,000 worth of hardware on your head isn’t quite the peak technology experience that some people thought it would be. We’re talking about the recently released Apple Vision Pro headset, which early adopters are lining up in droves to return. Complaints run the gamut from totally foreseeable episodes of motion sickness to neck pain from supporting the heavy headset. Any eyeglass wearer can certainly attest to even lightweight frames and lenses becoming a burden by the end of the day. We can’t imagine what it would be like to wear a headset like that all day. Ergonomic woes aside, some people are feeling buyer’s remorse thanks to a lack of apps that do anything to justify the hefty price tag. The evidence for a wave of returns is mostly gleaned from social media posts, so it has to be taken with a grain of salt. We wouldn’t expect Apple to be too forthcoming with official return figures, though, so the ultimate proof of uptake will probably be how often you spot one in the wild. Apart from a few cities and only for the next few weeks, we suspect sightings will be few and far between.
blender63 Articles
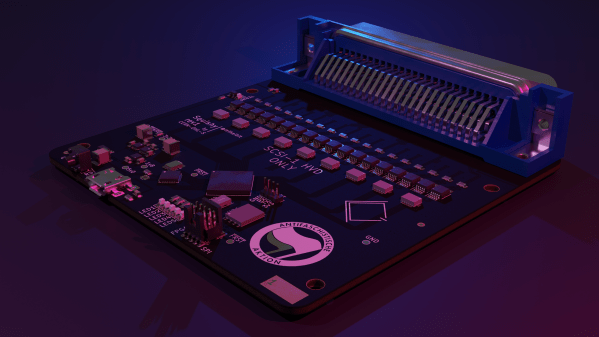
From KiCad To Blender For A Stunning Render
We love Blender. It brings you 3D modeling, but not in a CAD way — instead, people commonly use it to create animations, movies, games, and even things like VR models. In short, Blender is about all things art and visual expression. Now, what if you want a breathtaking render of your KiCad board? Look no further than the pcb2blender tool from [Bobbe 30350n].
This isn’t the first time we’ve seen KiCad meet Blender. However, compared to the KiCad to Blender paths that people used previously, pcb2blender makes the import process as straightforward and as quick as humanly possible. Install a plugin for both tools, and simply transfer a .pcb3d file out of the KiCad plugin into the Blender plugin. Want to make the surfaces of your design look like they’re meant to look in real life? Use the free2ki plugin to apply materials to your 3D models. In fact, you should check out [30350n]’s Blender plugin collection and overall portfolio, it’s impressive.
There’s no shortage of Blender hacks – just this year we’ve covered a hacker straight up simulating an entire camera inside Blender for the purpose of making renders, and someone else showing how to use Stable Diffusion to texture 3D scenes at lightning speed. We even recently published a comprehensive tutorial on how to animate your robot in Blender ourselves! Want to give it a shot? Check out this quick and simple Red Bull can model design tutorial.
Thanks to [Aki] for sharing this with us!
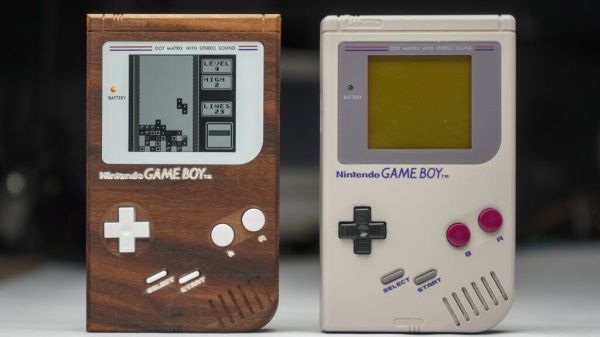
Wooden Game Boy Is A Challenging Intro CNC Project
[Sebastian] describes himself as “a total noob” when it comes to CNC, so in an attempt to get to know his new CNC router, he chose about the most complex possible project — replicating an original Game Boy case in wood. And spoiler alert: he nailed it.
Of course, he did have a few things going for him. At least from a straight woodworking perspective, it’s hard to go wrong by choosing walnut as your material. Then again, it can be unforgiving at times, and picky about tooling, which is probably why [Sebastian] used nine different tools to get the job done. But where he upped the difficulty level was in reproducing so many of the details of the original injection-molded plastic case. There are top and bottom shells, each of which has to be milled from both sides. This makes registration tricky when the parts are flipped. Specific indexing holes were used for that, along with the old “blue tape and CA glue” fixturing trick, which seemed to work quite well. For our money, though, the best bit is the lettering on the front face, which was milled out with an engraving bit and then filled with a spritz of white spray paint. A surfacing bit then came along to knock the overspray down, leaving labels that contrast beautifully with the dark wood. Gorgeous!
It wasn’t all easy sailing, though. There are just some things plastic can do that wood can’t, like holding screw threads in small studs without splitting. So, the case had to be glued shut once the mix of salvaged and new components went in. Still, it looks fabulous, and [Sebastian] says what we see in the video below is the one and only piece. Pretty sweet for the first try. Surprisingly, it doesn’t seem as if we’ve seen a wooden Game Boy before — a wooden NES, sure, but not a Game Boy.
Continue reading “Wooden Game Boy Is A Challenging Intro CNC Project”
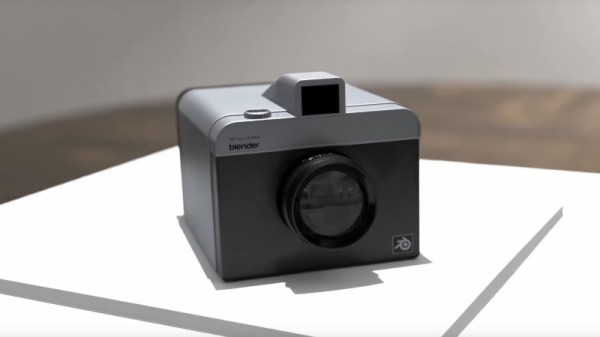
This Camera Does Not Exist
Blender is a professional-grade 3D-rendering platform and much more, but it suffers sometimes from the just-too-perfect images that rendering produces. You can tell, somehow. So just how do you make a perfectly rendered scene look a little more realistic? If you’re [sirrandalot], you take a photograph. But not by taking a picture of your monitor with a camera. Instead, he’s simulating a colour film camera in extraordinary levels of detail within Blender itself.
The point of a rendering package is that it simulates light, so it shouldn’t be such a far-fetched idea that it could simulate the behaviour of light in a camera. Starting with a simple pinhole camera he moves on to a meniscus lens, and then creates a compound lens to correct for its imperfections. The development of the camera mirrors that of the progress of real cameras over the 20th century, simulating the film with its three colour-sensitive layers and even the antihalation layer, right down to their differing placements in the focal plane. It’s an absurd level of detail but it serves as both a quick run-down of how a film camera and its film work, and how Blender simulates the behaviour of light.
Finally we see the camera itself, modeled to look like a chunky medium format Instamatic, and some of its virtual photos. We can’t say all of them remove the feel of a rendered image, but they certainly do an extremely effective job of simulating a film photograph. We love this video, take a look at it below the break.
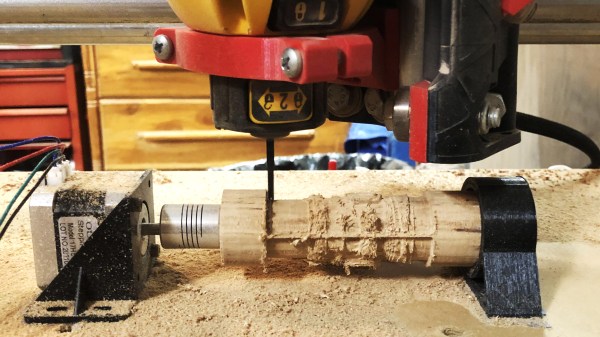
This $12 CNC Rotary Axis Will Make Your Head Spin
[legolor] brings us a great, cheap rotary axis to add to your small 3 axis CNC mills. How are you going to generate G-Code for this 4th axis? That’s the great part, and the hack, that [legolor] really just swapped the Y axis for the rotation. To finish the workflow and keep things cheap accessible to all there’s a great trick to “unwrap” your 3D model so your CAM software of choice thinks it’s still using a linear Y axis and keeps your existing workflow largely intact. While this requires an extra step in Blender to do the unwrapping, we love the way this hack changes as little of the rest of your process as possible. The Blender script might be useful for many other purposes too.

The results speak for themselves too! We thought the 3D printed parts were suspect in a CNC setup, but for the small scale of game pieces and milling wood, the setup is stable enough to produce a surprisingly accurate and detailed finish. If you want to try the same approach with something larger or a tougher material, [legolor] has a suggestion of a tailstock setup that’s still under $100 USD. Continue reading “This $12 CNC Rotary Axis Will Make Your Head Spin”
Image-Generating AI Can Texture An Entire 3D Scene In Blender
[Carson Katri] has a fantastic solution to easily add textures to 3D scenes in Blender: have an image-generating AI create the texture on demand, and do it for you.
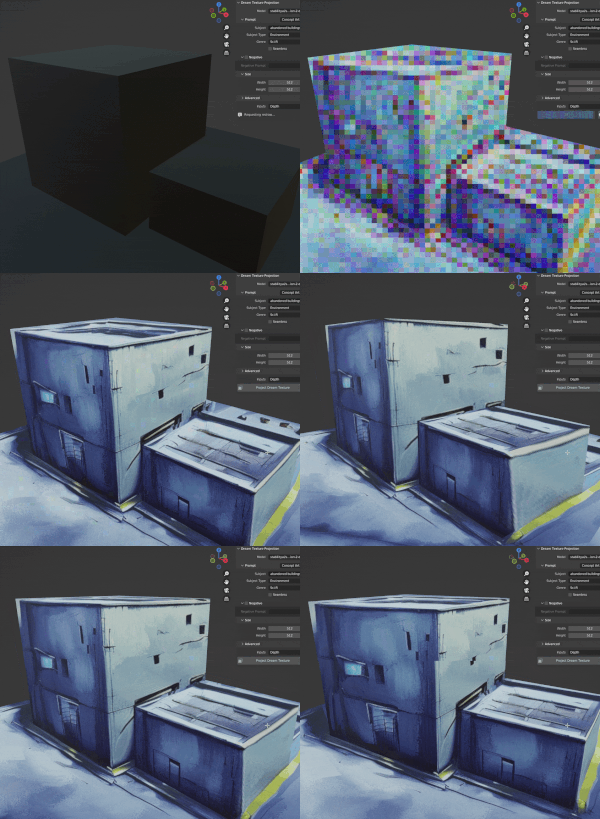
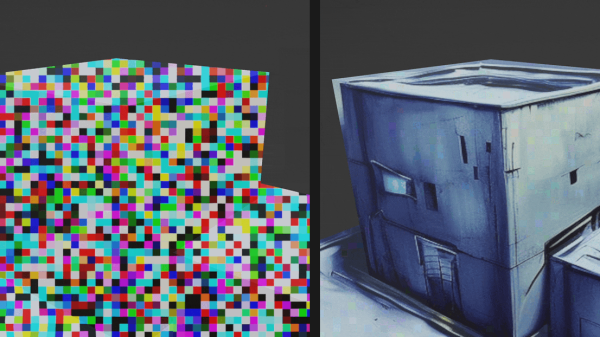
As shown here, two featureless blocks on a featureless plain become run-down buildings by wrapping the 3D objects in a suitable image. It’s all done with the help of the Dream Textures add-on for Blender.
The solution uses Stable Diffusion to generate a texture for a scene based on a text prompt (e.g. “sci-fi abandoned buildings”), and leverages an understanding of a scene’s depth for best results. The AI-generated results aren’t always entirely perfect, but the process is pretty amazing. Not to mention fantastically fast compared to creating from scratch.
AI image generation capabilities are progressing at a breakneck pace, and giving people access to tools that can be run locally is what drives interesting and useful applications like this one here.
Curious to know more about how systems like Stable Diffusion work? Here’s a pretty good technical primer, and the Washington Post recently published a less-technical (but accurate) interactive article explaining how AI image generators work, as well as the impact they are having.
Blender Builds LEGO Models
Blender is a free and open source computer graphics package that’s used in the production of everything from video games to feature films. Now, as demonstrated by [Joey Carlino], the popular program can even be used to convert models into LEGO.
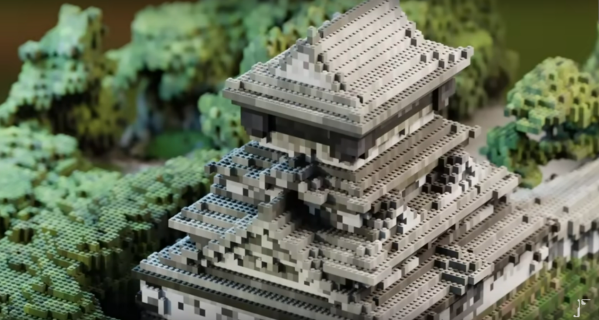
This new feature available in Blender 3.4 allows for the use of instance attributes in a way that a large number of points on a model can be created without causing undue strain on (and possible crashing of) the software. Essentially, an existing model is split into discrete points at specific intervals. The spacing of the intervals is set to be exactly that of LEGO bricks, which gives the model the low-resolution look of a real LEGO set. From there, a model brick is created and placed at each of these points, and then colors can be transferred to the bricks individually.
The demonstration that [Joey] uses is converting a beach ball model to LEGO, but using these tools on other models delivers some striking results. He goes over a lot of the details on how to create these, and it would only be a short step from there to ordering the bricks themselves. Or, using these models and sending them over to a 3D printer straight from Blender itself. Not bad for free software!


