[lovablechevy] Transforms A Nomad Into The HandyGen

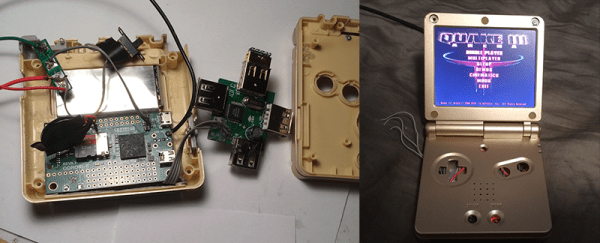
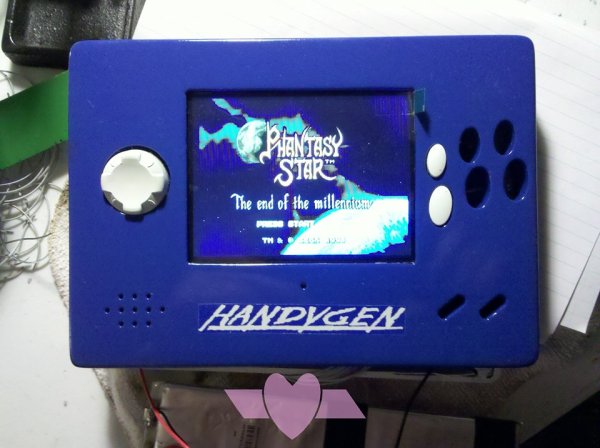
[lovablechevy], aka the Queen of Bondo, has added another member to her Mushroom family of custom portable consoles.  This time, it’s the HandyGen, an improved Sega Nomad.  As an owner of the latter, we can attest that the Nomad had limitations, including its unwieldy size and shape, and its godawful battery life. As part of a build-off contest over at the Bacman forums , [lovablechevy] took apart a half-working Nomad and trimmed its board to fit into a smaller case of her own design, while retaining features such as the A/V out, headphone jack, and Player 2 controller port.  She also bumped up the size of the screen, swapping in a new 4″ LCD and its corresponding controller board. The best improvement was increasing the battery life considerably; HandyGen uses 2 LiPo batteries lasting 7 hours instead of the Nomad needing 6AA’s that barely lasted two. HandyGen’s battery life is roughly double that of the GeneBoy, an earlier portable Genesis mod we’ve featured before.

[lovablechevy] always does a great job with her portables, from the Nintenduo to the HandyNES. Being avid PS fans, we also award her bonus points for testing out the HandyGen with Phantasy Star 4. Check out her video of the HandyGen after the break.

Continue reading “[lovablechevy] Transforms A Nomad Into The HandyGen”

A Raspberry Pi In A Game Boy Advance SP

It’s not the biggest use of a Raspberry Pi, but running emulators for old game systems is by far the most visible use of the Pi. In fact, putting Pis inside old game systems has led to a resurgence of case modding not seen since the heyday of the Mini-ITX craze of the early ‘aughts.

You’d think every possible Pi casemod had been done by now, but [frostedfires] is still raising the bar with a Pi casemod that stuffs a clone of everyone’s favorite credit card sized computer into a Game Boy Advance SP.

[frostedfires] isn’t using a real Raspi from The Foundataion. Instead, he found the Odroid W, a raspi compatible board that’s about half the size of a model B. It still has everything needed to complete the build – analog video out, a reasonable Linux system, and enough processing power to run Quake III. Right now, [frostedfires] has the screen working – that was taken from a car backup camera. Other than that, the only portion of the build left to go is a few buttons.

This is officially the smallest derivative casemod we’ve ever seen. the previous record holder was the still tiny Game Boy Pocket build from last summer. That build required heavy modifications to the Model B board, though, so if you’re aiming for a smaller build, the Odroid is the way to go.

Thanks to the Bacman forums for yet another great build.

IPad Finds New Home In Mac Classic

Who of us out there don’t have a spare iPad and Mac Classic kicking around? If you are one of those lucky folks then this project is for you. [site hirac] has made a pretty neat stand for an iPad made out of a Mac Classic case (translated). It just happens that the screens of the Mac Classic and iPad are pretty darn close in size. Although the screen size is similar, the resolution is not. The original Macintosh Classic had a black and white screen with a resolution of 512 × 342 pixels. The iPad’s resolution of 1024 x 768 pixels has 450% more pixels than the original Mac.

To get the iPad to fit correctly, the case had to be significantly modified. First, all of the internals of the Mac were removed, leaving just an empty case. The front panel of the case was removed and a slot on the left side is made. This slot helps to allow the iPad to slide into the Mac. On the inside of the front panel quite a few of injection molded supports were trimmed away for clearance. A slot was also cut in the left side of the rear case half. When the case is re-assembled, the slots in the front and rear halves provide a large enough hole for the iPad to fit through. Oddly, there are some plastic features on the front panel that are at just the right height to hold the iPad in the ideal location to line up with the screen cutout in the case.

Continue reading “IPad Finds New Home In Mac Classic”

Case Modder Builds LCD Window; Causes LSD Flashbacks

lcd-casemod

[Chris, aka Mosquito’s Mods]  is well-known for some awesome PC case mods. He’s outdone himself this time with an embedded LCD panel as his case window. This use of an LCD is becoming common on arcade games and slot machines. [Chris] was inspired by an arcade game he saw at a local Dave & Buster’s. He started with an off the shelf 16″ USB LCD monitor from AOC. [Chris] then stripped off the back light, diffuser, and reflectors. Left with  the bare panel and polarizers, he then created an LCD sandwich of sorts. First a layer of 2mm acrylic. Then the LCD and panel, along with 4 strips of acrylic forming a frame around the LCD. The frame strips are in blue in the image after the break. Continue reading “Case Modder Builds LCD Window; Causes LSD Flashbacks”

Putting Every Game Console In The Palm Of Your Hand

SNES

Casemodders extraordinaire [Downing] and [Hailrazer] are known for their fabulous builds that put just about every gaming console into a portable hand-held format. Everything from a Game Cube to N64s and a Sega Genesis have been conquered by the two, and for the last year they’ve been putting their heads together to make the best solution to portabalizing console gaming forever. It’s called the Cross Plane, and puts just about everything with an HDMI connection in the palm of your hand.

The build began as one of [Downing]’s more ambitious projects. He imagined a system that could play nearly every retro game on a small handheld device. After finishing this build, he set up a Kickstarter and called up his friend [Hailrazer] to get some feedback. Just hours before the Kickstarter launched, [Hailrazer] suggested making a device for modern consoles. [Downing]’s pride and joy was scrapped, but out of its ashes arose the Cross Plane.

Inside the Cross Plane is a wireless HDMI receiver and a 7″ 720p display. This, along with a few buttons and analog controls, allow the Cross Plane to serve as a remote display and controller for an XBox 360, Playstation 3, and even a PC, for all that retro emulator goodness.

It’s a really, really cool project, and since the dream of an open Wii U controller seem to have died, we’re thinking this could be a great controller for an FPV quadcopter or other remotely operated vehicle.

A Gamecube And N64 Console Mashup

gc

[Hailrazer] over on the Made by Bacteria forums was a bit tired of all his consoles cluttering up the space underneath his TV. No worries, though, because it’s actually fairly easy to combine a Gamecube and an N64 into one system that looks very professional.

While [Hailrazer]’s Gamecube was left reasonably complete, not including the addition of a mod chip and SD card to hold Gamecube disk images, the N64 portion of the build required quite a bit of hardware hacking. After finding a Game Boy Advance player for a Gamecube – a neat hardware add-on that allows you to play GBA games on a Game Cube – [Hailrazer] thought he found the perfect enclosure for an N64 case mod.

The guts of the GBA player were thrown out and the guts of an N64 were carefully filed down to fit inside their new home. An Everdrive 64 holds almost every US N64 release on an SD card, making access to the cartridge port unnecessary.

A switch on the side of the Gamecube toggles the video and audio output between the Gamecube and N64. It’s a neat little setup, and packs two consoles into the space of the tiny Gamecube.

Continue reading “A Gamecube And N64 Console Mashup”

Building A Very Low Power, Full Featured Desktop

For a few years now, [mux] has been playing around with extremely efficient computation. In 2010, he built a fully featured MiniITX / Core 2 duo computer that only consumed 20 watts. Last year, [mux] managed to build an Intel i3-powered desktop that was able to sip a mere 8.3 watts at idle. He’s back at it again, and now his sights are set on a fully featured Intel i5-powered build with a built-in monitor that will draw less than 6 watts of power.

Like his previous 8 watt i3 build, [mux] reduces the power requirement of his build by carefully measuring the power draw of every component on his board. The power savings come from a simple fact of any power supply; when converting from AC to DC, or from one DC voltage to another, there’s always a little bit of power lost in the process.

[mux] reduces these power losses by removing a few voltage regulators and re-routing power lines across his motherboard. So far, the power draw on [mux]’s computer is more than half of what it was when the parts were stock, and we can’t wait for the finished build that includes a built-in monitor, UPS, and a proper case.