Bring Doping, Microfluidics, Photovoltaics, And More Into The Home

Can you make a spectrometer for your home lab all from materials you have sitting around? We might not believe it from a less credible source, but this MIT course does indeed build a spectrometer from foam board using two razor blades as the silt cover and a writable CD as the diffraction grating. The coolest part is removing the metal backing of the CD.

mit_experiments_thumbHackaday reader [gratian] tipped us off about the course available from MIT courseware called Nanomaker. It boils down some fairly complicated experiments to the kind one can do in the home lab without involving thousands of dollars of lab equipment. The whole point is to demystify what we think of as complicated devices and topics surrounding photovoltaics, organic photovoltaics, piezoelectricity and thermoelectricity.


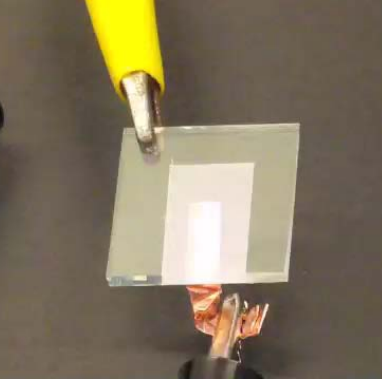
Spectrometers are used to analyze the wavelengths of a light source. Now that you have a measurement tool in hand it’s time to build and experiment with some light sources of your own. Here you can see an LED that is the topic of one of the course labs.

If you have a bit of background in chemistry this is a good step-by-step guide for getting into these types of experiments at home. It reminds us of some of the really cool stuff [Jeri Ellsworth] was doing in her garage lab, like making her own EL panels.

Continue reading “Bring Doping, Microfluidics, Photovoltaics, And More Into The Home”

Arduino Vs. Phidgets Vs. Gadgeteer

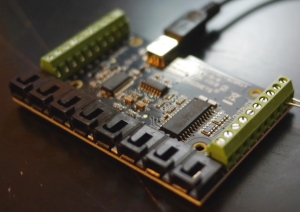
A few days ago, we saw a dev time trial between the Arduino and Phidgets, a somewhat proprietary dev board that is many times more expensive than an Arduino. The time trial was a simple experiment to see which platform was faster to prototype simple circuits. As always in Hackaday comments, there was a ton of comments questioning the validity and bias of the test. Not wanting to let a good controversy go to waste, [Ian Lee] tossed his hat into the ring with the same dev trial with the Gadgeteer.

The Gadgeteer has the same design philosophy as Phidgets: modular components and a unique software system -the Gadgeteer is based on .NET Micro Framework – that allows you to get up and running quickly. Unlike Phidgets, the Gadgeteer is priced competitively with the Arduino, and the mainboard is priced within an order of magnitude of a single ATMega chip.

[Ian] pulled off three projects with the three development platforms: blinking a LED, moving a servo, and building a pedometer with an accelerometer. For each trial, the time taken and the price of all components were added up. Here’s the relevant graph:

Continue reading “Arduino Vs. Phidgets Vs. Gadgeteer”

Arduino Vs. Phidgets – Dev Time Trials

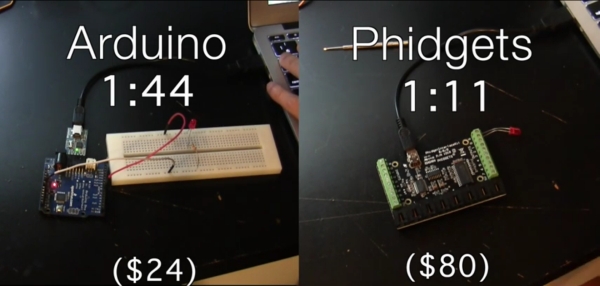
Is developing on an Arduino too slow? Are Phidgets too expensive? When might you use one or the other? Hackaday regular [Ken] breaks down what he learned from three experimental time trials.

The main development differences between Arduino and Phidgets are a mix of flavor preferences and some hard facts. The Arduino is open source, Phidgets are proprietary. Arduino requires a mix of hard- and software where Phidgets only needs (and only allows) a connection to a full computer but enables high level languages – it is expected to get the job done sooner and easier. And finally, Arduinos are cheap, Phidgets are 3-5x the cost.

The three time trials were common tasks: 1. Blink an LED. 2. Use a pot to turn a servo. 3. Build a pedometer. For [Ken], the Phidgets won in each of the three experiments, but not significantly: 37%, 45%, and 25% respectively. The difference is only minutes. Even considering time value, for most hackers it is not worth the cost.

HAD - Phidgets3In context, the advantages of a mildly more rapid development on the simplest projects are wasted away by needing to rebuild a permanent solution. Chained to a PC, Phidgets are only useful for temporary or fixed projects. For many of our readers that puts them dead in the water. Arduinos may technically be dev kits but are cheap enough to be disposed of in the project as the permanent solution – probably the norm for most of us.

[Ken] points out that for the software crowd that abhor electronics, Phidgets plays to their preferences. Phidgets clips together their pricey peripherals and the rest is all done in code using familiar modern languages and libraries. We wonder just how large this group could still be; Phidgets might have been an interesting kit years ago when the gulf between disciplines was broader but the trend these days is towards everyone knowing a little about everything. Hackaday readers probably represent that trend more than most, but let us know if that seems off.

[Ken]’s article has much more and much better detailed explanations of the experiments and the tradeoffs between the platforms.

If you enjoy watching parallel engineering, see the time-lapse video below for a split screen of the time trials.

Continue reading “Arduino Vs. Phidgets – Dev Time Trials”

Bare-metal Programming On The Teensy 3

Teensy

The Teensy 3.x series of boards are amazing pieces of work, with a tiny, breadboard-friendly footprint, an improbable number of IO pins, and a powerful processor, all for under $20. [Karl Lunt] loves nearly all the features of the Teensy 3, except for one: the Arduino IDE. Yes, the most terrible, most popular IDE in existence. To fix this problem, [Karl] set up a bare-metal development environment, and lucky us, he’s chosen to share it with us.

[Karl] is using CodeBench Lite for the compiler, linker, assembler, and all that other GCC fun, but the CodeSourcery suite doesn’t have an IDE. Visual Studio 2008 Express is [Karl]’s environment of choice, but just about every other IDE out there will do the same job. Of course a make utility will be needed, and grabbing the docs for the Freescale K20 microcontroller wouldn’t be a bad idea, either.

The end result is [Karl] being able to develop for the Teensy 3.X with the IDE of his choice. He was able to quickly set up a ‘blink a LED’ program with the new toolchain, although uploading the files to the Teensy does require the Teensy Loader app.

The Story Behind Developing The Sifteo From An Engineer’s Perspective

how-the-sifteo-was-developed

The video game industry must be one of the most secretive sectors when it comes to developing the electronic hardware used in the gaming consoles. The big guys don’t want to give anything away — to the competition or to the hackers who will try to get around their security measures. But it seems Sifteo doesn’t share those secretive values. We had a great time reading about the bumpy ride for the developers bringing the gaming system from concept to market. [Micah Elizabeth Scott] wrote the guest post for Adafruit Industries. She was brought on as an engineer for the Sifteo project just after the first version of the interactive gaming cube was released. From her narrative it seems like this was the top of the big hill on the roller coaster ride for the company.

What’s seen above is one gaming cube. The system developed in [Beth’s] story puts together multiple cubes for each game. The issue at hand when she joined the company was how to put more power in the hardware and rely less heavily on a computer to which it was tethered. She discusses cost of components versus features offered, how to deliver the games to the system, and all that the team learned from studying successful consoles that came before them like the long line of Nintendo hardware. It’s a fascinating read if you’re interesting in how the sausage is made.

Come See What’s Cooking In The Arduino Kitchen

arduino_labs

The crew that brought you the Arduino is always hard at work trying to bring the community closer together and to foster collaborative development. They recently rolled out a new feature on their site that is sure to be of interest to Arduino veterans and neophytes alike.

Arduino Labs is a platform which the team plans on using as an incubator of sorts, for projects that are underway, but not fully baked. Currently, they have highlighted two in-progress initiatives, including the Arduino Mega ADK, as well as a GSM/GPRS shield that the team has been developing in collaboration with Telefonica I+D.

As of right now, the site looks to be a one-way information outlet for the Arduino team to the community, but they stress that their aim is to create a more open development process within the Arduino project. While there is no official statement on the matter, we hope that the site will eventually allow members of the community to offer both their feedback and lend manpower to forthcoming projects.

[via Adafruit blog]

build_status_board

LED Build Monitor Helps Keep An Eye On Your Servers

In his line of work, Hackaday reader [Pedantite] often has to monitor the build status of several continuous integration servers throughout the day. One afternoon, he got the idea to install a set of stop lights in the office in order to monitor the status of the servers, but filed it away as a “wouldn’t it be cool if…” project.

After some time had passed, he was bitten by the idea bug again and decided he would build a physical device to display the status of his build processes. This time around, he brainstormed on a smaller scale and the result is the “Indictron” you see above.

He built a simple LED board made up of four rows of four LEDs to display the build processes. Different LEDs are lit depending on the project’s current build status as well as the results of the previous build. The board uses an ATmega88, and interfaces with a compiler watchdog application using a virtual USB package made specifically for AVR micro controllers.

The end result is a simple, yet useful status board that “just works”. He does not seem to have code or schematics posted on his site at the moment, but we’re pretty sure he would share them upon request.

If you’re interested in a bit more of [Pedantite’s] work, check out his “Good Times” parental timer we featured last week.