If there’s one thing we’ve learned from [Chris] at Clickspring, it’s that a clockmaker will stop at nothing to make a clock not only work perfectly, but look good doing it. That includes measures as extreme as this complete re-toothing of a wheel from a clock. Is re-toothing even a word?
The obsessive horologist in this case is [Tommy Jobson], who came across a clock that suffered a catastrophic injury: a sudden release of energy from the fusee, the cone-shaped pulley that adjusts for the uneven torque created by the clock’s mainspring. The mishap briefly turned the movement into a lathe that cut the tops off all the teeth on the main wheel.
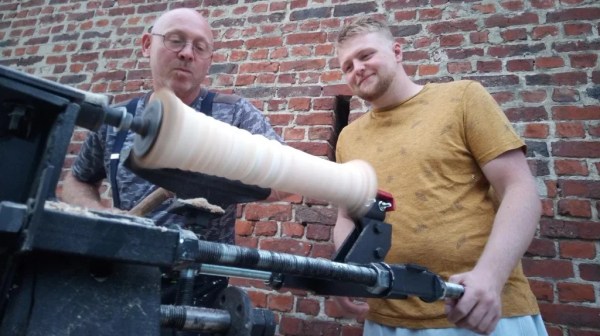
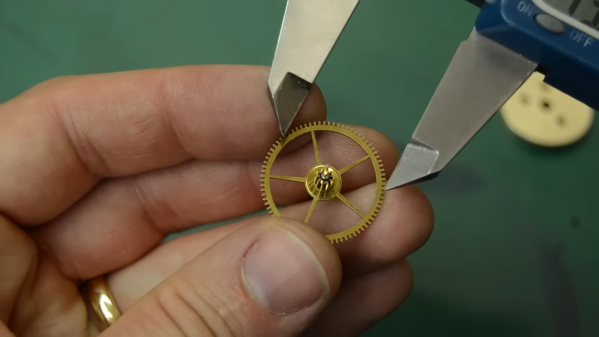
Rather than fabricate a completely new wheel, [Tommy] chose to rework the damaged one. After building a special arbor to hold the wheel, he turned it down on the lathe, leaving just the crossings and a narrow rim. A replacement blank was fabricated from brass and soldered to the toothless wheel, turned to size, and given a new set of teeth using one of the oddest lathe setups we’ve ever seen. Once polished and primped, the repair is only barely visible.
Honestly, the repaired wheel looks brand new to us, and the process of getting it to that state was fascinating to watch. If the video below whets your appetite for clockmaking, have we got a treat for you.
Continue reading “Stripped Clock Wheel Gets A New Set Of Teeth, The Hard Way” →