Repent! The Church Of Robotron Accepts All!

Are you the mutant savior? Are you prepared for the robot uprising of 2084? Have you accepted robotron into your life? The Church of Robotron is now conducting training, testing, and confession at the new window altar in downtown Portland.

The Church of Robotron is the fake totally legit religion based on the classic arcade game prophecy Robotron 2084. In keeping with the church’s views on community outreach and missionary work, a Robotron altar has been installed at the Diode Gallery for electronic arts.

The altar consists of a system running Robotron 2084 with capacitive sensing controls built by DorkbotPDX’s own [Phillip Odom]. He’s using the same techniques featured in his capacitive sensing workshop, allowing the game to be played 24 hours a day. There are also monitors displaying the leaderboard and tenants of the Church of Robotron.

The Church of Robotron has also been showing up at Toorcamp for a few years now, with an even more spectacular altar that triggers physical events in response to game events. That’s a very cool use of MAME’s debugger, and a story worthy of its own Hackaday post.

Video of the altar below.

Continue reading “Repent! The Church Of Robotron Accepts All!”

ROM dump

Raiders Of The Lost ROM

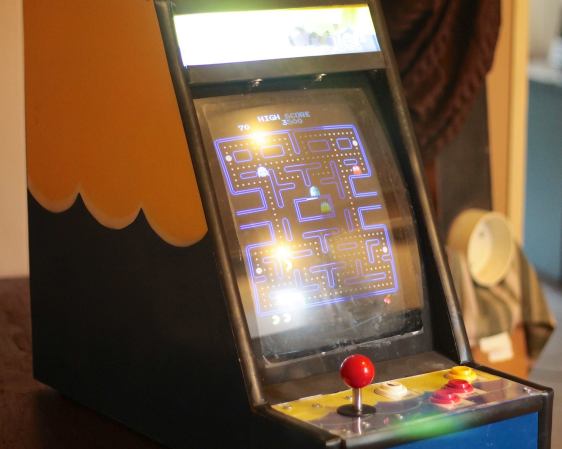
Once upon a time, arcades were all the rage. You could head down to your local arcade with a pocket full of quarters and try many different games. These days, video arcades are less popular. As a result, many old arcade games are becoming increasingly difficult to find. They are almost like the artifacts of an ancient age. They are slowly left to rot and are often lost or forgotten with time. Enter, MAME.

MAME (Multiple Arcade Machine Emulator) is a software project, the goal of which is to protect gaming history by preventing these arcade machines from being lost or forgotten. The MAME emulator currently supports over 7000 titles, but there are still more out there that require preservation. The hackers who work on preserving these games are like the digital Indiana Jones of the world. They learn about lost games and seek them out for preservation. In some cases, they must circumvent security measures in order to accurately preserve content. Nothing as scary as giant rolling boulders or poison darts, but security nonetheless.

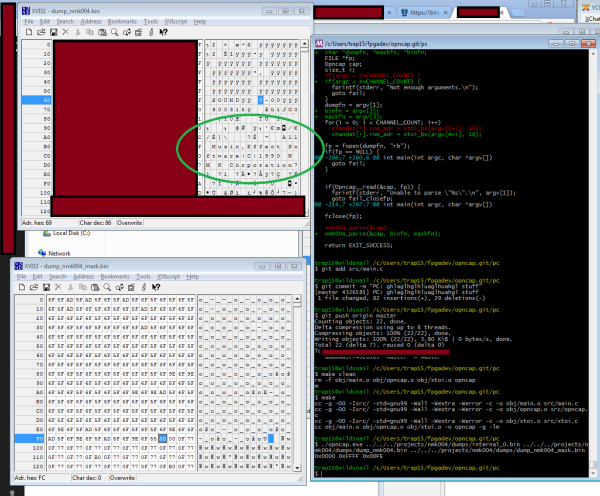
Many of the arcade cabinets produced by a publisher called NMK used a particular sound processor labeled, “NMK004”. This chip contains both a protected internal code ROM and an unprotected external ROM that controls the sound hardware. The actual music data is stored on a separate unprotected EEPROM and is different for each game. The system reads the music data from the EEPROM and then processes it using the secret data inside the NMK004.

The security in place around the internal ROM has prevented hackers from dumping its contents for all this time. The result is that NMK games using this chip have poorly emulated sound when played using MAME, since no one knows exactly how the original chip processed audio. [trap15] found it ridiculous that after 20 years, no one had attempted to circumvent the security and dump the ROM. He took matters into his own hands.

The full story is a bit long and contains several twists and turns, but its well worth the read. The condensed version is that after a lot of trial and error and after writing many custom tools, [trap15] was able to finally dump the ROM. He was able to accomplish this using a very clever trick, speculated by others but never before attempted on this hardware. [trap15] exploited a vulnerability found in the unprotected external ROM in order to trick the system into playing back the protected internal ROM as though it were the sound data stored on the EEPROM. The system would read through the internal ROM as though it were a song and play it out through the speakers. [trap15] recorded the resulting audio back into his PC as a WAV file. He then had to write a custom tool to decode the WAV file back into usable data.

[trap15] has released all of his tools with documentation so other hackers can use them for their own adventures into hardware hacking. The project was a long time in the making and it’s a great example of reverse engineering and perseverance.

[Thanks Ryan]

Table-Top MAME Cabinet Dubbed “The Water Cooler”

Table-Top MAME Cabinet Dubbed "The Water Cooler"

[Greg] wanted to build a MAME cabinet. Not one of those monsters that take up a bunch of floor space, mind you: this one would be table-top size. He admits he could have made his game system out of new, currently available, off the shelf parts, but part of the design goal was to reuse old hardware that was kicking around. It was important to [Greg] to keep unnecessary waste out of the landfill.

An old PC motherboard was pulled out of an old desktop. It’s not fast enough for use as an everyday computer but it will be totally sufficient for a MAME machine. The project’s screen is an old 13 inch Gateway CRT computer monitor. Notice that it is turned 90 degrees so that it is taller than it is wide. This screen orientation lends itself better to certain types of games. The monitor’s plastic casing was removed before some measurements were taken. SketchUp was used to plan a basic idea of the cabinet.

Table-Top MAME Cabinet Dubbed "The Water Cooler"

The controls consist of a joystick and 4 buttons. During past projects, [Greg] has had experience with the least-expensive arcade controls available on eBay. Well, you get what you pay for. This time around he ponied up the extra cash for some high quality controls and is satisfied with the purchase. These buttons were wired straight into a PS/2 keyboard so the computer does not know the difference between the keyboard keys or recently added controls… another great re-use of old obsolete hardware.

The cabinet is made from MDF, glued and screwed together. The limited wood working tools available wasn’t a show stopper for this dedicated builder. For example, the square hole for the joystick was made by removing most of the material with a spade drill bit before using a chisel to clean up the edges. Doing it this way was a little tedious, but you have to do what you have to do sometimes. Once the entire cabinet was finished, several coats of paint were added in a yellow and blue water-theme. Black rubber molding finishes off the edges of the cabinet nicely.

Hackaday Links: August 3, 2014

hackaday-links-chain

A ton of people sent in this video of crazy Russians who have taken a microwave, removed the magnetron, taped it to a broom, and turned it on. Don’t try this at home. Or near us.

You know the Google Cardboard kit that’s a real VR headset made of cardboard (and a smart phone)? Google may have gotten their inspiration from Oculus, because every Oculus Rift DK2 ships with a Samsung Galaxy Note 3 inside.

paul allen

Ever design a PCB and be disappointed by the quality of the silkscreen? [Paul Allen] has been defining the edges of his PCB labels with the copper layer, and the examples are dramatic. Etching copper is what you actually pay for when you fab a board, so it should come as no surprise that the quality is a little higher.

Dunk tanks are fun, but how about competitive dunk tanks? [Chad] built a dunk tank (really more of a ‘dunk shower’) out of a 2×4 tripod, a garbage can, and a few parts from a the toilet aisle of Home Depot’s plumbing department. Then he built a second. Set up both dunk showers across from each other, give two people a few balls, and see who gets soaked last. Looks fun.

Want a MAME cabinet, but don’t want it taking up room in your house? Build a MAME coffee table! Here’s the reddit thread. Maybe we’re old-fashioned, but we’d rather have a giant NES controller coffee table.

Last week we saw a 16-bobbin rope braiding machine, but odd braiding machines like this aren’t limited to fibers. Here’s a wire twisting machine for making RS422 cables. It only produces a single twisted pair, but that’s really all you need to create a cable. Somebody get some paracord and make some Cat5.

The Raspi GameBoy For The Rest Of Us

We’ve seen quite a few casemods that stuff a Raspberry Pi into a Game Boy with all the required to turn it into a very cool portable Pi and retro gaming device. Most of these builds use a modified 20-year-old Game Boy for the enclosure, and if you have an attachment to your old green screened friend, you might not want to cut it up for a Pi project. [Noe] over at Adafruit has a solution – a 3D printed Game Boy enclosure that turns a Pi and TFT screen into a barely pocketable Raspberry Pi, with all the buttons and batteries required for taking an installation of RetroPi on the road.

The PiGRRL, as this build is called, uses the Adafruit touchscreen TFT kit for the Pi, effectively turning the Pi into a very tiny tablet. This allows for normal desktop interaction with the Pi, and it’s also small enough to fit in the smallest of enclosures.

The 3D printed enclosure is the star of the show here, allowing complete access to most of the Pi’s ports, while allowing enough space in the rest of the enclosure for a largish battery, charging circuit, and buttons taken from an SNES controller.

The end result is a very usable portable Pi that just happens to be in the perfect form factor for loading up a few ROMs and playing some classic video games. Video below.

Continue reading “The Raspi GameBoy For The Rest Of Us”

Hackaday Links: June 15, 2014

hackaday-links-chain

Love the classic brick Game Boy, but hate the low-contrast LCD, terrible battery life, and the inability to play Pokemon Emerald? This one’s just for you. It’s the ultimate DMG Game Boy – a Game Boy Advance SP stuffed (is it stuffed if it’s taking up more room?) into the classic Game Boy enclosure. Forum thread.

Zooming in to a microchip. It starts off with a DSLR and ends up on a scanning electron microscope. This is an older chip, and the CPU you’re using right now probably has much smaller features.

Every movie and every TV show set in space invariably has space helmets with LEDs pointing towards the face. Think how annoying that would be for an astronaut. Here’s how you add LEDs to a space helmet for a nice theatrical effect. Just don’t use it on a real EVA.

Everyone’s favorite crowdfunded space probe can apparently be detected with an 8-foot dish. That’s the same size as an old C-band dish, a.k.a West Virginia wildflowers. We know some of you have one of these out there, so go make a ~2GHz feed horn, grab a USB TV dongle, write it up, and send it in.

Alright, MAME cabinets. Say you want to go old-school and have a CRT. Some arcade games use a vertically oriented display, while other, slightly more modern games use a horizontally mounted display. How do you fix this? Get a big bearing, of course. This one allows a 19″ CRT to be rotated 90 degrees – all you need, really, if you’re switching between Pacman and Mortal Kombat.

Hey mechanical keyboard enthusiasts! Here’s some Hackaday Cherry MX keycaps. Informal interest check in the comments below. Suggestions welcome.

Digital Pinball With Force Feedback

pinball 
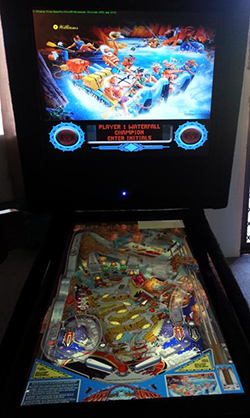
Hang around Hackaday long enough and you’ll hear about MAME, and all the other ways to emulate vintage arcade machines on a computer. The builds are usually fantastic, with real arcade buttons, MDF cabinets, and side graphics with just the right retro flair to make any connoisseur of ancient video games happy. MAME is only emulating old video games, though, and not physical systems like the digital pinball system [ronnied] put up on the Projects site.

[ronnied] was inspired by a real life, full-size White Water pinball machine at his previous job, and decided it was high time for him to acquire – somehow – a pinball machine of his own. He had a spare computer sitting around, an old 16:9 monitor for the main playfield, and was donated a smaller 4:3 monitor for the backglass. With an MDF cabinet, PinMAME, and a little bit of work, [ronnied] had his own machine capable of recreating hundreds of classic machines.

The build didn’t stop at just a few arcade buttons and a screen; [ronnied] added a 3-axis accelerometer for a tilt mechanism, solenoids and a plunger torn from a real pinball machine for a more realistic interface, and a Williams knocker for a very loud bit of haptic feedback. We’ve seen solenoids, buzzers, and knockers in pinball emulators before, and the vibrations and buzzing that comes with these electromechanical add ons make all the difference; without them, it’s pretty much the same as playing a pinball emulator on a computer. With them, it’s pretty easy to convince yourself you’re playing a real machine.

Videos of the mechanisms below.

Continue reading “Digital Pinball With Force Feedback”