Anyone who’s spent significant amounts of time salvaging old electronics has probably wished there were a way to take apart a circuit board without desoldering it. [Zeyu Yan] et al seem to have had the same thought, and designed circuit boards that can be dissolved and recycled when they become obsolete. Read the details in the research paper. (PDF)
The researchers printed the circuit boards out of water-soluble PVA, with hollow channels in place of interconnects. After printing the boards, they injected a eutectic gallium-indium liquid metal alloy into these channels, populated the boards with components, making sure that their leads were in contact with the liquid alloy, and finally closed off the channels with PVA glue, which also held the components in place. When the board is ready to recycle, they simply dissolve the board and glue in water. The electric components tend to separate easily from the liquid alloy, and both can be recovered and reused. Even the PVA can be reused: the researchers evaporated the solution left after dissolving a board, broke up the remaining PVA, and extruded it as new filament.
Continue reading “A Solderless, Soluble Circuit Board”
PVA12 Articles
PVA Filament: Not Always What It Seems

PVA filament is an interesting filament type, for the reason that while it can be printed with any FDM printer, it supposedly readily dissolves in water, which is also the reason why PVA glue sticks are so popular when doing crafts and arts with young children. This property would make PVA filament ideal for printing supports if your printer can handle two different materials at the same time. So surely you can just pick any old PVA filament spool and get to printing, right? As [Lost in Tech] found out, this is not quite the case.
As an aside, watching PVA supports dissolve in water set to classical music (Bach’s Air from Orchestral Suite No. 3) is quite a pleasant vibe. After thus watching the various PVA prints dissolve for a while, we are left to analyze the results. The first interesting finding was that not every PVA filament dissolved the same way, or even fully.
The first gotcha is that PVA can stand for polyvinyl acetate (the glue stick) or polyvinyl alcohol (a thickener and stabilizer) , with the ‘PVA’ filament datasheets for each respective filament showing various combinations of both types of PVA. This results in wildly different properties per filament, both in terms of Shore hardness, their printability, as well as their ability to dissolve in water. Some of the filament types (Yousu, Reprapper) also have an outer layer and inner core for some reason.
Ultimately the message appears to be that ‘PVA’ filament requires a fair bit of research to have any chance of having a relatively trouble-free printing experience.
Sustainable 3D Prints With Decomposable Filaments
What if you could design your 3D print to fall apart on purpose? That’s the curious promise of a new paper from CHI 2025, which brings a serious hacker vibe to the sustainability problem of multi-material 3D printing. Titled Enabling Recycling of Multi-Material 3D Printed Objects through Computational Design and Disassembly by Dissolution, it proposes a technique that lets complex prints disassemble themselves via water-soluble seams. Just a bit of H2O is needed, no drills or pliers.
At its core, this method builds dissolvable interfaces between materials like PLA and TPU using water-soluble PVA. Their algorithm auto-generates jointed seams (think shrink-wrap meets mushroom pegs) that don’t interfere with the part’s function. Once printed, the object behaves like any ordinary 3D creation. But at end-of-life, a water bath breaks it down into clean, separable materials, ready for recycling. That gives 90% material recovery, and over 50% reduction in carbon emissions.
This is the research – call it a very, very well documented hack – we need more of. It’s climate-conscious and machine-savvy. If you’re into computational fabrication or environmental tinkering, it’s worth your time. Hats off to [Wen, Bae, and Rivera] for turning what might otherwise be considered a failure into a feature.
Continue reading “Sustainable 3D Prints With Decomposable Filaments”
A Little Pigment Helps With Laser Glass Engraving
The range of materials suitable for even the cheapest laser cutter is part of what makes them such versatile and desirable tools. As long as you temper your expectations, there’s plenty of material to cut with your 40 watt CO2 laser or at least engrave—just not glass; that’s a tough one.
Or is it? According to [rschoenm], all it takes to engrave glass is a special coating. The recipe is easy: two parts white PVA glue, one part water, and two parts powdered titanium dioxide. The TiO2 is the important part; it changes color when heated by the laser, forming a deep black line that adheres to the surface of the glass. The glue is just there as a binder to keep the TiO2 from being blasted away by the air assist, and the water thins out the goop for easy spreading with a paintbrush. Apply one or two coats, let it dry, and blast away. Vector files work better than raster files, and you’ll probably have to play with settings to get optimal results.
With plain float glass, [rschoenm] gets really nice results. He also tried ceramic tile and achieved similar results, although he says he had to add a drop or two of food coloring to the coating so he could see it against the white tile surface. Acrylic didn’t work, but there are other methods to do that.
Continue reading “A Little Pigment Helps With Laser Glass Engraving”
Homebrew 3D Printer Goop Promises Better Bed Adhesion
Back when 3D printers were pretty new, most of us had glass beds with or without painter’s tape. To make plastic stick, you’d either use a glue stick or hair spray. Many people have moved on to various other build surfaces that don’t require help, but some people still use something to make the bed sticky and there are quite a few products on the market that claim to be better than normal glue or hairspray. [Jonas] wanted to try it, but instead of buying a commercial product, he found a recipe online for “3D printer goop” and made it himself.
You need four ingredients: distilled water and isopropyl alcohol are easy to find. The other two chemicals: PVP and PVA powder, are not too hard to source and aren’t terribly dangerous to handle. The recipe was actually from [MakerBogans] who documents this recipe as “Super Goop” and has another formula for “Normal Goop.” You’ll probably have to buy the chemicals in huge quantities compared to the tiny amounts you really need.
We assume the shots of the 3D printer printing its first layer is showing how effective the glue is. This looks like a very simple thing to mix up and keep in a sprayer. If you have some friends, you could probably do a group buy of the chemicals and it would cost nearly nothing for the small amounts of chemicals you need.
If you don’t want to order exotic chemicals, you might not need them. We used to make “goop” by dissolving ABS in acetone, but hairspray usually did the trick.
Continue reading “Homebrew 3D Printer Goop Promises Better Bed Adhesion”
DIY Self-Assembling 4D Printing
A 4D printed object is like a 3D printed object, but it changes shape or self-assembles when its environment changes. [Teaching Tech] has been reading about this technology and decided to try to replicate it using his conventional 3D printer.
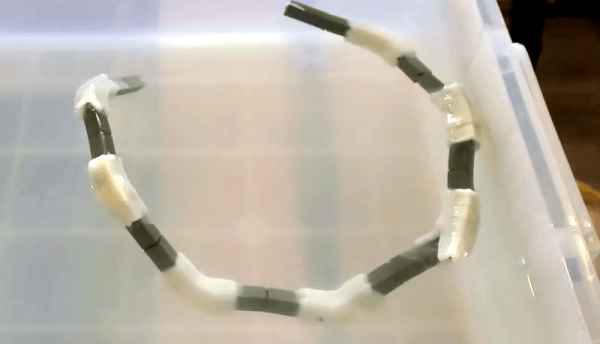
His attempts to make a joint that changes when submerged in the water looked at several options: material that can absorb water, material that expands with temperature, and — the selected option — a dissolvable locking mechanism. Essentially, a hinge is held open by a water-soluble lock. When water dissolves the lock, the hinge can spring to its natural position.
Like most experiments, this one had a few false starts. But you always learn something each time. The final design had a TPU hinge and spring with PLA structural beams. The TPU required flat printing, so various pieces have to be rotatable so they can be placed in their final orientation after printing.
Usually, multi-material setups are for printing different colors of the same kind of plastic, it’s possible to use different plastics, but it can be tricky. As a compromise, [Teaching Tech] did one print using PLA and TPU, but printed the PVA locks in a separate pass and installed them on the print at the end. The first finished 4D print wasn’t entirely successful. The hot water slowly dissolved the PVA, but it also deformed the PLA. A redesign of the lock made a big difference.
We aren’t sure this is practical yet, but we are sure someone has a need for this technique and it could be made very practical with a little work. The last time we saw 4D printing, there were magnets involved. We think this is an exciting time where people aren’t just trying to get conventional printing to work well, but are pushing the envelope with new techniques like conical slicing, for example.
Cannonball Mold Makes A Dandy Integrating Sphere For Laser Measurements
It’s an age-old riddle: if you have a perfect sphere with a perfectly reflective inner surface, will light bounce around inside it forever? The answer is pretty obvious when you think it through, but that doesn’t mean that you can’t put the principle to use, as we see with this homemade Ulbricht sphere for optical measurements.
If you’ve never heard of an Ulbricht sphere, don’t worry — it’s also known as an integrating sphere, and that makes its function a little more apparent. As [Les Wright] explains, an integrating sphere is an optical element with a hollow spherical cavity that’s coated with a diffusely reflective coating. There are two ports in the sphere, one for admitting light — usually from a laser — and one for light to exit. The light bounces around inside the sphere and becomes perfectly diffuse, and creates a uniform beam at the exit port.
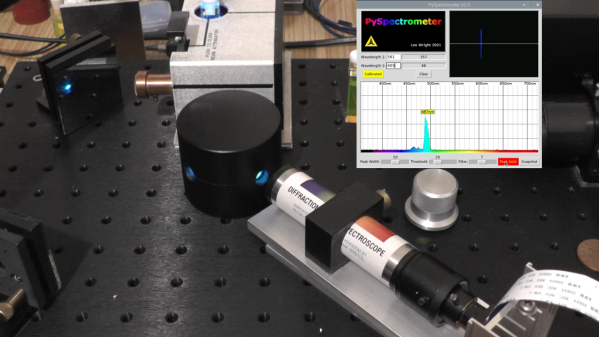
[Les]’ need for an integrating sphere comes from the desire to measure the output of some of his lasers with his Raspberry Pi-based PySpectrometer. Rather than shell out for an expensive commercial integrating sphere, or turn one on a lathe, [Les] turned to an unlikely source: cannonball molds. The inside of the mold was painted with an equally unlikely ultra-white paint concocted from barium sulfate and PVA glue. With a few ports machined into the mold, it works perfectly to diffuse the light from his dye lasers for proper measurements.
Lasers can be an expensive hobby, but [Les] always seems to find a way to make things more affordable and just as good. Whether it’s homemade doorknob caps for high-voltage power supplies or blasting the Bayer filter off a cheap CCD camera, he always seems to find a way.
Continue reading “Cannonball Mold Makes A Dandy Integrating Sphere For Laser Measurements”


