New Hard Drives For Old Computers

After a certain age, computers start to show signs that they might need to be replaced or upgraded. After even more time, it starts getting hard to find parts to replace the failing components. And, as the sands slip through the hourglass, the standards used to design and build the computer start going obsolete. That’s the situation that [Drygol] found himself in when he was asked to build a SD-card hard drive for an Atari.

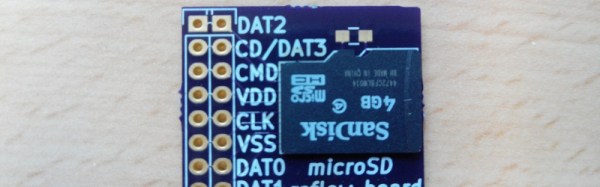
The 8-bit Atari in question was a fixture of home computing in the 80s. In fact, if you weren’t on the Commodore train, it’s likely that your computer of choice was an Atari. For the nostalgic among us, a new hard drive for these pieces of history is a great way to relive some of the past. Working off of information from the SIO2SD Wiki page, [Drygol] used the toner transfer method to build a PCB, 3D printed a case, and got to work on his decades-old computer.

Resurrecting old hardware is a great way to get into retrocomputing. Old protocols and standards are worth investigating because they’re from a time where programmers had to make every bit count, and there are some gems of genius hidden everywhere. Whether you’re reworking SIO from an old Atari, or building a disk emulator for an Apple ][, there are lots of options.

Reflow Solder Your Micro SD To Ensure It Doesnt Go Anywhere

SD cards are great inexpensive storage for your embedded project. Using SPI,  they only take a few wires to hook up, and every micro-controller has a FAT file system interface to drop in your project. Problem with SD cards are the connectors.

Usually connectors cost more than the brains of your project,  and the friction fit, spring loaded contacts are not ideal for temperature swings, humidity and high vibration applications. Wouldn’t it be nice if you could just solder the thing down, especially if you know you are never going to remove it?

[Timothée] decided to try and succeeded in reflow soldering a Micro SD card direct to a breakout board. While starting as a what if experiment, the PCB was laid out in Ki-Cad and sent off to a fab. Once returned the Micro SD was fluxed, tinned and fluxed again, then reflowed using an IR setup.

The end result is a handy breakout board where you never have to worry about someone swiping the card to jam in their camera, and is ready for any breadboard project.

The In-Circuit SD Card Switch

SDISP

For nearly every problem, it’s possible to engineer a solution, even if you’re dealing with an extraordinarily niche problem that might only apply to yourself. [Joel] wanted to be able to program the microSD card in his BeagleBone with a new bootloader or file system without removing the SD card from the target board. This is a peculiar requirement, and it’s highly doubtful a product or even a circuit exists for such a function. This meant [Joel] would need to roll his own board to accomplish the task.

The board is remarkably simple, housing a single microSD socket, two expansion headers for a microSD sniffer for a computer and an embedded board, an FTDI header, and a pair of 4-bit multiplexer/demultiplexers. The operation of the device is fairly straightforward: send a signal down the FTDI cable, and the board switches the onboard SD card from one device to another.

[Joel] has a video of his screen that shows him pulling off in-circuit SD card reading and writing. You can check that out below.

Continue reading “The In-Circuit SD Card Switch”

The Tiniest SD Card Locker

sdlocker-tiny

In case you weren’t aware, that little ‘write protect’ switch on your SD cards probably doesn’t do anything. It’s only a switch, really, and if an SD card reader doesn’t bother to send that signal to your computer, it’s completely ineffective. Then there’s the question of your OS actually doing something with that write protect signal.

The better way to go about write protecting an SD card is using the TMP_WRITE_PROTECT bit on the SD card’s controller. [Nephiel] came up with an amazingly small device to set that bit, with the entire circuit fitting inside an old Playstation memory card.

[Nephiel] based his project on [Karl Lunt]’s SD Card Locker we saw late last year. [Karl]’s SD Locker uses an ATMega328 microcontroller, a pair of AA batteries, and an SD card socket to perform the bit toggling. This is still a very small device that fits inside an Altoids tin, but [Nephiel] thought he could make it smaller.

The new and improved version uses an ATTiny85 for SPI access to the SD card. A single button and LED serves as the user interface: with the LED off, the SD card is writable. Press the button, the card is locked, and the LED lights up.

Making Use Of The Trancend WiFi SD Card

had

[CNLohr] spends most of his time on the Internet, but sometimes real life drags him away from his keyboard. These “vacations”, as he calls them, don’t have a good Internet connection and forces him to rely on flaky cell phone connections that go up and down at the drop of a hat. Figuring this would be a great opportunity for some hardware hacking, [CNLohr] came up with an ‘Internet-o-mometer’ – a device powered by a Trancend WiFi SD card that uses an 8×8 LED display to show the current status of his phone’s Internet connection.

This build uses the Trancend WiFi SD card motherboard we’ve seen before. When the card boots, it tries to connect to his phone’s WiFi connection.  When it connects, a green smiley face is displayed on the LED matrix. When a whole lot of files are downloaded or, more specifically, the ping to google.com is more than 4 seconds, a red frowny face indicates the Internet connection is down.

In other Trancend WiFi SD card news, a whole lot of people including [Dan Krause] (thanks for the tip) have been working on a complete replacement OS for these neat little cards. Right now the OS is in very rough shape, but there is a pre-built system available should anyone want to experiment. [CNLohr] is also working on a compact, double-sided version of his SD card motherboard and we’ll be happy to feature a link to his Tindie store when he sends that in.

Rescuing An SD Card With An Arduino

A few days ago, one of [Severin]’s SD cards died on him, Instead of trashing the card, he decided to investigate what was actually wrong with the card and ended up recovering most of the data using an Arduino and an immense amount of cleverness.

SD cards can be accessed with two modes. The first is the SDIO mode, which is what cameras, laptops, and other card readers use. The second mode is SPI mode. SPI is slower, but much, much simpler. It turned out the SDIO mode on [Severin]’s card was broken, but accessing it with an Arduino and SPI mode worked. There was finally hope to get files off this damaged card.

[Severin] used a few sketches to dump the data on the SD card to his computer. The first looked at the file system and grabbed a list of files contained on the card. The second iterated over the file system and output all the files in hex over the serial port. With a bit of Python, [Severin] was able to reconstruct a few files that were previously lost forever.

Even though the SD card was completely inaccessible with a normal card reader, [Severin] was able to get a few files off the card. All the sketches and Python scripts are available on the Githubs, ready to recover files from your broken SD cards.

UDP Between STM32-F4 Discovery Boards

stm32-f4-udp

[The Backwoods Engineer] tested out a new accessory kit for the STM32-F4 Discovery board. The image above shows two boards communicating with the UDP protocol. Notice the extra PCB into which each Discovery board has been plugged. This is a third-party add-on which adds Ethernet, RS-232, SD card slot, and a connector for LCD or Camera. We’ve had one of these F4 Discovery boards on hand for a while and haven’t figured out a good way to connect external hardware to the huge dual pin-headers. This doesn’t solve the problem — the base board also includes dual headers to break-out all the pins — but having Ethernet, serial, and SD certainly reduces the need to add all that much more. The other drawback to the hardware is that the sample firmware is targeted at the IAR Embedded Workbench which is neither free, nor in the realm of affordable for hobbyists.

The NIC used on the baseboard has auto-crossover capabilities so the boards were connected using a regular Cat6 patch cable. This example has the boards constantly sending UDP packets with the module on the right reporting status information to a terminal via the serial connection.