Tricked-Out Tablet Becomes Workbench Tool

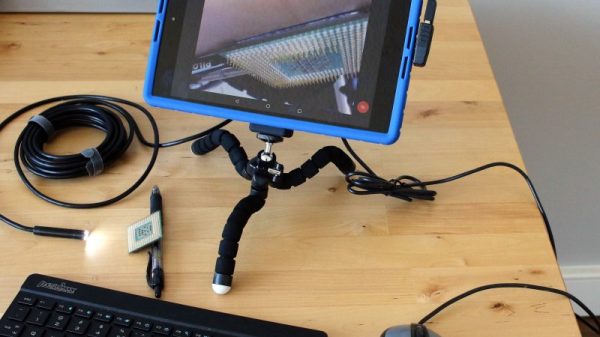
The workbench of the typical electronics hobbyist today would probably be largely recognizable by Heathkit builders back in the 60s and 70s. But where the techs and tinkerers of yesteryear would have had a real dead-tree SAMS Photofact schematic spread out on the bench, today you’ll get more use out of a flat-screen display for data sheets and schematics, and this handy shop Frankentablet might be just the thing to build.

Tablets like the older Nexus 9 that [enginoor] used as the basis for this build have a little bit of a form-factor problem because unlike a laptop, a tablet isn’t very good at standing up on its own. To fix that, they found a suitable silicone skin for the Nexus, and with some silicone adhesive began bedazzling the back of the tablet. A bendy tripod intended for phones was added, and with the tablet able to stand on its own they maximized the USB port with a right angle adapter and a hub. Now the tablet has a USB drive, a mouse, and a keyboard, ready for perusing data sheets online. And hackers of a certain age will appreciate the eyeball-enhancing potential of the attached USB microscope.

[enginoor]’s bench tablet is great, but we’ve seen full-fledged bench PCs before too. Take your pick — wall mounted and floating, or built right into the workbench.

Thanks to [ccvi] for the tip.

Another Helping Hands Build

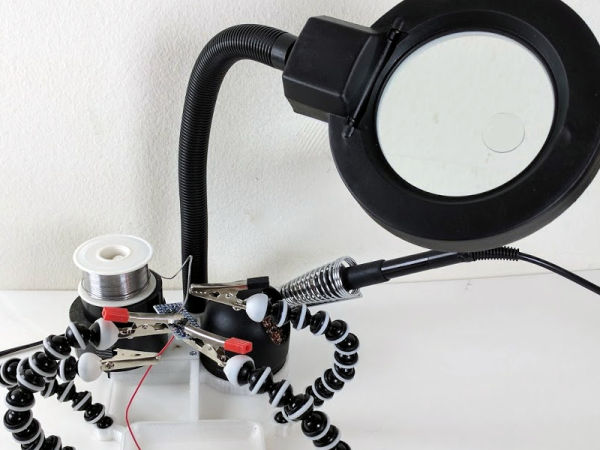
[Punamenon2] wanted a soldering station with integrated helping hands. He couldn’t find one, but he decided it would be a good 3D printed project. In all fairness, this is really 3D printing integrating several off-the-shelf components including a magnifier, a soldering iron holder, a soldering iron cleaner, a couple of “octopus” tripods, and some alligator clips. Total cost? Less than $30.

In addition to holding the Frankenstein monster together, the 3D printed structure also provides a storage tray with special sloped edges to make removing small screws easier.

Continue reading “Another Helping Hands Build”

A Compact Star Tracking Tripod

The next giant leap for mankind is to the stars. While we are mostly earthbound — for now — that shouldn’t stop us from gazing upwards to marvel at the night sky. In saying that, if you’re an amateur astrophotographer looking to take long-exposure photos of the Milky Way and other stellar scenes, [Anthony Urbano] has devised a portable tracking setup to keep your photos on point.

When taking pictures of the night sky, the earth’s rotation will cause light trails during long exposures. Designed for ultra-portability, [Urbano’s] rig uses an Arduino UNO controlled Sanryusha P43G geared stepper motor coupled to a camera mounting plate on a small tripod. The setup isn’t designed for anything larger than a DSLR, but is still capable of taking some stellar pictures.

Continue reading “A Compact Star Tracking Tripod”

Hackett’s Tripod And Some Advice on abstraction

hackettTripod

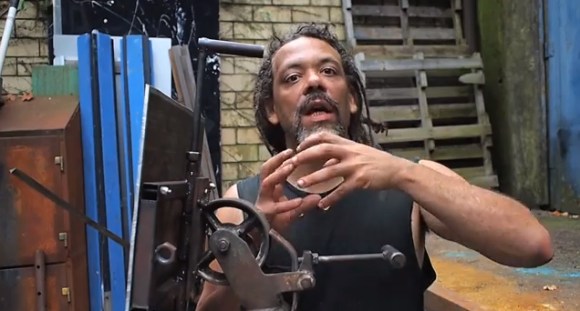
[Hackett] calls it a “transmission problem.” You’ve scavenged the pieces for your build, but nothing fits. Metric and standard hardware clash, a successful weld is as reliable as duct-taping. You’ll hear about plenty of these obstacles as [Hackett] tries to tackle a tripod build in this video.

He was contacted by a group looking to make a bicycle-mounted portable projector. Their request: build them an easy-to-use tripod on a shoestring budget that is strong enough to hold a 30-pound projector. Garbage and scrap turn into a functional device as [Hackett] grinds and welds the tripod together.

The video’s greatest contribution, however, is the advice near the end.

You need to retrain your eye, so you’re not looking at a thing as to what it is, what it’s branded, what it’s originally intended for. What you’re looking at is what it is at the core, and once you start looking at things for what they really, really are, you have the power to completely remake the world.

A desire to re-contextualize everyday stuff is probably the reason you’re a Hackaday reader. Hopefully [Hackett’s] succinct advice strikes some chords and encourages you to keep abstracting and re-purposing the world around you. If you’re new to hacking and need somewhere to start, why not build a robot?

Continue reading “Hackett’s Tripod And Some Advice on abstraction”

GoPro Slingshot

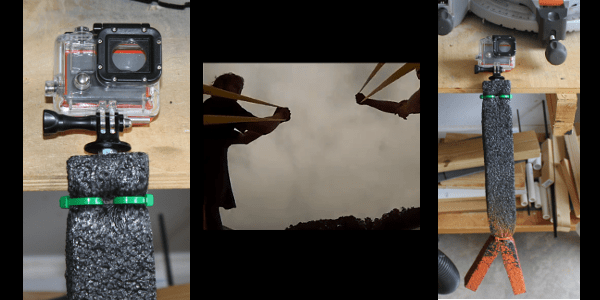
Want to try out aerial photography, but can’t afford a quadcopter? [Jeremy] rigged up a low cost GoPro Slingshot and took some pretty nice flyover shots of the lake.

The slingshot itself is meant for water balloons, but easily has enough power to fire the camera. In order to get good video, some stabilization was needed. [Jeremy] made a stabilizing fin out of packaging foam, and used an eye bolt to connect it to the GoPro’s threaded tripod mount. The simple tail fin made of out foam and zip ties actually did a good job of stabilizing the camera.

This looks like a fun experiment to try when you’re at the lake, since you can probably build it with stuff lying around the house. For [Jeremy], it also proved to be a way to keep his dog entertained since she retrieved the camera after each shot. After the break, check out the video footage from the GoPro slinging rig.

Continue reading “GoPro Slingshot”

Scratch Built Camera Tripod

scratch-built-camera-tripod

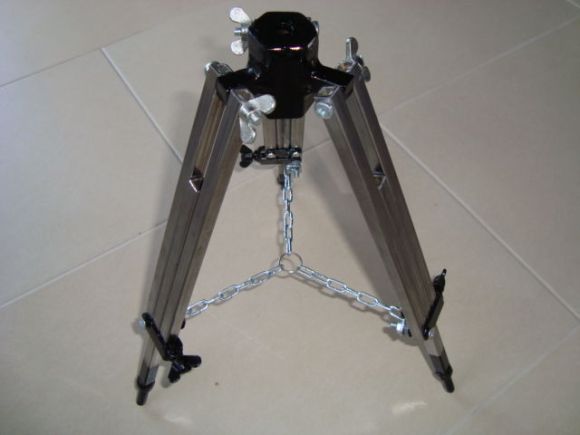
We’re used to seeing hacked camera mounts but [CroBuilder] mentioned to us that nobody is really making plain old tripods themselves. He loves to work in his shop so he spent about ten hours building this tripod for himself.

We’d say it’s built to last, but that comes at the cost of weighing a lot. He used square tubing for the legs, which are tripled up in order to allow them to telescope. Each leg has two pipes mounted to the central hub that he fabricated out of hexagonal pipe. A bolt and wing nut acts as hinge and clamp. On the bottom section of the leg there’s a tab spanning the two pieces and another clamping mechanism to hold the adjustable bottom portion of the leg in position.

He finished up the project with black paint on many of the pieces, with the legs themselves polished until shiny. Will rust be a problem if he doesn’t use a clear coat?

The nice thing about a quality tripod is that you can use them for more than just cameras. For instance, add some components to make your own laser level.

Tripod Mount Anything!

webcam-mounted

[Shawn] wrote in to tell us about his extremely simple method he used for mounting a webcam on a tripod. His article explains it better, but the basic premise is to glue a 1/4 – 20 nut onto the bottom of it. The hack-worthiness of this could be in question, but the technique could come in handy at some point.

After seeing this tip, I was reminded of a slightly crazier, if effective mount that I made for my state of the art Env2 phone. Referenced in a links post in March, it was made of a 2×4 with a 1/2 inch slot milled in it.  After some thought, it was drilled and tapped for a 1/4 – 20 bolt in the other side to mount it on a tripod. So this could be an option in very limited circumstances.

On the other hand, if you want something a bit more hack-worthy, why not check out this motorized camera rig that we featured in July. Sure, it’s more complicated than gluing a nut onto a webcam, but at least it still uses 2 x 4s in it’s mounting hardware!