Converting Bluetooth Sensors To Zigbee

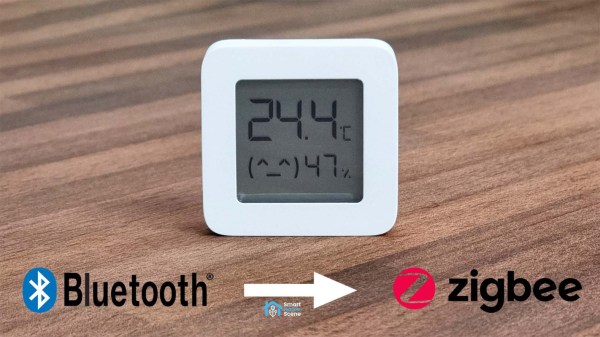
With the increase in popularity of Internet of Things (IoT) devices and their need to communicate wirelessly,  there’s been a corresponding explosion of wireless protocols to chose from. Of course there’s Wi-Fi and Bluetooth, but for more specialized applications there are some other options like Z-Wave, LoRa, Sigfox, and Thread. There’s a decent amount of overlap in their capabilities too, so when [SHS] was investigating some low-cost Xiaomi sensors it was discovered that it is possible to convert them from their general purpose Bluetooth protocol over to the more IoT-specialized Zigbee protocol instead.

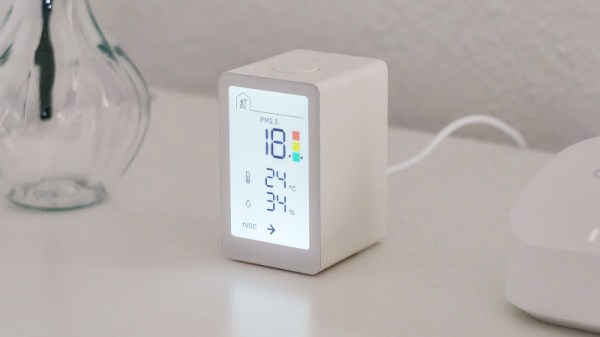
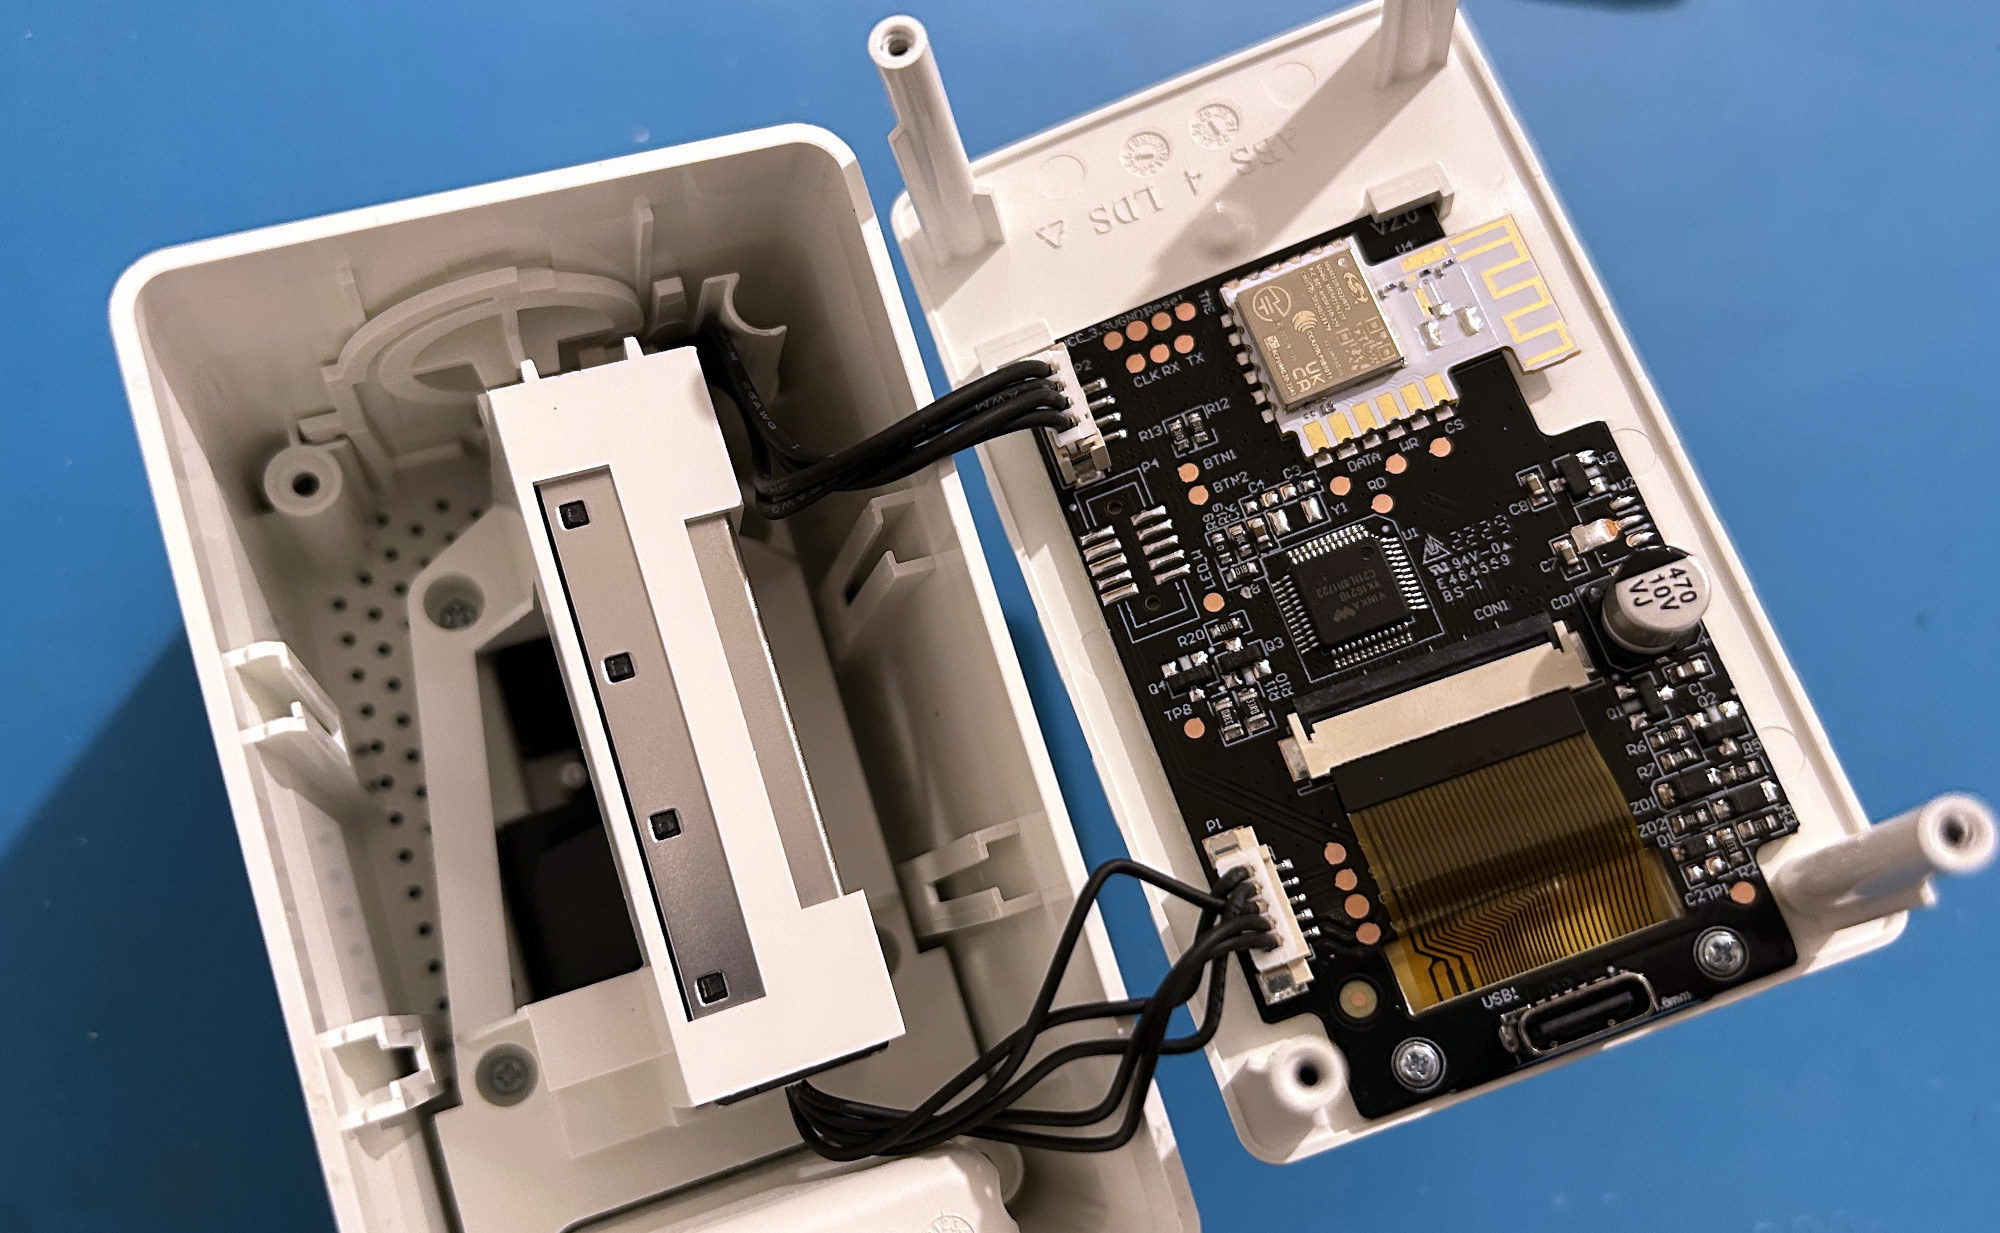
These combination temperature and humidity sensors have already been explored by [Aaron Christophel] who found that it’s possible to flash these devices with custom firmware. With that background, converting them from Bluetooth to Zigbee is not a huge leap. All that’s needed is the Zigbee firmware from [Ivan Belokobylskiy] aka [devbis] and to follow the steps put together by [SHS] which include a process for flashing the firmware using an over-the-air update and another using UART if the wireless updates go awry. Then it’s just a short process to pair the new Zigbee device to the network and the sensor is back up and running.

Converting from one wireless protocol to another might not seem that necessary, but using Bluetooth as an IoT network often requires proxy nodes as support devices, whereas Zigbee can communicate directly from the sensor to a hub like Home Assistant. Other Zigbee devices themselves can also act as a mesh network of sorts without needing proxy nodes. The only downside of this upgrade is that once the Bluetooth firmware has been replaced, the devices no longer has any Bluetooth functionality.

Thanks to [RoganDawes] for the tip!

A Lightweight Smart Home Server

Working towards automating a few things in a home often seems simple on the surface, but it’s easy for these projects to snowball into dozens of sensors and various servos, switches, and cameras strewn about one’s living space. The same sort of feature creep sneaks into some of the more popular self-hosted home server platforms as well, with things like openHAB requiring so much computing power that they barely function on something like a Raspberry Pi. [Paulo] thought there should be a more lightweight way of tackling a project like this, and set about building his own smart home server with help from some interesting software.

The project is based around the Dirigera hub from Ikea, partially because [Paulo] is planning to use other smart home devices from Ikea as he can easily find them where he is, and also because these devices tend to use Zigbee, a non-proprietary communications standard. This means that if he ever wants to swap out the hub for another one in the future, it won’t be difficult to do. From here the major hurdle is that using the default software from these devices is fairly limiting, so [Paulo] reached for a Raspbee 2 Zigbee gateway for use with a Raspberry Pi and an extremely lightweight and customizable web server called Mako to make this happen. Using Lua as the high-level language to tie everything together he was able to easily deploy the server to control the Ikea hub and devices and automate them in any way he sees fit.

While it is true that software like openHAB and others already exists to do virtually any home automation task that could be imagined, if you’re looking to do something with a bare minimum of computing power something like [Paulo]’s solution is likely going to be the fastest and most reliable method of getting a few things automated around the home. If you’re looking for something completely open source and built from the ground up, though, we have seen a few alternative smart home solutions like this one which don’t rely on any proprietary hardware or software, but do take a little bit more effort on the user’s part.

Taking Apart IKEA’s Latest Air Quality Sensor

Whether it’s because they’re concerned about worsening pollution or the now endemic variants of COVID-19, a whole lot of people have found themselves in the market for a home air quality monitor thee last couple of years. IKEA noted this trend awhile back, and released the VINDRIKTNING sensor to capitalize on the trend.

The device must have sold pretty well, because last month the Swedish flat-packer unveiled the considerably more capable (and more expensive) VINDSTYRKA. Now thanks to the efforts of [Oleksii Kutuzov] we’ve got a fantastic teardown of the new gadget, and some more information on the improvements IKEA made over its predecessor.

Certainly the most obvious upgrade is the addition of an LCD readout that displays temperature, humidity, and how many particulates the device detected in the air. There’s even a “traffic light” colored indicator to show at a glance how bad your air supply is. The other big change is the addition of wireless, though unlike the WiFi hacks we saw for the VINDRIKTNING, this built-in capability uses Zigbee and is designed to plug into IKEA’s own home automation ecosystem.

Speaking of those hacks, a GitHub user by the name of [MaartenL] chimes in to say they’ve managed to hook an ESP32 up to test pads on the VINDSTYRKA motherboard, allowing the parasitic microcontroller to read the device’s sensors and report their data on the network over a service like MQTT, without impacting the sensor’s normal operations. This is how the first hacks on the older VINDRIKTNING were pulled off, so sounds like a promising start.

But even if you aren’t looking to modify the device from its original configuration (how did you find this website?), it seems pretty clear the VINDSTYRKA is a well-built piece of kit that will serve you and your family well. Which is more than what could be said for some of the cheapo environmental sensors flooding the market.

Thanks to [killergeek] for the tip.

E-Paper Wall Paper

Just like the clock clock of old, there’s something magical about a giant wall of smaller pieces working together to make a larger version of that thing. The E-Paper Wall 2.0 by [Aaron Christophel] is no exception as it has now upgraded from 2.9″ to 7.4″ screens.

On the 1.0 version, the bezels made it harder to make out the image. The larger screens still have bezels but the larger screen area makes it much easier to make out the image. 3D-printed clips hold the displays onto a plywood backer. We can marvel that e-ink price tags brought the price of e-ink down so that building a wall is still expensive but not eye-wateringly so. The 5×9 array likely uses a module sold on DigiKey for $47 each.

So aside from being willing to drop some money on a custom piece of art, what’s special about this? The real magic comes with the firmware and tooling that [Aaron] developed to flash custom firmware onto each of the 45 displays. A 100MHz ZBS243/SEM9110 8051-based controller lives inside each display and [Aaron] even has a Ghidra plugin to reverse-engineer the existing firmware. It only has 64kb of flash onboard, so [Aaron] devised a clever compression technique that enabled him to store complex images on the displays. A 3D-printed jig with pogo pins means flashing them doesn’t require soldering pins or headers, just drop it on and flash it with an Arduino with a helpful library [Aaron] wrote. A central station communicates with the various displays over ZigBee to send image updates.

The 8051 has a funny way of showing up in projects like this portable soldering iron or the TV Guardian. In many ways, it is a boon for us hackers as it makes it easier to reverse engineer and write new custom firmware when so many devices use the same architecture.

Continue reading “E-Paper Wall Paper”

E-paper Price Tags Combined To Create A Large Wireless Display

E-paper price tags have become popular for retail stores over the past few years, which is great for hackers since we now have some more cheap commodity hardware to play with. [Aaron Christophel] went all on creating grid displays with E-paper price tags, up to a 20×15 grid.

E-paper price tags are great for these kinds of projects, since they are wireless, lightweight, and can last a long time with the onboard batteries. To mount the individual tags on the plywood backboard,[Aaron] simply glued Velcro to the backboard of the tags. The displays’ firmware is based on the reverse engineering work of [Dmitry Grinberg], flashed to a few hundred tags using a convenient 3D printed pogo pin programming jig. All the displays are controlled via a Zigbee USB dongle plugged into a PC running station software.

[Aaron] is also experimenting with the displays removed from their enclosure and popped into a 3D printed grid frame. The disadvantage is the loss of the battery holders and the antenna, which are both integrated into the enclosure. He plans to get around this by powering the displays from a single large battery, and connecting an ESP32 to the displays via ISP or UART.

This project comes hot on the heels of another E-ink grid display project that uses Bluetooth and a rather clever update scheme.

Continue reading “E-paper Price Tags Combined To Create A Large Wireless Display”

New Part Day: An ESP With ZigBee

It seems that the folks at Espressif are doing their best to produce chips to fit every possible niche in the microcontroller-with-radio market, because here comes news of their latest chip bearing the ESP32 name: a single-core 96MHz RISC-V part with built-in IEEE 802.15.4 to support ZigBee 3.x and Thread 1.x. The ESP32-H2 is not the most powerful of the Espressif line-up, but it will find its place in home automation products and projects.

The ESP32-H2 joins a multitude of other IEEE 802.15.4 devices from manufacturers such as Microchip, ST, NXP, and Nordic in an increasingly crowded marketplace, so what can if offer that the others can’t? If previous ESP chips are anything to go by we’d expect it to compete on price as well as the obvious attraction for developers used to working with other Espressif products. We look forward as always to seeing what you do with it.

Hacking The Lidl Home Gateway

For years, Europeans have been browsing the central aisles of the German Aldi and Lidl supermarket chains, attracted by the surprising variety of transitory non-grocery bargains to be found there. There are plenty of temptations for hackers, and alongside the barbecues and Parkside tools at Lidl last year was a range of Zigbee home automation products. Every ZigBee network requires some form of hub, and for Lidl this comes in the form of a £20 (about $28) Silvercrest Home Gateway appliance. It’s a small embedded Linux computer at heart, and [Paul Banks] has published details of how it can be hacked and bent to the user’s will.

Under the hood is a Realtek RTL8196E MIPS SoC with 16Mb of Flash and 32 Mb of memory. Gaining control of it follows the well trodden path of finding the bootloader, dumping the firmware, and re-uploading it with a known password file. If you’ve done much hacking of routers and the like you’ll recognise that this quantity of memory and Flash isn’t the most powerful combination so perhaps you won’t be turning it into a supercomputer, but it’s still capable enough to be integrated with Home Assistant rather than the cloud-based services with which it shipped.

There was a time when repurposing routers as embedded Linux machines was extremely popular, but it’s something that has fallen from favour as boards such as the Raspberry Pi have provided an easier path. So it’s good to see a bit of old-fashioned fun can still be had with an inexpensive device.

If you fancy a bit more German budget supermarket goodness, feast your eyes on an Aldi stick welder!