Adding A MIDI Input To A Game Boy

[Sprite_tm] is back again, and his work never fails to impress. His latest project is a Game Boy Advance MIDI synth that takes MIDI data from a keyboard or sequencer and maps that to Game Boy sound channels.

Because he seems to never do anything the normal way, [Sprite_tm] decided to run the Game Boy without a cartridge. We’ve seen this before; the GBA boots into the synth software over the link cable with multibooting.

Continue reading “Adding A MIDI Input To A Game Boy”

Add A Real Life Hardware Terminal To That Newfangled Computer Of Yours

vt200_serial_hardware_terminal_over_usb

If you find a crusty old IT guy and give him half a chance, he’ll probably regale you with stories of how things were done “in the old days” where no one had their own computer and everyone worked on mainframe-connected dumb terminals. [JSTN] yearned for a true to life terminal display that he could attach to his 2010 Mac Pro, and since there’s no chance anybody is bringing one to market any time soon, he pieced one together on his own.

He dug up a digital VT220 terminal, and got to work trying to interface this office relic with his shiny new Mac. He found a few helpful tips from someone

DIY Smart Tweezers Make SMD Work A Cinch

diy_smd_smart_tweezers

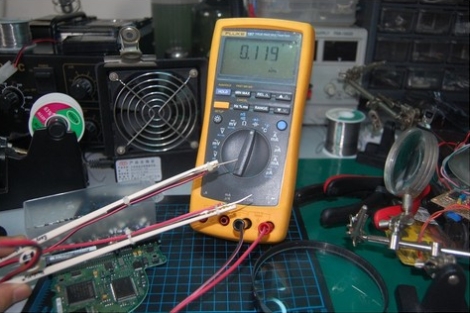
[Noel] does a lot of SMD work and wanted a pair of “smart” tweezers that could be used to place components as well as for reading their capacitance and resistance values on the fly. As we have seen, these things can be somewhat costly, and not really necessary if you already have a good multimeter. With that in mind, he figured he could build his own for almost nothing.

He started off with a pair of kids’ “training” chopsticks which are durable, but more importantly, non-conductive. He took a second pair of tweezers, this time made of metal, and split them in two. He soldered wire to a set of ring terminals, mounting one on each leg of his broken tweezers. The final bit of assembly involved using zipties to mount everything on the plastic chopsticks along with the addition of banana plugs to the end of his probes.

[Noel] says that the tweezers work quite well, and with such a low price tag, we can’t argue.

Control LED Lighting With An Old Stereo Receiver

stereo_controlled_home_lighting

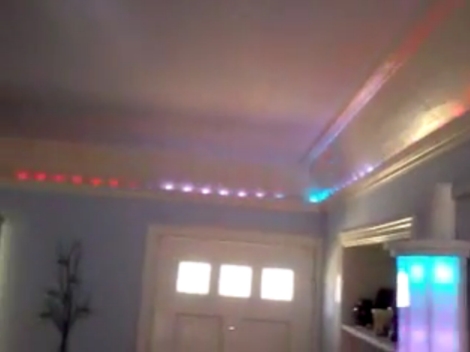
[Marklar] needed an IR receiver for a project he was working on, and his local electronics store was fresh out. He dug through his junk pile and found an old stereo receiver, so he decided to pull the IR module from it before tossing it out. Once he had it taken apart, he figured that he could utilize the wide array of electronic components he found inside, and set off to start a new project.

The control panel housed the components which interested him most of all. Using an Arduino, he was able to easily interface with the rotary encoders as well as the buttons, giving him a cheap and easy way to control his home lighting system. With a bit of programming, he was able to map lighting presets to various buttons, as well as use the rotary encoder to control the LEDs’ brightness and color. As an added bonus, he kept the IR receiver intact and can control his setup wirelessly as well.

Check out the video we have embedded below to see his scavenged control system at work.

[via HackedGadgets]

Continue reading “Control LED Lighting With An Old Stereo Receiver”

Kinect-based Turntable 3D Scanner Looks Very Promising

We know that the appearance of the Kinect 3D camera hardware, and subsequent open source driver hacking conquest, is a game-changer that brings the real world into much closer contact with the virtual world. But it still amazes us when we see a concept like this turntable-based 3D object scanner that works so incredibly well.

The concept is extremely simple. A box made from foamboard rests atop a turntable. At its center is the object you wish to scan being well-lit by a small LED light source at each upper corner of the box. First up some code and capture data about the sides and top of the object as it spins. To put the shoe back together in the virtual world, he used a modified version of RGBDemo v0.6.0, a Kinect focused project written by Nicolas Burrus.

[A.J] says that the scan comes out pretty well after just one pass, but that’s not stopping him from setting his sights on making this work with three of four Kinects at once. Don’t forget to check out his video demonstration which is embedded after the break.

Continue reading “Kinect-based Turntable 3D Scanner Looks Very Promising”

Color Changing Door Handles

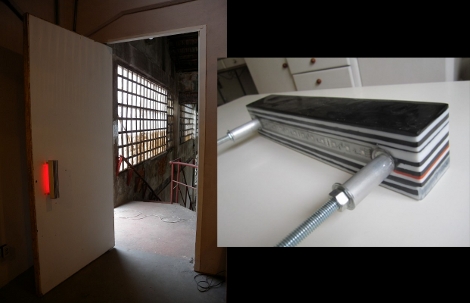
This color changing door handle was made using a very simple manufacturing process. [Barmak] already had experience working with polyester resins when making passive component filled drawer pulls (he included a couple of pictures at the end of his post). The same process was used here except that instead making it from one solid chunk of clear resin he decided to use alternating layers of dyed resin.

The build begins with a mold made out of MDF. This material has a very smooth surface finish which will help with the final look of the door handle. Threaded rod is inserted through carefully placed holes in the side of the mold — these will serve as the mounting hardware when complete. He then pours thin coats of resin to build up the complete handle.

An RGB LED strip is incorporated in the side of the handle that will go toward the door. It seems like the wires to control the device pass through a hollow spacer surrounding the threaded rod. He makes some mention of using a 555 timer to control the colors, but there’s not much more information than that. Still, the reflected light is a unique feature if you’ve got a place in your home that needs to be spiced up.

Once you’re done, you can use any leftover resin to make your own project boxes.

Feel The Hum Of Electricity Between Your Legs

Here’s a little eye candy for motorcycle enthusiasts everywhere. This is the newest iteration of [Julian’s] electric motorcycle. He obviously knows what he’s doing because everything fits into the frame in a way that is still very pleasing to the eye. But this is actually slimmed down from the original design. If you take a look a back at some of his older posts you’ll see that the four relatively small lithium batteries are a new addition.

The frame was designed to hold four lead-acid batteries. Those things really take up a lot of space and add considerable weight to the vehicle. His recent upgrade was also accompanied by a re-gearing that allows him to reach higher speeds (although he doesn’t say what the top speed actually is). You can’t really see it above, but [Julian] included a wooden insert where the tank on a gasoline motorcycle would have been. It houses control switches as well as a 48V voltmeter. It’s a fantastic finishing touch like the cherry on a sundae.