Learn To Debug Msp430 Chips Using IAR

If you haven’t done any debugging with microcontroller programs [Kphlight] posted a follow-along guide for debugging MSP430 chips. You can see above that he’s using the TI Launchpad and has chosen the free (but code limited) IAR Embedded Workbench that is one of the IDE’s that TI provides for the kit. The example builds a Pomodoro timer with just five LEDs and one resistor. You’ll flash the code to the chip, step through each line of the firmware, and learn how to manipulate register data during code execution.

It’s a great primer for the uninitiated, and we’d love to see one using open-source tools like DDD and GDB. If you do write one, don’t forget to send us a tip about it. If you want to give open source a try with this hardware check out our own tutorial.

Nimbus, The Wall-following Robot

nimbus_wall_following_robot

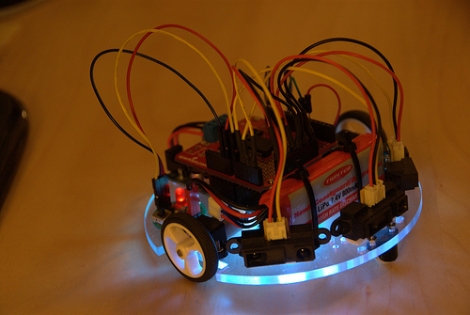
[Johannes] sent in the latest iteration of an ongoing project – Nimbus, the wall-follwing robot. Originally operating on a cardboard frame, the robot has undergone several revisions as you can see by reading through his blog. Nimbus started out as a simple, Arduino-powered robot, but the project has progressed nicely over time. The last revision simply avoided walls, using a Sharp IR proximity sensor to detect, then avoid obstacles. The most recent model sports a nice polycarbonate frame as well as two additional IR proximity sensors, allowing Nimbus to navigate quite well, following walls and avoiding obstacles with ease. It does get caught up from time to time on carpets and wires, but overall Nimbus is a great little robot. [Johannes] even added a small RGB status LED for the bottom of the bot, communicating its navigation status to the operator at all times. This is done by flashing various colors when objects have been discovered or have moved out of sight – it’s a really novel addition.

Keep reading for a video of Nimbus navigating his way around, and don’t forget to check out the Nimbus photo stream.

Continue reading “Nimbus, The Wall-following Robot”

WWII’s Top Cryptography Comes To A Child’s Toy

This toy has some upgraded internals that turn it into an Enigma machine. We absolutely love the idea, as it takes a toy that your child may have grown out of, and uses it to provide teachable moments dealing with both history and mathematics. But who are we kidding? We want to make one just because it’s a fun project.

[Sketch] grabbed this toy from a thrift store because it has a full keyboard that he can use to make his own machine. It’s powered by an Arduino, with a four-line character LCD display taking the place of the original. His post covers the methods he used to figure out the keyboard wiring, and also contains a cursory overview of how the Enigma Machine functions. See a video of the finished project after the break.

If this wet your appetite, also check out the paper Enigma Machine we covered during Hackaday’s first year.

Continue reading “WWII’s Top Cryptography Comes To A Child’s Toy”

Inexpensive Robot Platform Combines Mass-produced Parts

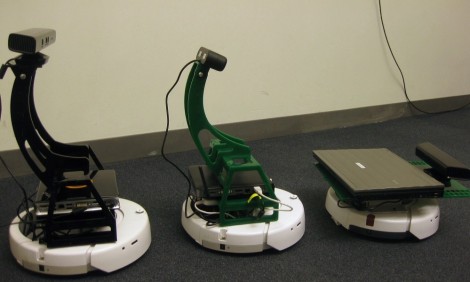
Meet Bilibot, a modular robot that aims to lower the cost of entry for robotic tinkerers. It combines the Kinect, the iRobot Create, and an Ubuntu box running ROS using some laser cut mounting brackets. These are relatively inexpensive components but the most exciting thing is that there’s already a slew of example out there that use this hardware. For instance, we looked in on ROS body tracking in January that can be directly plucked and used with this hardware. You’ll recognize the base as the iRobot create which was used in video chat robot from last week. The brains of the operation come in a choice of three Linux boxes – two headless and one laptop – which have ROS pre-installed. Watch the open-source autonomy as it tools around the office in the video after the break.

Continue reading “Inexpensive Robot Platform Combines Mass-produced Parts”

Super Brite LED Sneakers

[i am jen] needed to spice up some shoes, and what better way to do that, than to spike them out in LEDs controlled by a micro controller. In order to make the LED strips, an inventive use of Velcro is applied. One half of the strip is secured to the shoes, while the other half gets a sheet of electrical tape on the sticky side. Small holes are then punched though the strip and the LEDs are then soldered.

Electronicswise the shoes are using a pair of 6 volt batteries, with no readily available holder, a “AA” battery holder is chopped to size and glued back together. Patterns are controlled by a Really Bare Bones Board Arduino, (which, even if your not an Arduino fan, is a cool little AVR breakout board for 28 pin chips) and cycles through different patterns using magnets and reed switches on the inside edges of the shoes.

Even if its not your style, check it out for a few good hacks and join us after the break for a short video.

Continue reading “Super Brite LED Sneakers”

IR-controlled Musical Alarm Clock

Music-Playing-Alarm-Clock

Forum user [Frank] shared with us his recent project, a musical alarm clock. More than just a simple alarm clock, his creation allows the user to load music onto a micro SD card, has alarm settings for each day of the week, and best of all, can be controlled using an IR remote. He uses a Teensy++ to control most of the clock’s functions including the display, delegating the time keeping to a DS1307 real-time clock. All of the audio playback is handled by a separate music decoder mounted on a breakout board.

His Instructables writeup is extremely detailed, with tons of annotations, pictures, diagrams, and source code available. He walks through each step in detail, making this a great learning guide for others looking to start in on AVR programming.

His final presentation is a great lesson in recycling, though unfortunately a bit lackluster, as the clock is packaged in an old SparkFun cardboard box. He does mention that there were some time constraints towards the end, which may explain this choice – it would be nice to see a revised version of this clock packaged in a nice plexi case.


Shockingly Fun Quiz Game

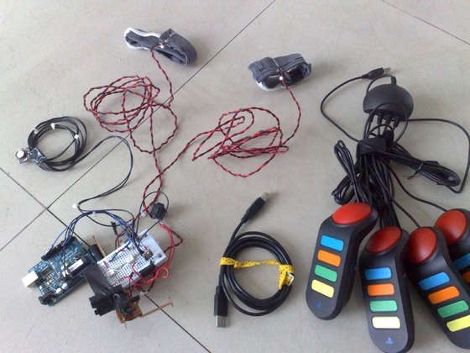
Gather your friends round the living room for a head-to-head quiz game. This one’s not quite as nice as you might think. Get an answer wrong and you’re going to get the Venkman treatment thanks to the stored electricity in a disposable camera flash circuit. [Israel] runs the game questions from a Windows machine, and uses a set of four USB joystick buzzers that let each contestant ring in. They all wear a cuff that houses electrodes for negative-reinforcement upon an incorrect answer. Since every contestant answers each question it won’t be long before you hear the uncomfortable yelp of failure from your guests. This seems a little bit more fair than shocking people for not calming their minds, but the video from that hack is still one of our all-time favorites.