Video: Interrupts On The ATmega328p

This week, we are bringing you the final video in our series where [Jack] uses the 3pi robot as a fancy development board for the ATmega328p processor. Today’s video deals with interrupts. If you have been wanting to have your programs do more than one thing simultaneously, interrupts are the solution. [Jack] discusses various ways that you can use interrupts in your programs and then shows how he created a interrupt routine that drives the 3pi’s beeper. He also shows the routines that enable, disable, and control the interrupt.

Since this is the last post for this series of videos, we are posting the code used for all of the previous videos. Click here to grab a copy.

For our next series of videos, we are going to attempt something more challenging so most likely we will be taking a couple of weeks off to do some development before presenting it here. Stay tuned folks, we’ll be back.

Video is after the break…

In case you missed any of the previous videos, check out these links:

Part 1: Setting up the development environment
Part 2: Basic I/O
Part 3: Pulse Width Modulation
Part 4: Analog to Digital conversion
Part 5: Working with the 3pi’s line sensors

Continue reading “Video: Interrupts On The ATmega328p”

This Animatronic Horus Guard Mask Is So Good, Even Anubis Would Be Fooled

horus-guard-mask

[Jerome Kelty] is a big fan of the movie Stargate, and when he saw it for the first time, he wanted one of the awesome helmets worn by the Horus Guards. This isn’t the kind of thing you would normally find at your local costume shop, so he knew that he would have to build one of his own. After rejecting multiple designs over the years, he finally came up with a solution that he thought would work well.

His Horus Guard helmet was constructed primarily out of cardstock, papier-mâché, spray foam, and spackle. Don’t let that list of materials give you the wrong idea about this helmet however – it looks absolutely amazing!

Not only does it look good, but it moves just like the guard’s helmets in the movie too. To control the helmet’s movements [Jerome] used an Arduino animatronics setup he designed, which we’ve seen before in his slick Predator build from last year. The Arduino controls a set of 5 servos, which are tasked with turning the helmet’s head and actuating the fans mounted on either side.

Stick around to see a short video of the mask in action, and if you’re thinking of building one yourself, be sure to check out his writeup for a very thorough BoM.

Continue reading “This Animatronic Horus Guard Mask Is So Good, Even Anubis Would Be Fooled”

Kitchen Hacks: An Android Bartender

[Nick] just finished up bis barbot build that is named after our favorite bartender. It’s an impressively capable even if it was done on the cheap.

The user chooses a libation for iZac to make via an Android tablet. This drink is interpreted by an Android ADK to have the mechanics of the robot swing into action and start making a drink.

The part of the build that moves the fluid was inspired by the Evil Mad Scientist Labs’ Drink Making Unit 2.0. Instead of pumps pulling the liquid through tubing, [Nick] attached an aquarium air pump to an Erlenmeyer flask. A siphon tube draws liquid out of the flask because of the difference in air pressure. The liquid is controlled by a few laser cut pinch valves that he designed.

Once a user selects a cocktail, the robot swings into action and dispenses liquid into a glass sitting on a load cell. Since the glass is being weighed at all times, iZac knows exactly how much alcohol (and in what proportion) is in the cocktail. [Nick] tested out iZac at the Sydney Hackerspace with soda water and flavoring. iZac proved very popular and we’re wondering if we could build something like this in a liquor cabinet.

Brute Force BIOS Hacking Using The Arduino

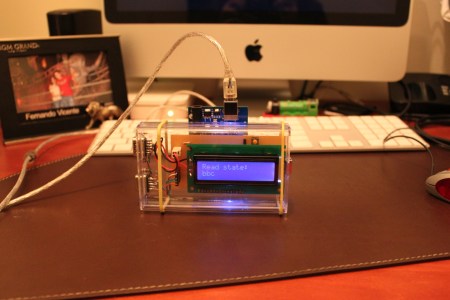
This clever hack uses an Arduino to do a brute force attack on a computer’s BIOS. In theory, this technique could be used for other programs, but it’s use would be limited since there’s no way to account for too many wrong passwords.

The Arduino generates and outputs the possible password emulating a USB keyboard. When this is done, the pixel in the middle of the screen is read. This is done by reading the analog red signal synced up with the corresponding horizontal and vertical pulses. As with any hack, there were some programming issues that had to be overcome (including one that locked up the keyboard emulator), but this was resolved, and the code is available if you wan to build your own.

Hardware for this build is simple, involving a LCD output, a button to stop everything, and a couple diodes to get the USB keyboard working correctly. This hack turned out quite nicely, and the code and schematics are included!

EagleUp Pulls Your PCBs Into SketchUp

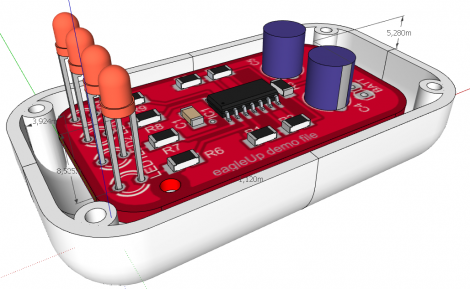
[Karl] wrote in to tell us about a software package called EagleUp that will import your Eagle CAD PCB designs into Google SketchUp. It bridges the gap between the two using the open source image processing software ImageMagick.

As you can see above, you’ll end up with a beautifully rendered 3D model of your hardware. This is a wonderful way to make sure that your enclosure designs are going to work without needing to wait for the PCBs to arrive from the fab house. It is available for Windows, OSX and Linux (although the last time we tried to run Sketchup under Wine nothing good came of it — perhaps it’s time to try again).

In [Karl’s] case, he’s working on an Arduino compatible board based around the Xmega. He mentions that EagleUp is a great way to get an idea of how component placement will end up, and to see if the silk screen layer is going to turn out well or not. Here’s a link to one of his test designs.

Electronic Recorder Conversion

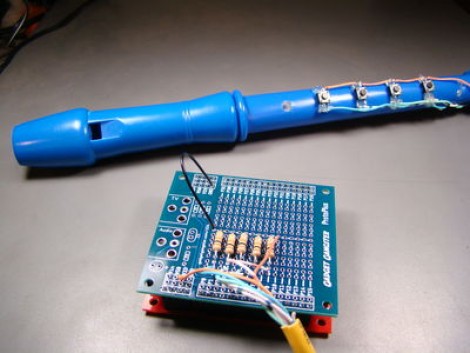
As we wrote the title to this feature we can see why [Jeff Ledger] calls it an electronic flute and not a recorder; this is a musical instrument and not something for archiving audio. Confusion aside, we’re all familiar with these plastic ‘musical’ instruments. Many elementary schools in our area require students to buy one as part of music class. So it shouldn’t be hard to find one if you want to try this for yourself (heck, [Jeff] grabbed his a the dollar store).

Basically, he’s replaced the finger holes with momentary press switches, then uses a Propeller dev board to turn the button presses into music. It’s simple and quick, but what does it for us is the breath actuator. Sure, you can set this up to play whenever a button is depressed, but [Jeff] went that extra mile and added a piezoelectric element to the bottom. When you blow through the instrument it flexes slightly, generating a tiny current that can be measured by the microcontroller. Check out the short clip after the break.

Do a little more work and you could turn this into some type of musical game controller. We’re thinking Zelda!

Continue reading “Electronic Recorder Conversion”

POV Bauble Uses DIY Accelerometer To Sync The Image

So we saw this tip come in and thought–oh, another POV device. We watched the video (embedded after the break), took a sip of coffee, then almost sprayed the beverage all over the computer when we realized that this uses a diy sensor to synchronize the POV image.

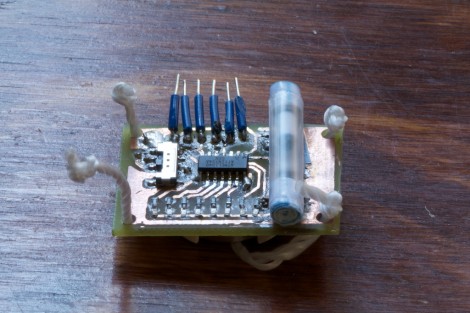
[Ch00f] came up with the idea for the sensor after seeing a similar implementation on a commercial POV toy. Instead of using a proper accelerometer to sense the motion, the toy uses a plastic bead in a channel. When you move the body of the toy the bead rolls to one end or the other, covering or exposing a reflective sensor.

A similar sensor is used here. A drinking straw servers as the channel, with a paper-covered nylon screw as the bead. [Ch00f] cut a window in the bottom of the straw for his reflective sensor, then sealed each end with a wad of paper.

This method works, but not as well as he had hoped. It seems the refresh rate and timing of the particular sensor he’s using is rather poor. If it were replaced with one that is simply and IR LED and phototransistor (like the sensors from [Jack’s] last video) he thinks it would work a lot better.

via Buildlounge.

Continue reading “POV Bauble Uses DIY Accelerometer To Sync The Image”