2708 EPROM Dumper

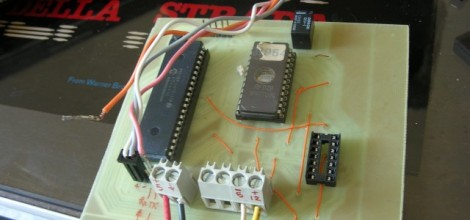
[Andrea “Mancausoft” Milazzo] has been restoring old equipment which often contain EPROM chips. He thought he was all set with an EPROM reader which easily dumped the data from 2716 chips and a few others. But he found that the hardware was unable to read 2708 and 2704 chips. His solution was to build a PIC-based EPROM dumper.

You may remember from some of our recent features that these chips are something of a ticking clock. They store program code and other information vital to the functioning of old hardware. Since they’re erased with UV light, years of exposure to ambient light can zap some of the data.

The specs needed to read a chip of this type are rather rudimentary. There are ten address pins and eight data pins. [Andrea] also needed a way to get data from the microcontroller to a computer for backup. He uses two more pins for this purpose, bringing the I/O count to 20. He went with  PIC 18F4610 and built the rest of the reader around it.

Mind-controlling Cockroaches

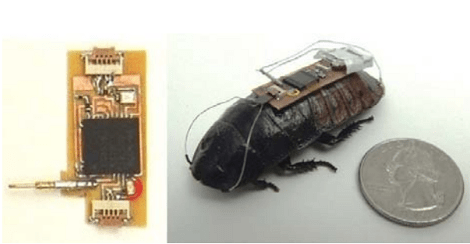
Producing micro robotics is not yet easy or cost-effective, but why do we need to when we can just control the minds of cockroaches? A team or researchers from North Carolina State University is calling this augmented Madagascar Hissing cockroach an Insect Biobot in their latest research paper (PDF). It’s not the first time the subject has come up. There have already been proofs in research and even more amateur endeavors. But the accuracy and control seen in the video after the break is beyond compare.

The roach is being controlled to perfectly follow a line on the floor. One of the things that makes this iteration work so well is that the microcontroller includes a new type of ADC-based feedback loop for the stimulation of the insect brain. This helps to ensure that the roach will not grow accustom to the stimulation and stop responding to it. Since this variety of insect can live for about two years, this breakthrough makes it into a reusable tool. We’re not sure what that tool will be used for, but perhaps the next plague of insects will be controlled by man, and not mother nature.

Continue reading “Mind-controlling Cockroaches”

Rickrolling Remote Control Prank

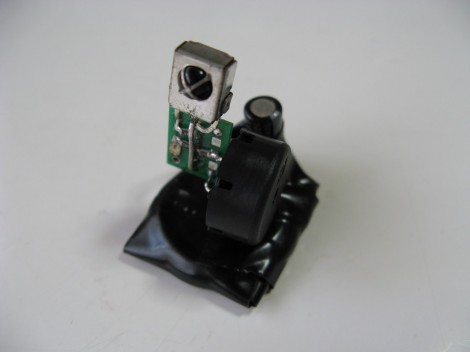
This device is a prank or gag that [Eric Heisler] came up with. It will intercept IR remote control codes and play them back after a bit of a delay. The example he shows in the video (embedded after the break) catches the television power signal from a remote, then sends it again after about thirty seconds. This shuts off the TV and would be extremely annoying if you were unable to find the device. Fortunately (for the victim), [Eric] included a piezo buzzer that Rickrolls after sending each code. Just follow that tune to find the offending hardware.

He chose to use an ATtiny10 microcontroller. It looks like it’s realizing its full potential as the six-pin package use all available I/O to control the IR receiver module, an IR led, and the buzzer. It runs from a coin cell without regulation and the circuit was free-formed on a tiny surface mount breakout board which hosts the microprocessor.

Kalman Filter Keeps Your Bot Balanced

If you’re looking to improve the stability of your self balancing robot you might use a simple horrifying equation like this one. It’s part of the journey [Lauszus] took when developing a sensor filtering algorithm for his balancing robot. He’s not breaking ground on new mathematical ideas, but trying to make it a bit easier for the next guy to use a Kalman filter. It’s one method of suppressing noise and averaging data from the sensors commonly used in robotic applications.

His robot uses a gyroscope and accelerometer to keep itself upright on just two wheels. The combination of these sensors presents an interesting problem in that accelerometer input is most accurate when sampled over longer periods, and a gyroscope is the opposite. This filter takes those quirks into account, while also factoring out sensor noise. Despite the daunting diagram above, [Lauszus] did a pretty go job of breaking down the larger function and showing us where to get the data and how to use it in microcontroller code.

Humanoid Robot Kinects With Its Enviroment

[Malte Ahlers] from Germany, After having completed a PhD in neurobiology, decided to build a human sized humanoid robot torso. [Malte] has an interest in robotics and wanted to  show case some of his skills.The project is still in its early development but as you will see in the video he has achieved a nice build so far.

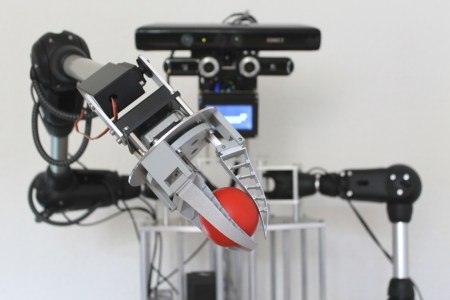
A1 consists of a Human sized torso with two arms, each with five (or six, including the gripper) axes of rotation, which have been based on the robolink joints from German company igus.de. The joints are tendon driven by stepper motors with a planetary gear head attached. Using an experimental controller which he has built, [Malte] can monitor the position of the axis by monitoring the encoders embedded in the joints.

The A1 torso features a head with two degrees of freedom, which is equipped with a Microsoft Kinect sensor and two Logitech QuickCam Pro 9000 cameras. With this functionality the head can spatially ”see” and ”hear”. The head also has speakers for voice output, which can be accompanied by an animated gesture on the LCD screen lip movements for example. The hands feature a simple gripping tool based on FESTO FinGripper finger to allow the picking up of misc items.

Bits And Pieces Robotic Arm

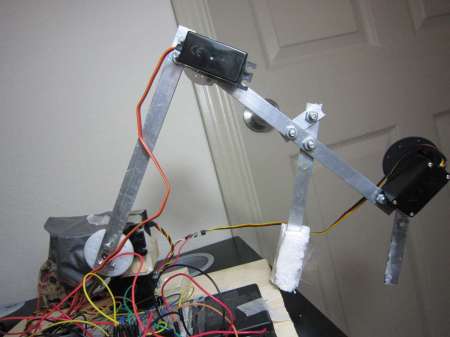
[V0R73X], who is 17  has been working on a project, to build A robotic arm. This project started out as a challenge put forward from one of his school teachers to build a robotic arm for $200.  [VoR73X] accepted, and the challenge began.

He came up with a robotic arm that can be controlled from his mobile phone and other bluetooth enabled devices. He also designed it so that he can control it from the infrared remote control of an old tv set. [VoR73X] decided to kept the design simple, to make it easy for others to build.  [VoR73X] has shared the code and a step by step process of how to build in the hopes that others would also like to take up the challenge.  Watch the video after the break for further details on his project.

via[Instructables]

Continue reading “Bits And Pieces Robotic Arm”

Getting Around The Raspi’s USB Host Current Limit

For being such a revolutionary device, there are still a few problems with the Raspberry Pi. For one, the USB host ports are only able to source 140 mA per port, while the USB ports on your desktop, laptop, and even tablet are able to send a full 500 mA per port.

The official ‘fix’ for this problem is to use a powered USB port for any device that requires more than 140 mA,  something that didn’t sit well with [Manis]. He came up with an easy fix , though, that only requires a few bits of wire and a soldering iron.

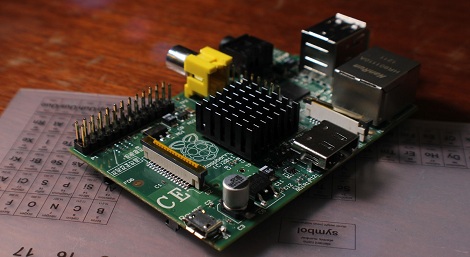
The USB ports on the Raspi are current limited to 140 mA by a pair of polyfuses. [Manis] bridged these fuses, effectively taking them out of the circuit with a short length of wire. This allowed him to use a USB hard drive (powered by USB, of course) with the Raspi.

There’s one small problem with sending that much current through the Raspi’s USB port. Sometimes, when the high-power USB device is powered on, the voltage will sag, resetting the SoC and rebooting the system. [Manis] did his homework and discovered USB 2.0-spec ports should use a 120 μF, low-ESR capacitor to prevent this. The Raspi comes stock with a 47 μF cap used for this purpose. Replacing this cap (C32) might be a good idea if you’re planning on using high-power devices with your Raspi.