From 0 To C: Teaching Programming Without A Computer

It’s no secret that learning how to program is very hard, and teaching it doubly so, requiring the student to wrap their head around very unorthodox concepts. [Ubi de Feo] over at the Amsterdam tech collective Hello, Savants! has a unique solution for taking someone who knows nothing of programming and turning them into a computer aficionado capable of deftly wielding semicolons and parens. It’s called From 0 to C, and aims to teach students programming in an environment without computers.

For his class, [Ubi] made up a lot of wooden boxes with eight subdivisions representing the bits in a byte. By putting ping-pong balls in each slot, [Ubi]’s students can grasp the concept of counting by powers of two and quickly move on to hexidecimal and more advanced concepts like bit shifting.

After learning the ins and outs of how stupid computers actually are, [Ubi]’s students then learn the syntax of a language of their choice (C, JavaScript, or Python, for example), and write a few programs.

Although we’re sure most of our readers are far past the ‘learning programming from a blank slate’ portion of their hacker and maker career, anything that gets more people solving their own problems is okay in our book. [Ubi] has a pretty neat take on the pedagogy of teaching programming, and we’d really like to see his work expand outside his Amsterdam collective.

Comparing Altium And Cadence PCB Layout Tools

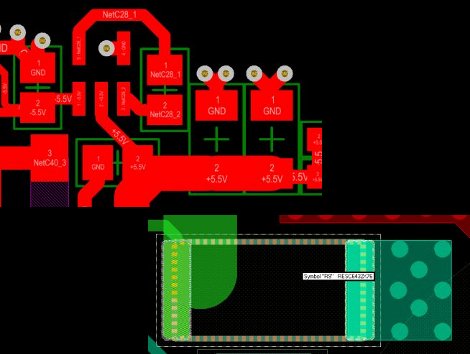
We see a lot of projects using Eagle for the schematics and PCB layout. There are a few that use Kicad, but we hear very little about other alternatives. Recently, [Limpkin] has been working with Altium and Cadence and wrote about how they compare when it comes to PCB layout. Neither are free packages so it’s good to know what you’re getting into before taking the plunge.

[Limpkin] begins his overview by mentioning that the schematic editors are comparable; the differences start to show themselves in the PCB layout tools. Here you can see that Altium always labels the pads so you know what net each of them belongs to. Cadence (whose PCB layout tool is called Allegro) will display the net if you hover over the pad with your mouse. Both have 3D rendering, with Altium’s looking a bit more pleasant but what real use is it anyway? Okay, we will admit we love a good photorealistic board rendering, but we digress. The most interesting differences show themselves once traces are all on the board and need to be rejiggered. Cadence will actually move traces on other layers automatically to avoid collision with a via that is late to the party, and Altium shows some strange behavior when dragging traces. [Limpkin] doesn’t register a final judgement, but the comparison alone is worth the read.

Flip-dot Display Is An Advertising Experience We Can Get Behind

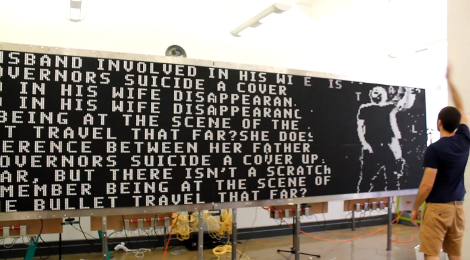
This huge and mesmerizing interactive display is just a big piece of advertising. It is a flip-dot display. Each pixel is a mechanical disk, white on one side and black on the other. The team over at BreakfastNY hacked the display modules and wrote their own software so that it can be refreshed with lighting quickness. To the left you can see the high contrast text, but on the right it’s showing the camera-based interactivity. A few seconds later this gentleman sweeps his arm to the side and all the pixels scatter as if blown away by a forceful wind. You might as well just skip down to the video after the break right now.

The display is an advertisement for a new show on the TNT network called Perception. We’ve got to say, if you’re going to advertise this is the way to do it. Make something cool, then share the details. We get to enjoy the clickity-clack of all those dots flipping into place and they got us to at least recognize the network and say the name of the show. Everyone wins.

Continue reading “Flip-dot Display Is An Advertising Experience We Can Get Behind”

USB Dongle For Unmodified NES Controllers

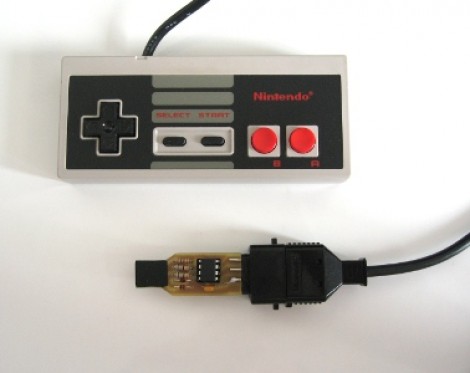
This USB dongle will let you use your unmodified NES controllers on a computer. That’s because it includes the same socket you’d find on the classic console.

The image above shows the prototype. Instead of etching the copper clad board, each trace was milled by hand (presumably with a rotary tool). To the left the black square is made of several layers of electrical tape that builds the substrate up enough to fit snugly in a USB port.

An ATtiny45 running the V-USB stack has no problem reading the controller data and formatting it for use as a USB device. This is actually the second iteration of the project. The first attempt used an ATtiny44 and a free-formed circuit housed inside the controller. It worked quite well, but required alterations to the circuit board, and you needed to replace the stock connector with a USB plug. This dongle allows the controller to go unaltered so it can be used with an NES console again in the future.

Automatic Trough Filler Makes Sure The Animals Have Water

It has been a hot hot summer for many parts of the US. The heat has been dangerous at times and making sure the livestock has the water they need is incredibly important. [Maddox] recently upgraded the automation on their water troughs which will help with the process. Sure, they still have to check on the animals, but this will ensure there’s plenty to drink in between those visits, and that a malfunction doesn’t waste precious water.

There has always been some level of automation here, but it relied on float valves which were frequently malfunctioning. This project seeks to get rid of the float value and use solenoid valves like those used in irrigation. These solenoids can run from a 9V battery and offer quite a bit more reliability than the mechanical vales. There is still a float sensor which measures the water level, filling up the trough when needed.

An MSP430 Launchpad was used for the prototype, from which a PCB was designed. Since this needs to be weather-proof a water tight enclosure was sourced. The company that makes the enclosure also provides DXF templates which [Maddox] used to establish the size and outline of the PCB.

The Live Streaming 72 Hour Build-off Begins Tonight!

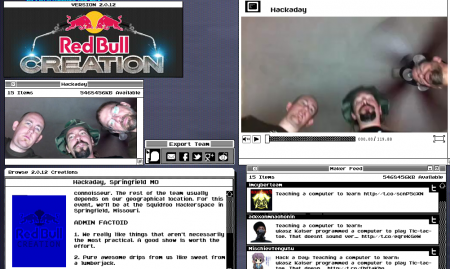
Tonight at 6pm pst, the people at RedBull will be announcing the theme for the 72 hour build-off. We’ve cleaned our space, set up the cameras, and tried to get a good night’s sleep.  We’re all ready to kick some ass and would love it if you would join in to watch and even chat with us during the build. You should be able to watch all of the teams at the red bull contest web site. Though you can also just tune in to us at the link below, or on the sidebar.

During some of our team meetings we decided that watching a live stream of us hunched over some device for 72 hours would be extremely boring. To help remedy this, we have been contacting people all week to arrange proper amusement. We have graffiti artists, dancers, and some other miscellaneous things(possibly fire breathers?) in the works to help break the monotony. You’ll see a board labelled “EVENTS” in the bottom left of our stream. This should help keep you notified when the next bit of amusement shall arrive.

If you want to just watch the teams individually, there’s a list of each of our channels after the break.

Continue reading “The Live Streaming 72 Hour Build-off Begins Tonight!”

Use Your TV Remote As An HID Mouse

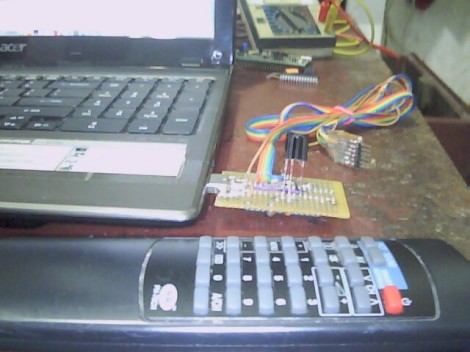
[Vinod’s] latest project lets him use a TV remote control as a mouse. It may not sound like much, but he did it with a minimum of hardware and packed in the maximum when it comes to features.

He’s using an ATmega8 to read the remote control signals and provide USB connectivity. With the V-USB stack he enumerates the device as an HID mouse. One note of warning, he used the PID/VID pair from the USBasp programmer project. If you use that programmer you’ll need to uninstall the drivers to get this to work (we think this is only necessary on a Windows box).

The cursor can be moved in eight directions using the number pad on the remote. The numeral five falls in the center of the directional buttons so [Vinod] mapped that to the left click, with the zero key serving as right click. He even included the scroll wheel by using the volume buttons. The firmware supports cursor acceleration. If you hold one direction the cursor will move slowly at first,then pick up speed. Fine adjustments can be made by single clicking the button. Check out his demonstration embedded after the break.

Continue reading “Use Your TV Remote As An HID Mouse”