Real Time GPS Decoding With Software Defined Radio

In case the Realtek RTL2832u-based USB TV tuner dongle isn’t useful enough, the folks behind a project to get a software defined GPS receiver off the ground successfully plotted GPS data in real-time with this very inexpensive radio.

Previously, we’ve seen these dongles grab data from GPS satellites – useful if you’re building a GPS-based clock – but this build required hours of data collection to plot your location on a map.

The folks working on the GNSS-SDR project used an RTL2832 USB TV tuner and a Garmin active GPS antenna to track up to four GPS satellites in real-time and plot a location accurate to about 200 meters.

The Google Earth plot for this post shows the data collected by the GNSS-SDR team; the antenna was fixed at the red arrow for the entirety of the test, and the  yellow lines represent a change in the calculated location every 10 seconds. Amazing work, and only goes to show what this remarkable piece of hardware is capable of.

Toorcamp: Kelp Horns

[Ari] and Jake from Noisebridge were out on the beach at Toorcamp when they saw some giant kelp and had an idea. Using a pocketknife, [Ari] cut a mouthpiece into the stem and cut the bulb in half. After some practice, they figured out how to play the kelp horn. [Jimmie], shown here, was able to get a pretty good range of notes out of it by playing it like a bugle. [Neil] tried to cut holes into the stem to play it like a flute.

The horns were fairly loud, so they attracted a few people who wanted to make their own. Once the group had six or seven horns playing various tones, they headed to the camp to show off their new instruments. They weren’t quite in tune, and didn’t taste very good, but they did make a variety of odd sounding tones. Leave it to a camp of hackers to make musical instruments of whatever they find washed up on shore.

[Photo maltman23]

An Adafruit Raspberry Pi Extravaganza

The folks at Adafruit are busy as a bee working on bringing some of their really cool boards to the Raspberry Pi platform. Here’s a few that came in over the last few days:

16 servos is almost too many

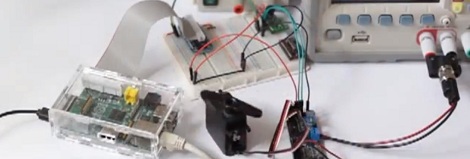
Servos require a PWM output but the Raspi only has hardware support for PWM on a single GPIO pin; certainly not enough to build a gigantic, city-leveling robot. [Kevin] over at Adafruit put together a tutorial for using this 16 channel servo driver with the Raspi.

12 bit DAC

With only one PWM pin and no analog out, it was only a matter of time before someone hooked up the Adafruit 12 bit DAC to the Raspberry Pi.

16×2 LCD displays

Both the servo and DAC builds use the Adafruit I2C library and a bit of Python. Of course it’s possible to treat the GPIO pins on the Raspberry Pi as digital outs, just as [Mikey] did with his Raspi LCD display tutorial.

So, what distro are you using?

Of course all these builds use Adafruit’s Occidentalis distro, a maker-friendly Linux distro we’ve posted about before. It’s too useful to languish as a single Hackaday post, so here it is again.

Expand Your Pi With A Gertboard

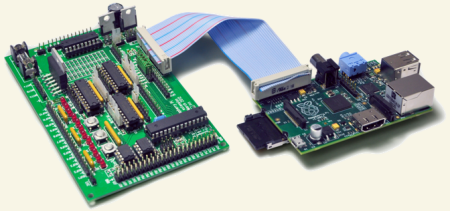
[Gert van Loo], the person who designed the alpha hardware for the Raspberry pi model B, has put out an expansion board for the Raspberry pi that we think many of you might be interested in seeing. Dubbed the Gertboard, this expands the Raspi  with some GPIO goodness.

We have seen TONS of tutorials for the Raspberry pi, and a few projects as well. We’re hoping that we’ll start seeing more projects where the Raspberry pi is the brain, but only part of the project, start becoming more frequent. The board is pretty cool, now lets see what you guys can build with all that power!

[thanks Zimm3rmann]

Making The Arduino Sleep The Long Sleep

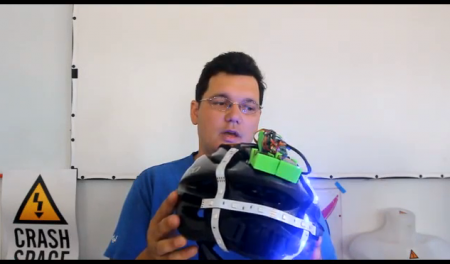
Earlier this week, I showed you [Naim Busek’s] kickstarter for his turn signal helmet. In that article I explained that, while the helmet is a neat idea, I was really interested in what [Naim] had told me about his power consumption.  To put it the shortest way, he has made his arduino sleep so efficiently, it can be waiting for input longer than the battery’s optimum shelf life.

After that article, [Naim] wrote in to give me the details on what he did to achieve such an efficient system. You can read his entire explanation, un altered here.

Continue reading “Making The Arduino Sleep The Long Sleep”

CRT Reborn As A Planter

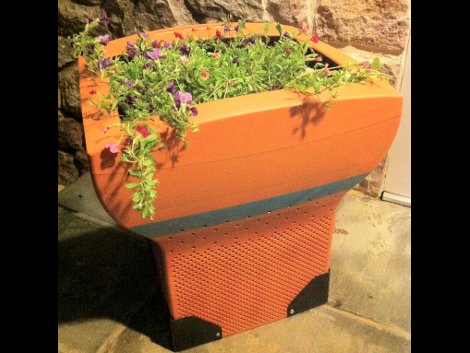
It does make us sad to see all the waste generated as we move from CRT monitors and televisions to flat panel offerings. Here’s a way to cut down just a bit on how much is going to waste. [Denizpa] turned a CRT monitor into a planter.

The project is very straight-forward. First remove the plastic body from the electronic guts. Next you’ll want to choose your paint colors. While you’re at the home store, pick up a sanding sponge as well. [Denizpa] used 320 grit to sand all of the outside surfaces to help ensure the paint would bond well. Once the paint dried four plastic corner brackets were screwed in place to add some interest to the bottom of the planter. It’s not quite time to plant though, there’s way too many holes in the case to just fill it up with soil. A black plastic garbage bag serves as a liner and completes the project.

No mention on what to do with the guts you removed. If you have an idea let us know in the comments section.

Water Glider Prototype

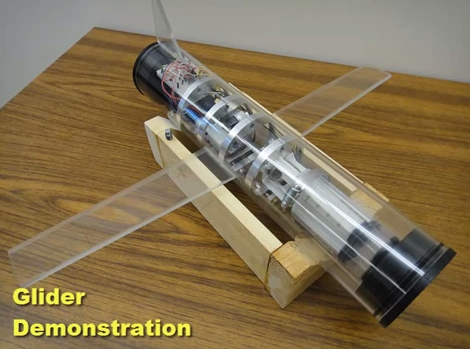
[Byrel Mitchell] wrote in to share some details on this water glider which he has been working on with his classmates at the Nonlinear Autonomous Systems lab of Michigan Technological University. As its name implies, it glides through the water rather than using propulsion systems typically found on underwater ROVs. The wings on either side of the body are fixed in place, converting changes in ballast to forward momentum.

The front of the glider is at the bottom right of the image above. Look closely and you’ll see a trio of syringes pointed toward the nose. These act as the ballast tanks. A gear motor moves a pinion connected to the syringe plungers, allowing the Arduino which drives the device to fill and empty the tanks with water. When full the nose sinks and the glider moves forward, when empty it rises to the surface which also results in forward movement.

After the break you can find two videos The first shows off the functionality and demonstrates the device in a swimming pool. The second covers the details of the control systems.

Continue reading “Water Glider Prototype”