Game Of Life Clock

GOLclockOperating

[Alex] wanted to make an LED clock. But simply making an LED array clock was far too easy — so he decided to make it follow some interesting rules…

Ever heard of John Conway’s Game of Life? It’s quite simple — there are four rules.

  1. Any live cell with fewer than two live neighbours dies, as if caused by under-population.
  2. Any live cell with two or three live neighbours lives on to the next generation.
  3. Any live cell with more than three live neighbours dies, as if by overcrowding.
  4. Any dead cell with exactly three live neighbours becomes a live cell, as if by reproduction.
    [from Wikipedia]

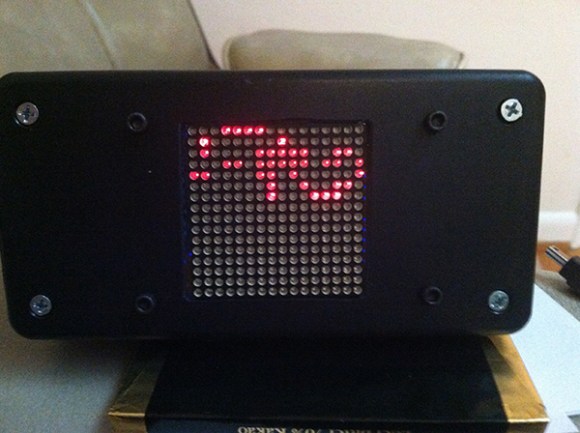
So [Alex] decided to make his clock LED matrix follow these rules, with lit pixels representing life. Every minute, on the minute, the time is displayed. But as soon as it is displayed, the rules take over, and the display disintegrates, following the rules of the Game of Life. It makes for an very interesting display that’s just waiting to be scaled up to a larger size!

He’s done a great job writing it up on his blog, and has included his code as well — so if you’re so inclined, take a look! If not, stick around after the break to see the clock in action.

Continue reading “Game Of Life Clock”

Solar Camping On Steroids

[Rick] does a lot of camping, but he loves his electronics. So he’s now on his third iteration of his solar-powered battery box, and it packs quite the punch!

It’s a pretty simple build, but very effective. [Rick] is using a 200W solar panel, a 20 Amp MPPT solar charge controller, a large 100Ah Military Spec Deka 6TMF deep cycle battery, three 12 volt car accessory outlets, and to box it all up — an inexpensive plastic tote from Walmart to keep it dry in bad weather. The only problem we can see with this is that since the battery isn’t a sealed gel cell, it could out gas inside the tote which might cause him problems down the road. He’s aware of this though so the lid is only on when it needs to be.

This unit can power pretty much anything that runs on 12 volts, from USB devices, to camping light batteries, air pumps for air mattresses, C-PAP machines via the included A/C inverter, and it can even run an EdgeStar FP-430 portable fridge/freezer for 3+ days before even needing to plug in the solar panel for recharging! Total system cost is a bit high at around $1000 — but that includes the portable fridge, solar panels, and all accessories and miscellaneous hardware that went into assembling the system.

Stick around after the break to see the video demonstration.

Continue reading “Solar Camping On Steroids”

Circular Saw To Table Saw Conversion

Corded circular saws are a dime-a-dozen at any old thrift store, yet table saws are a bit more of a costly investment — have you ever wondered if you could just make one out of a circular saw? [Matthias Wandel] did, and he just so happens to be very good at woodworking! He makes a lot of great woodworking videos to share on YouTube, and in his latest blog post, he shows us a rather elaborate way to convert a plain old circular saw, into a functional table saw.

While the concept seems simple, unless you do a lot of woodworking, you’ll probably marvel at how easily making things comes to [Matthias] — we know we did. By the end of the video he has a fully functional table saw that can raise and lower in height, and cut at different angles.

If you’re interested in making one yourself, he does a very thorough job explaining the process in his video — check it out after the break!

Continue reading “Circular Saw To Table Saw Conversion”

Build A Sensorless Brushless DC Motor Controller

[Davide Gironi] shows us how to implement a sensorless brushless DC motor controller (sensorless BLDC) using an ATmega8 microcontroller. In order to control a BLDC motor you need to know its rotational sequence position and speed so you can calculate and apply the correct current phase sequence to the motor windings at just the right time.

Simply said, sensorless BLDC means you’re not using a purpose built sensor to determine the motor’s position and speed, however, you are sensing the motor’s sequence position using the back EMF signal coming from one of motor’s coils that is not currently receiving power. When this back EMF signal crosses zero voltage a microcontroller can calculate the rotational speed and when to switch to the next power sequence. This technique is not good for position control motors but is great for continuous motors like computer fans and drives were the slightly reduced wiring costs make this type of BLDC control favored.

If you want to build a BLDC controller we recommend starting with [Davide’s] last project on sensor controlled BLDC motors. You can also checkout these interactive demonstrations for more understanding on the different BLDC configurations.

Follow along after the break to watch the video demonstration of [Davide’s] sensorless BLDC controller controlling a motor from CD-ROM drive.

Continue reading “Build A Sensorless Brushless DC Motor Controller”

Alas, Poor Yorick! I Tweeted Him

yoreck the talking skull

You know Halloween is coming around when the tweet reading skulls start popping up. [Marc] wanted to bring the Halloween spirit into his workplace, so he built “Yorick”. In case you’re worried, no humans were harmed (or farmed for parts) in the creation of this hack. Yorick started life as an anatomical skull model, the type one might find in a school biology lab. Yorick’s skull provided a perfect enclosure for not one but two brains.

A Raspberry Pi handles his higher brain function. The Pi uses the Twitter API to scan for tweets to @wedurick. Once a tweet is found, it is sent to Google’s translate server. A somewhat well-known method of performing text to speech with Google translate is the next step. The procedure is simple: sending “http://translate.google.com/translate_tts?tl=en&q=hackaday” will return an MP3 file of the audio. To get a British accent, simply change to google.co.uk.

The Pi pipes the audio to a speaker, and to the analog input pin of an Arduino, which handles Yorick’s lower brain functions.  The Arduino polls the audio in a tight loop.  An average of the last 3 samples is computed and mapped to a servo position. This results in an amazingly realistic and automatic mouth movement. We think this is the best part of the hack.

It wouldn’t’ be fair for [Marc] to keep the fruits of his labors to himself, so Yorick now has his own Livestream channel. Click past the break to hear Yorick’s opinion on the Hack A Day comments section! Have we mentioned that we love pandering?

Continue reading “Alas, Poor Yorick! I Tweeted Him”

Blender CAM – Open Source CAM Software

[Vilem] sent in a tip about a plugin he’s been working on for Blender, called Blender CAM. It allows for exporting directly from Blender to a G-code file. He has been working on it for several months, and releasing regular updates with various tweaks and improvements. While the project isn’t complete, [Vilem] has made some very impressive progress. It currently supports 2D and 3D strategies, various cutter types, simulation of 3D operations, and even automatic bridges.

The image above was made using the plugin, and it shows the level of detail possible. We can’t wait to see the 4 and 5-axis support that he is planning on adding.

A basic tutorial video is embedded after the break. As with anything Blender-related, it isn’t incredibly automatic, but another free tool is definitely a good thing. It looks like [Vilem] is looking for some other developers who could help out. If you have the knowledge, you might consider contributing.

Continue reading “Blender CAM – Open Source CAM Software”

Woodcut Stamps And Conductive Ink

circuit

Even though it’s been a while since the Rome Maker Faire, we’re still getting some tips from the trenches of Europe’s largest gathering of makers. One of these is a 30-minute experiment from [Luong]. He wondered if it would be possible to create SMD circuit boards by using a 3D printer to fabricate a stamp for conductive ink.

[Luong] told this idea  to a few folks around the faire, and the idea eventually wound up in the laps of the guys from TechLab. the Chieri, Italy hackerspace. They suggested cutting a wooden stamp using a laser cutter and within 30 minutes of the idea’s inception a completed stamp for an Atari Punk Console PCB was in [Luong]’s hands.

As an experiment, the idea was a tremendous success. As a tool, the stamp didn’t perform as well as hoped; the traces didn’t transfer properly, and there’s no way this wooden laser cut stamp could ever create usable PCBs.

That being said, we’re thinking [Luong] is on the right track here with printed PCBs. One of the holy grails of home fabrication is the creation of printed circuit boards, and even a partial success is too big to ignore.

This idea for CNC-created PCB stamps might work with a different material – linoleum or other rubber stamp material, or even a CNC milled aluminum plate. If you have any ideas on how to use this technique for PCB creation, leave a note in the comments, or better yet, try it out for yourself.