Oculus Rift + Head Tracking = The Ultimate Drone Experience

oculus rift quad

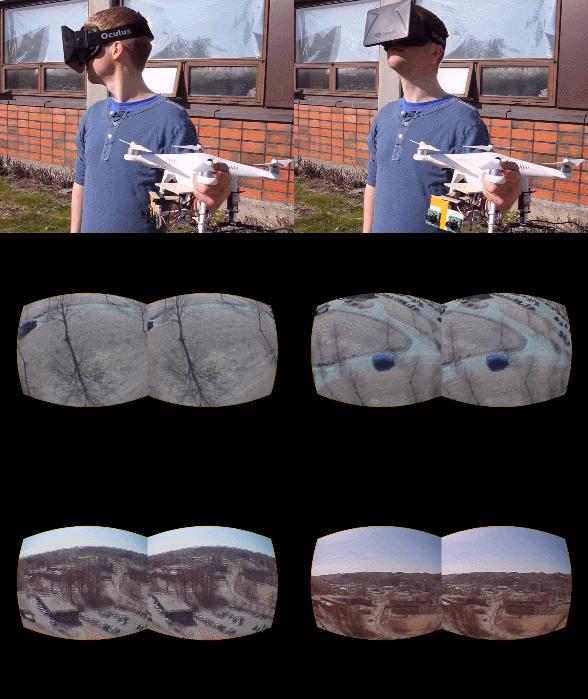
What happens when you strap a stereoscopic camera onto a drone and transmit the video feed directly to your Oculus Rift? A pretty amazing experience, that’s what!

Several students from the Norwegian University of Science and Technology recently finished a term project dubbed Oculus FPV. In it, [Erik Hals], [Jacob Prescott], [Mats Svensson], and [Mads Wilthil] succeeded in combining virtual reality, a head mounted display, and a UAV for a great result.

Drones with cameras are the next big step in search and rescue, remote inspection, and many other use cases in other environments that are typically inaccessible for a human to poke around. What we really like about this project is they also mounted the stereoscopic cameras on a gimbal, allowing for full head movement — this means the pilot can “park” (read “hover”) his drone in remote locations, and then look around, without having to worry about performing complex aerial acrobatics to get the right camera angle.

Continue reading “Oculus Rift + Head Tracking = The Ultimate Drone Experience”

Roll With Dicebot, The Tweeting Dice Roller

dicebot

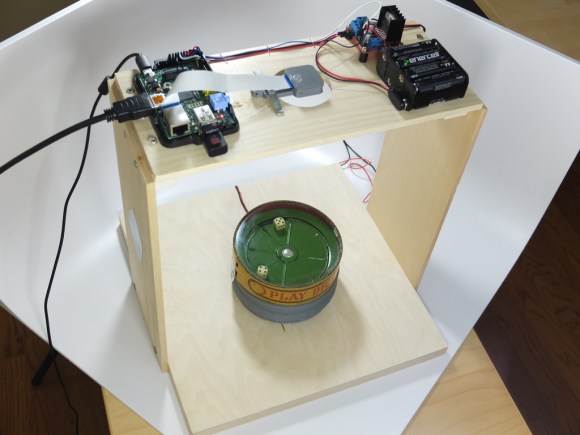
[David] modernized a 1920’s dice rolling game to bring us DiceBot, a twitter enabled dice rolling robot. DiceBot started with an antique dice tin. The original tin was human controlled. Pushing a button on the side of the tin would spin the bottom, rolling the dice.

It’s a bit hard to push a button from across the world, so [David] added a small motor to spin the tin. He connected the motor to a simple L298 motor driver chip, and wired that up to a Raspberry Pi. The Pi runs a few custom Ruby scripts which get it on the internet and connect to the Twitter API.

Operation is pretty straightforward. A tweet to @IntrideaDiceBot with the hashtag #RollTheDice will cause the Dicebot to spin up the dice. Once things have settled, DiceBot captures an image with its Raspberry Pi camera. The dice values are checked using OpenCV. The results are then tweeted back, and displayed on DiceBot’s results page.

Continue reading “Roll With Dicebot, The Tweeting Dice Roller”

I2C From Your VGA Port

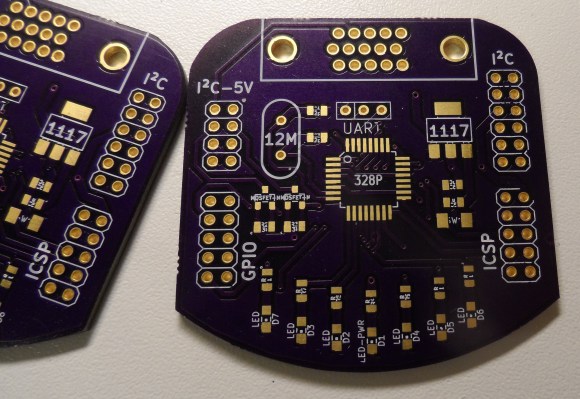
Breakout board for VGA to I2C

VGA, DVI, and HDMI ports use Display Data Channel (DDC) to communicate with connected displays. This allows displays to be plug and play. However, DDC is based on I2C, which is used in all kinds of electronics. To take advantage of this I2C port on nearly every computer, [Josef] built a VGA to I2C breakout.

This breakout is based on an older article about building a $0.25 I2C adapter. This adapter hijacks specific lines from the video port, and convinces the kernel it’s a standard I2C device. Once this is done, applications such as i2c-tools can be used to interact with the port.

[Josef] decided to go for overkill with this project. By putting an ATmega328 on the board, control for GPIOs and LEDs could be added. Level shifters for I2C were added so it can be used with lower voltage devices. The end product is an I2C adapter, GPIOs, and LEDs that can be controlled directly from the Linux kernel through an unused video port.

3D Printing Directly Onto Your IPad Screen

ipad 3d printing bed

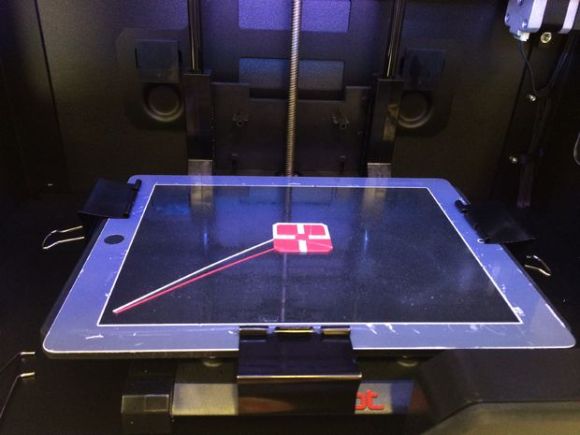
Corning’s Gorilla Glass is very scratch resistant, shatter resistant, heat resistant, and even flexible material — it’s actually a perfect candidate to be used as a print bed material. The only problem is it’s not typically sold outside of consumer products, but that’s when [cvbrg] realized an iPad’s replacement screen would fit his maker-bot perfectly.

One of the biggest problems people encounter with 3D printing usually involves the print bed. Sometimes the prints don’t stick, the edges peel, or it even gets stuck on there too well when it’s done! A popular solution is a borosilicate glass bed, which typically helps with adhesion and surface finish — but again, sometimes the prints don’t want to come off! Sometimes parts can even tear up pieces of the glass bed when you’re trying to remove them. People usually counteract this with Kapton tape, which can become a headache in its own right — trying to apply it bubble free, tearing it, doing it all over again…

Using an iPad’s screen (only about $15 on eBay), means you can hack and jab at the print bed all you want without fear of breaking it – It even has a bit of flex to it to help pry your parts off. Did we mention it also has a very uniform flatness, good thermal conductivity, and resistant to pretty much all solvents?

Continue reading “3D Printing Directly Onto Your IPad Screen”

THP Entry: Etch-A-CNC

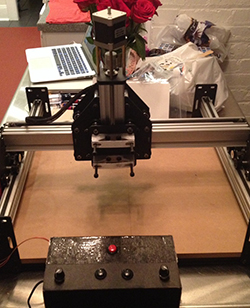
etchacncCNC machines have been around for decades, but only recently have small desktop routers, 3D printers, and laser cutters brought G code to the tabletop. Obviously, this is a teaching opportunity, and if you’re trying to get kids interested in the inner workings of machines that build things, you can’t begin with obtuse codes understood only by machines and CNC operators.
[johnyang] is building his own CNC controller based on something just about every kid is already familiar with: the Etch A Sketch. He’s retrofitted a small, travel size Etch A Sketch with an LCD, buttons, rotary encoders, and a Raspberry Pi to turn this primitive drawing toy into a machine that generates G code for a Shapeoko 2 CNC mill.

The user interface for this CNC controller is as similar to the Etch A Sketch as [johnyang] can make it – two rotary encoders draw a shape on the LCD, and G code is generated from the drawn shape. Adding a third dimension is a bit of a challenge – it looks like two buttons take care of the up and down movement of the spindle. Still, [johnyang] plans to add the definitive Etch A Sketch feature – holding it upside down and shaking it will reset the CNC to its original state.

There are a few videos of [johnyang]’s progress. You can check those out below.


SpaceWrencherThe project featured in this post is an entry in The Hackaday Prize. Build something awesome and win a trip to space or hundreds of other prizes.

Continue reading “THP Entry: Etch-A-CNC”

R/C Plane Flies With A Cockpit View

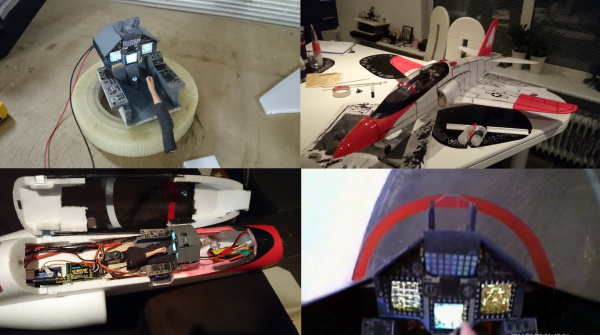
That’s not a jet jockey making a low altitude turn up there. In fact, the pilot has his feet planted firmly on the ground. [Reliku] has built a radio controlled BAE Hawk which is flown via First Person View (FPV). FPV models often have a small camera mounted on the exterior of the craft. This camera gives a great field of view, but it isn’t exactly how full scale planes are flown.

[Reliku] took it to the next level by creating a scale cockpit for his plane. The cockpit is accurate to the real BAE Hawk T2, and features back lit simulated screens. Even the pilot got the FPV treatment. Micro servos move the pilot’s right hand in response to aileron and elevator inputs from the radio control system. The pilot’s head has been replaced with the FPV camera, which is mounted on a pan tilt unit. Pan and tilt are controlled by a head tracking system attached to [Reliku’s] video goggles. The entire experience is very immersive.

All this is built into a Hobbyking BAE Hawk Electric Ducted Fan (EDF) model, so space is at a premium. Even with the Hawk’s relatively large cockpit, [Reliku] found he was tight on space. While attempting to keep the cockpit scale from the pilot’s view, he found he was barely able to fit a single seat cockpit into a space designed for two! Adding all these modifications to a plane and still keeping the model flyable was not easy, as displayed by [Reliku’s] earlier attempt with an F-16.

The ends do justify the means though, as the final model looks great. We’d love to see those static cockpit displays replaced with small LCD or OLED panels for an even more realistic experience!

Continue reading “R/C Plane Flies With A Cockpit View”

The Sega Mega Drive Dev Kit

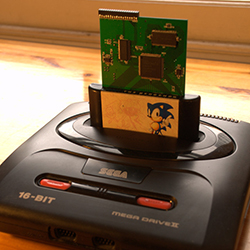
segaWhile most homebrew video game development has focused on the original NES, Atari consoles, and has produced a few SNES games, there is another console out there that hasn’t seen much love. Sega’s classic console, the Genesis or Mega Drive, depending on where you’re from, was an extremely capable machine with amazing capabilities for its time. [Chris] figured the Mega Drive would make a good target for an all-in-one development kit, and with a lot of work he managed to put one together.

The standard cartridge for the Genesis or Mega Drive is just a simple ROM chip wired directly into the console’s address space. [Chris] took a cheap FPGA and some dual port ram to create a seamless interface between the modern world and the inside of this ancient console, allowing him to load every Mega Drive game off an SD card, as well as use modern tools to modify old games, or even create new ones.

To demonstrate his dev kit, [Chris] took a copy of Sonic 1, and using the debugger and GDB, gave himself infinite lives. It’s a very cool demonstration, searching through all the commands executed by the Megadrive CPU with the standard Linux debugging tools.Going through the trace, [Chris] found the instruction that decremented that value representing Sonics lives, replaced it with NOPs, in effect giving himself infinite lives. This is a lot like how the Game Genie works, only using much, much better tools.

Of course a USB dev kit wouldn’t be much use if it could only modify existing games. The real power of [Chris]’ work comes from being able to develop your own demos, games, and homebrew apps.

[Chris] needed to write a small homebrew Mega Drive app for the ROM loader portion of his dev kit using SGDK. Disassembling his own code with the dev kit, he was able to take a look at the instructions, and potentially even modify his loader.

It’s a really impressive technical accomplishment, and something that could be a boon to the extremely small homebrew scene for the Mega Drive. All the boards, code, and everything else are available over on [Chris]’ github, with the entire project written up on hackaday.io. Videos below.

Continue reading “The Sega Mega Drive Dev Kit”