If you’re looking to get into flying first-person view (FPV) remote controlled aircraft, there’s an incredible amount of information available online. Seriously, it’s ridiculous. In fact, between the different forums and the countless YouTube videos out there, it can be difficult to sort through the noise and actually find the information you need.
What if there was one location where FPV folks could look up hardware, compare notes, and maybe even meet up for the occasional flight? That’s the idea behind the recently launched DIYFPV. In its current state the website is a cross between a social media platform, a hardware database, and a tech support forum.
 Being able to look up parts to see who has them in stock and for what price is certainly handy, and is likely to become a very valuable resource, especially as users start filling the database with first-hand reviews. There’s no shortage of social media platforms where you can post and chat about FPV, but pairing that with a dedicated tech support section has promise. Especially if the solutions it produces start getting scrapped by show up in search engines.
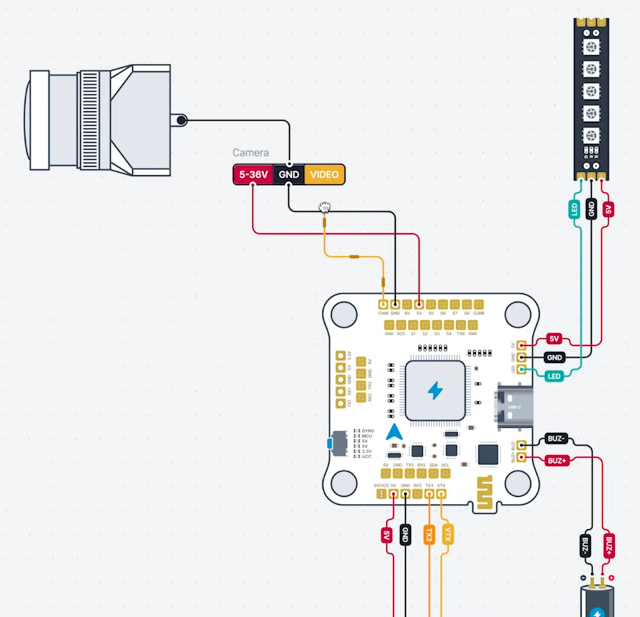
But the part of DIYFPV that has us the most interested is the interactive builder tool. As explained in the announcement video below, once this feature goes live, it will allow users to pick parts from the database and virtually wire them together. Parts are represented by high-quality illustrations that accurately represent connectors and solder pads, so you won’t be left guessing where you’re supposed to connect what. Schematics can be shared with others to help with troubleshooting or if you want to get feedback.
The potential here is immense. Imagine a function to estimate the mass of the currently selected electronics, or a simulation of how much current it will draw during flight. It’s not clear how far DIYFPV plans on taking this feature, but we’re eager to find out.