Wireless Warning Sign

Bluetooth-Enabled Danger Sign For Lab

[A Raymond] had some free time at work, and decided to spend it on creating a wireless warning sign. According to his blog profile, he is a PhD student in Applied Physics. His lab utilizes a high-powered laser system. His job is to use said system, but only after it’s brought online by faculty scientists. The status of the laser system is changed by a manual switchbox that controls the warning signs wired around the lab entrances. Unfortunately, if you were in the upstairs office, you only knew this after running downstairs to check. [A Raymond’s] admitted laziness finally got the better of him – he wanted a sign that displayed the laser’s status from the comfort of the office. He had an old sign he could use, but he wanted a way for it to communicate with the switchbox downstairs. After some thought, he decided Bluetooth was the way to go, using a pair of BlueSMiRF Bluetooth modules from Sparkfun and Arduino Uno R3’s.

He constructed a metal box that intercepted the cable from the main switchbox, mounting one BlueSMiRF and Uno into it. Upon learning that the switchbox sends 12V AC signals over three individual status wires, he half-wave rectified the wires and divided their voltages so that the Uno wouldn’t fry. Instead, it determined which status wire that had active voltage. and sent a “g(reen)”, “y(ellow)”, or “r(ed)” signal continuously via Bluetooth. On the receiving end, [A Raymond] gutted the sign and mounted the other BlueSMiRF and Uno into it along with some green, yellow, and red LEDs. The LEDs light up in response to the corresponding Bluetooth signal.

The result is a warning sign that is always up-to-date with the switchbox’s status. We’ve covered projects using Bluetooth before, from plush birds to cameras– [A Raymond’s] wireless sign is in good company. He notes that it’s “missing” a high pitched whining noise when the “Danger” lights are on. If he decides to add an accompanying (annoying) sound, he couldn’t go wrong with something like this. Regardless, we’re sure [A Raymond] is happy that he no longer has to go back and forth between floors before he can use the laser.

Espruino Pico, Javascript On A USB Stick

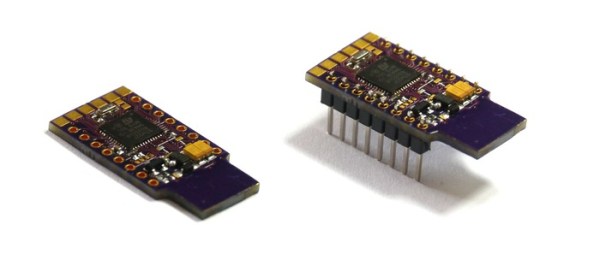
There are probably very few official numbers for this, but web developers at least seem to outnumber the amount of people who regularly poke pins and registers with C. For them, the embedded world must be a scary and foreboding domain, full of bitwise operations and dynamic types. [Gordon] figured there was another way and built a Javascript interpreter for a microcontroller. The latest board built around this interpreter is up on Kickstarter, and its even smaller and more capable than his earlier version.

This isn’t [Gordon]’s first rodeo; last year he launched the (full-sized) Espruino, featuring an ARM Cortex M3 and his very own Javascript interpreter. The large-scale Espruino was a rousing success, and now he’s moving on to a smaller thumb drive-sized footprint for the Pico. The hardware is a bit better, relying on the ARM Cortex M4 STM32F4 with a bit more RAM, and this time the board is slightly cheaper. It still runs the same Javascript interpreter, though, so all the code is exactly what you’d expect.

We haven’t seen many projects using this tiny Javascript of Things, but the new layout does make it fantastically useful. Depending on how the crowd funding campaign turns out, [Gordon] might be adding socket, and USB HID support, along with inline C functions.

From Nerf Gun To RF Cannon: Building A Movie Prop

[David Windestål] is back in the USA, and this time he’s armed and dangerous! He’s built an incredible RF cannon prop (YouTube link) as part of his drone hunter wardrobe for the Rotor DR1 series. [David] is no stranger to Hackaday. We’ve previously seen him gliding R/C planes from the edge of space and building afterburners as part of the Flite Test crew.

[David’s] drone hunter character is armed with a nasty RF cannon designed to fry drones out of the sky. The hunter can then collect and sell their Arcanum pellet power sources. [David] started with a seriously big Nerf gun. He cut off the front half of the gun and replaced it with a helical antenna. This is the same type of antenna [David] uses in his video ground stations. Coupled with a laser cut wood frame, the coil looks downright dangerous. We’re glad it’s just for show.

[David] added a few more accessories to the gun, including switches, an old heat sink, some wires, and the all-important Arcanum reactor. We seriously love his RF shielded glove, which keeps the hunter’s barrel hand from getting fried. [David] added a layer of copper mesh to a thick chemical resistant glove. He soldered the copper together and added a wire to connect glove and gun. [David] then enlisted the help of DR1 director [Chad Kapper] to paint and weather the gun and shield glove. The results are simply stunning.

We love watching hackers step a bit outside their element and build props like this. They always add a few realistic features that make even the most futuristic sci-fi prop a bit more plausible.

Continue reading “From Nerf Gun To RF Cannon: Building A Movie Prop”

The Hackaday Prize: Interview With A ChipWhisperer

chipwhisperer

Every finalist for The Hackaday Prize has some aspect of it that hasn’t been done before; finding the chemical composition of everything with some 3D printed parts is novel, as is building a global network of satellite ground stations with off the shelf components. [Colin]’s ChipWhisperer, though, has some scary and interesting implications. By looking inside a microcontroller as its running, the ChipWhisperer is able to verify – or break – security on these chips. It’s also extremely interesting and somewhat magical being able to figure out what data a chip is processing simply by looking at its power consumption.

We have no idea who the winner of The Hackaday Prize is yet, and I’m hoping to remain ignorant of that fact until the party two weeks from now. Until then, you can read the short interview with [Colin O’Flynn], or check out his five-minute video for the ChipWhisperer below:

Continue reading “The Hackaday Prize: Interview With A ChipWhisperer”

Nikes With Power Laces, Just In Time For Next Year

With the world’s first hoverboard being shown a few days ago, we’re on the verge of the fabulous world of tomorrow from Back to the Future. Hoverboards are cool, but there’s a wealth of other cool technology from the far-off year of 2015: Mr. Fusions, inflatable pizza, Dustbusters, and of course, Nikes with power laces. [Hunter] just built them, and with the right shoes, to boot.

[Hunter] is using the BttF-inspired Nike Air Mag shoes for this build, along with a few bits of electronics – an Arduino pro mini, a force sensing resistor, and a motor. The build began by carving out a notch in the back of the shoe for the electronics. A small bit of fishing line goes around the shoe, providing the power behind the power laces.

A force sensitive resistor under the heel of the insole tells the microcontroller when a foot is inside the shoe, and a rotary encoder on the motor shaft makes sure all the power lace cycles are the same. It’s not quite the same as the shoe seen on screen – the lower laces can’t be replicated and it’s certainly not as fast as the BttF shoes, but it does work, and as far as shoelaces are concerned, they work well.

Videos below.

Continue reading “Nikes With Power Laces, Just In Time For Next Year”

DIY FPV Goggles

DIY FPV Goggles Born From Necessity Of Cheapness

So now that you’ve built your quadcopter and can fly it without crashing most of the time, what’s next? How about metaphorically hopping into the pilot’s seat with a First Person View setup. Great idea… but the cost of the required gear can be a deal breaker. FPV goggles alone range from the low to high hundreds. [sneaky] was using his laptop screen for his FPV setup and decided to try to make is own FPV goggles.

The display is just a small LCD screen that was purchased off eBay. Craft foam board was cut, bent, glued and duct taped to form a box about the same size as the LCD screen which is also secured to the box with duct tape. [sneaky] then cut the opposite side of the box to fit his face before he lined it with 1/2″ weatherstripping foam. Staring at an LCD screen just inches from your face is sure to cause some discomfort. A Fresnel lens inserted in between the user’s eyes and the LCD reduces eye strain to make long flights tolerable. The whole assembly is then held to your noggin via a recycled ski goggle strap.

In the end, [sneaky] likes his new goggles better than his old laptop screen and sun shade setup. The goggles aren’t too heavy and he can wear them comfortably for a while. We’ve seen a DIY FPV goggle setup in the past that uses individual lenses for each eye rather than one large Fresnel lens.

A Pair Of Projects To Scare The Trick-or-Treaters

The countdown is on! There’s only a few days left until Halloween, and if you’re still looking for something to spice up the experience for the kids heading to your door, [MagicWolfi] has just what you need. He’s put together two motion-sensing projects that are sure to startle any trick-or-treater.

The first project is a chain of LED-lit pumpkins that are activated by a motion sensor. A set of inverters paired with RC delay lines light up the pumpkins sequentially. They are arranged almost like a strand of Christmas lights and are powered by AA batteries, so in theory they could be expanded to make a strand as long as needed. The project was inspired by a motion-sensing dress and works pretty well as a Halloween decoration!

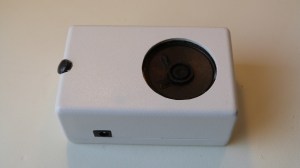
9378581414283863206[MagicWolfi] is pairing the LED pumpkins with his second project which uses another motion sensor to play scary sound effects. Dubbed the Scare-o-Matic, this device uses a 45-millimeter speaker connected to a SparkFun microSD audio module to produce the scary sound effects. Each time it is triggered it plays a different sound from the list. There are videos and schematics for each of these projects on the project sites if you are interested in recreating any of these before Friday!