Try Not To Fall Off The Backwards Brain Bike

[Destin] of SmarterEveryDay fame has a challenge for your brain : a bicycle where the handlebars turn the front wheel in the opposite direction of a typical bike (YouTube link). For example, turning the handlebars left turns the wheel right and vice versa. He warns you it’s harder than it looks.

The hack that pulls this off is a simple one compared to bike hacks we’ve previously covered. Gears on the head tube make this possible. It was built by his welder friends who challenged him to ride it. He couldn’t at first; determined to overwrite his brain’s memory of bike riding, he practiced until he finally succeeded. It took him eight months. When it was time to ride an old-fashioned bike, it only took him about twenty minutes to “un-learn” the Backwards Brain Bike. [Destin’s] biking illustrates neuroplasticity, memory, and learning in a fun way (fun for us; no doubt frustrating for him).

As a testament to the sponge-like brains of youth, [Destin’s] son learned to ride the Backwards Brain Bike in only two weeks.

Continue reading “Try Not To Fall Off The Backwards Brain Bike”

Workbench Eye Candy From Around The World

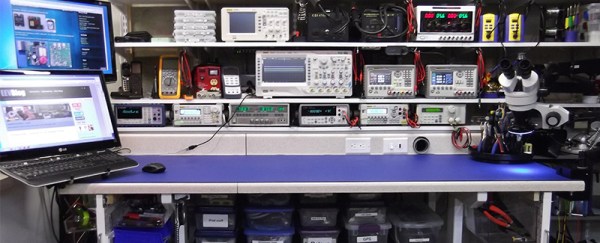
The workbench. We’re always looking for ways to make the most out of the tools we have, planning our next equipment purchase, all the while dealing with the (sometimes limited) space we’re allotted. Well, before you go off and build your perfect electronics lab, this forum thread on the EEVblog should be your first stop for some extended drooling research.

You’ll find a great discussion about everything from workbench height, size, organization, shelf depth, and lighting, with tons of photos to go with it. You’ll also get a chance to peek at how other people have set up their labs. (Warning, the thread is over 1000 posts long, so you might want to go grab a snack.)

We should stop for a moment and give a special note to those of you who are just beginning in electronics. You do not need to have a fancy setup to get started. Most of these well equipped labs is the result of being in the industry for years and years. Trust us when we say, you can get started in electronics with nothing more than your kitchen table, a few tools, and a few parts. All of us started that way. So don’t let anything you see here dissuade you from jumping in. As proof, we’ve seen some amazingly professional work being done with the most bare-bones of tools (and conversely, we seen some head-scratching projects by people with +$10,000 of dollars of equipment on their desk.)

Here’s some links that you might find handy when setting up a lab. [Kenneth Finnegan] has a great blog post on how his lab is equipped. And [Dave Jones] of the EEVblog has a video covering the basics. One of the beautiful things about getting started in electronics is that used and vintage equipment can really stretch your dollars when setting up a lab. So if you’re looking into some vintage gear, head on over to the Emperor of Test Equipment. Of course no thread about workbenches would be complete with out a mention of Jim Williams’ desk. We’ll leave the discussion about workbench cleanliness for the comments.

Making Music With Clojure And Bananas

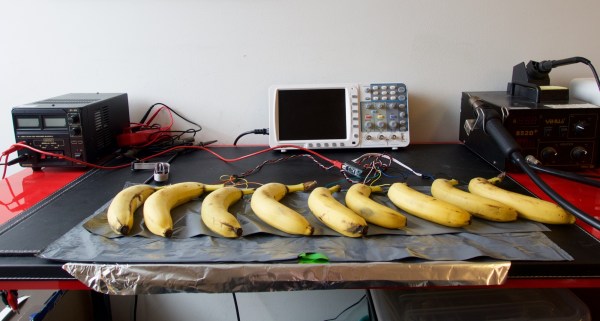
At this point, the banana piano is a pretty classic hack. The banana becomes a cheap, colorful touch sensor, which looks sort of like a piano key. The Arduino sets the pin as a low-level output, then sets the pin as an input with a pull up resistor. The time it takes for the pin to flip from a 0 to a 1 determines if the sensor is touched.

[Stian] took a new approach to the banana piano by hooking it up to Clojure and Overtone. Clojure is a dialect of Lisp which runs in the Java Virtual Machine. Overtone is a Clojure library that provides tons of utilities for music making.

Overtone acts as a client to the Supercollider synthesis server. Supercollider has been around since 1996, and provides a wide array of sound synthesis functions. Overtone simply tells Supercollider what to do, letting you easily program sounds in Clojure.

The banana piano acts as an input to a Clojure program. This program maps the banana to a musical note, then triggers a note on Overtone’s built-in piano sampler. The result is a nice piano sound played with fruit. Of course, since Overtone and Supercollider are very flexible, this could be used for something much more complex.

After the break, a video of the banana piano playing some “Swedish Jazz.”

Continue reading “Making Music With Clojure And Bananas”

3D Printed Metal Assembly

New 3D Printing Techniques At AMUG 2015

Sometimes there’s a lot of perks to working for a cutting edge tech company while also being a writer here at Hackaday. This week I had the opportunity to attend AMUG 2015 — the Additive Manufacturing User Group conference in Jacksonville, Florida.

I saw companies big and small, checked out the newest techniques like metal printing and mold making, and met a ton of interesting people. Join me after the break for the rundown and a video summary of my experience.

Continue reading “New 3D Printing Techniques At AMUG 2015”

Thursday Drink-Up In The City

Hackaday is headed to New York this week. Grab your projects and catch up with us for a tasty beverage. We’ll be hanging out at the Antler Beer & Wine Dispensary on Thursday night starting at about 7. Be part of Hackaday’s first ever social event in NYC!

This is the pre-game for our Hackathon which starts on Saturday afternoon. So far we have eight of the Hackaday crew confirmed for evening: [Brian Benchoff], [Adam Fabio], [Bil Herd], [Sophi Kravitz], [Aleksandar Bradic], [Matt Berggren], [Jasmine Brackett], and [Rob Vincent]. But hey, it wouldn’t be any fun without you there too! We want to pack the place with hardware hackers so grab your friends and RSVP using the link at the top.

This is part of our 2015 Hackaday Prize Worldwide tour. Start your entry now by hammering out a few quick ideas about a future build and we can gab about it on Thursday. See you soon!


The 2015 Hackaday Prize is sponsored by:

Slick Six-Voice Synth For AVRs

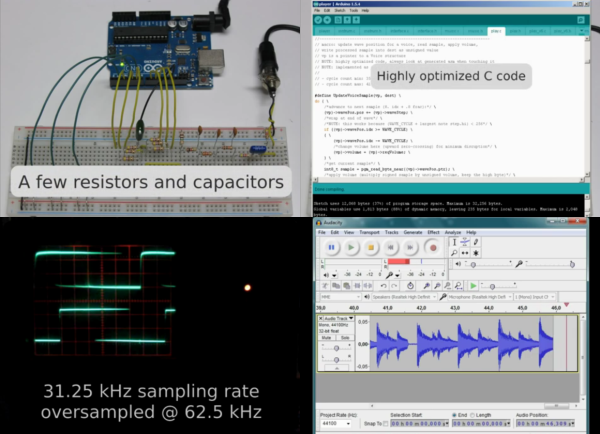
He started off making an AVR synthesized guitar, but [Erix] ended up with much more: a complete six-voice AVR wavetable synthesis song machine that’ll run on an ATMega328 — for instance, on an Arduino Uno.

If you’re an AVR coder, or interested in direct-digital synthesis or PWM audio output, you should have a look at his code (zip file). If you’d just like to use the chip to make some tunes, have a gander at the video below the break.

Continue reading “Slick Six-Voice Synth For AVRs”

An Introduction To Individually Addressable LED Matrices

The most fascinating project you can build is something with a bunch of blinky hypnotic LEDs, and the easiest way to build this is with a bunch of individually addressable RGB LEDs. [Ole] has a great introduction to driving RGB LED matrices using only five data pins on a microcontroller.

The one thing that is most often forgotten in a project involving gigantic matrices of RGB LEDs is how to mount them. The enclosure for these LEDs should probably be light and non-conductive. If you’re really clever, each individual LED should be in a light-proof box with a translucent cover on it. [Ole] isn’t doing that here; this matrix is just a bit of wood with some WS2812s glued down to it.

To drive the LEDs, [Ole] is using an Arduino. Even though the WS2812s are individually addressable and only one data pin is needed, [Ole] is using five individual data lines for this matrix. It works okay, and the entire setup can be changed at some point in the future. It’s still a great introduction to individually addressable LED matrices.

If you’d like to see what can be done with a whole bunch of individually addressable LEDs, here’s the FLED that will probably be at our LA meetup in two weeks. There are some crazy engineering challenges and several pounds of solder in the FLED. For the writeup on that, here you go.