Laser Cutting A Bread Knife

What started out as simply a question of whether or not they could… [G2AS] decided to try making a laser cut serrated bread knife — out of plastic.

Now from a distance this may look like they just took their laser cutter and cut out the pattern of a knife, with a jigsaw edge. But no, they actually laser cut a jig which allowed them to cut the serrated edge on an angle, creating an actual sharp edge. It’s quite the setup, but a pretty awesome result. Continue reading “Laser Cutting A Bread Knife”

Warm Up Your Small Talk With A Thermometer Scarf

Just how cold is it out there? This giant thermometer scarf is a fantastic entry-level wearables project. It’s sure to strike up conversations that move past the topic of weather.

The scarf is built around a FLORA, a Neopixel ring that represents the bulb, and a short length of Neopixels to show the temperature in Fahrenheit and Celsius. Temperature sensing is done with a poorly documented DHT11 that gave [caitlinsdad] the fits until he found Adafruit’s library for them.To make the scarf, [caitlinsdad] used a nice cozy micro-fleece. He built a pocket for the electronics and padded it with polyester fiber fill to diffuse the LEDs. This makes the lights blur and run together, resembling a mercury thermometer.

Once it was up and running, [caitlinsdad] figured out the temperature scale based on the DHT11 readings and marked it out on the scarf with a permanent marker. [caitlinsdad] has a few mods in mind for this project. For instance, it would be easy to add haptic feedback to keep you from being exposed for too long. Another wearable in the same spirit is this hat that has a sunblock reminder system.

Continue reading “Warm Up Your Small Talk With A Thermometer Scarf”

Rube Slowberg

This one was buried in our tips line for a couple of months, but we’re glad it eventually surfaced. [Bob Partington] built the “Rube Slowberg” contraption – it’s billed as the world’s slowest Rube Goldberg Machine. The golf ball that he tee’d off took six weeks to reach it’s rather dramatic end.

Rube Goldberg machines are fascinating, but most often the fun ends quite quickly. [Bob] decided to slow it all down and it took several hacks to get that done. Thankfully for us, the edited video with extensive use of stop-motion and fast forwards brings the chase down to under three minutes.

Check out the video below. It starts with the Golf ball riding a slow boat on molasses, hitching a ride on a Tortoise, running through a series of melting popsicle sticks and then being propelled one tiny bit at a time by a bunch of growing grass. If you are interested is seeing behind the scenes, watch the other video where he talks a little about how he managed to pull it off.

Continue reading “Rube Slowberg”

Hackaday Links: January 10, 2016

Everybody loves cheap stuff, and we hate telling everyone about coupon codes. That said, TI has a new LaunchPad development board they’re promoting. It’s based on the MSP432, the ARM extension of their MSP430 line. The MSP432 is an ARM Cortex M4F, low power, and planned for production later this year.

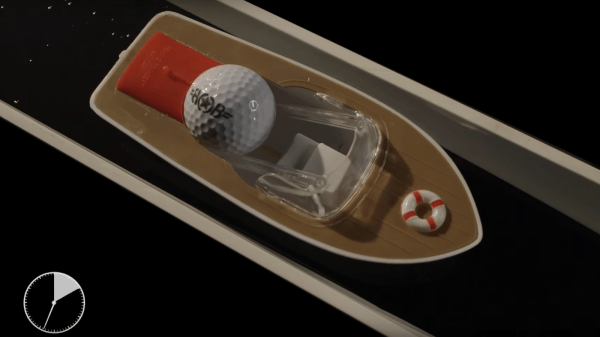
Here’s your daily CES garbage post. Through a collaboration between Sony and Nissan, a car has become a video game controller controller. A controller plugs into the ODB II port, reads throttle, brake, and steering wheel positions (and buttons on the dash/steering wheel, I guess), and translates that into controller input for a PlayStation 4. What games do they play with a car? You would think Gran Turismo, Rocket League, or other games with cars in them. Nope. Football.

Dangerous Prototypes is a legal Chinese company! [Ian] didn’t say anything about the process about becoming a legal Chinese company because he wrote a blog post, not a book. Shenzhen Dangerous Prototypes Electronics Technology Limited allows them to have an office in the Shenzhen electronics market, hire local and foreign hackers, host Hacker Camp Shenzhen, and allow people to apply for ‘Authorized Authority’ visa letters for the people who need them. Great news for a great company.

The Forge hackerspace in Greensboro, NC is growing. In just over a year they have 160 members and they’ve already outgrown their 3,400 square foot space. Now they’re moving to a larger space that’s twice the size and they’re looking for donations.

People have been taking old iPad screens and turning them into HDMI displays for years now. [Dave] got his mitts on a panel from a Macbook Pro 17″, and turned it into a monitor. It required a $50 LVDS adapter, but the end result is great – a 1920×1200 panel that looks pretty good.

Nixie Tubes Adorn Steampunk Solar Power Meter

The appeal of adding Nixie tube displays to a project seems to know no end. First it was Nixie clocks, now it’s Nixie power meters, with the latest addition being this Nixie-Steampunk hybrid solar power monitor.

We’re suckers for a project with a vintage look, and this one pushes all the buttons. Built on commission for a solar power company CEO’s office, [Paul Parry]’s build is based on a Depression-era Metropolitan-Vickers combined voltmeter and ammeter. The huge meters with mirrored scales and the rich wood of the case – our guess is that it’s mahogany – made a great starting point, and after some careful hole drilling, nine IN-18 Nixies were sprouting from the case. A strip of RGB LEDs below decks added the requisite backlighting of the envelopes, and a Raspberry Pi was enlisted to interpret data from the company’s solar farm and drive the tubes and the meters. The project was capped off with a new finish on the case and a couple of fancy brass plaques.

[Paul] sent us the tip for his build after seeing the last power meter we covered, and we have to say they’re both great looking and functional projects. Keep the Nixie projects coming!

Putting A Trackball Inside A Controller

Gaming on a PC is obviously superior and you would be a fool to argue otherwise. The keyboard and mouse is the obviously superior input device, but there are times when you just want to play games on a couch. [Gabriel] has an interesting solution to this input problem in the second version of his KeyBall Controller. It’s a controller, but it leverages the superior layout and precision of the keyboard and mouse combo, without making any compromises.

[Gabriel]’s KeyBall Controller began its life as several generic console controllers. The main body of is mostly a clone of the original Xbox S controller. Inside, there are parts from a clone SNES controller, a PSX controller, a generic USB trackball, and an iPazzPort USB handheld keyboard.

The construction of the KeyBall follows in the tradition of the best case modders we’ve ever seen: cutting plastic, gluing plastic, applying epoxy putty, and lots of sanding. The electronics for the controller also follow in the most hallowed traditions of case modders: perfboard, hot glue, and many fine strands of wire. Inside the controller is a USB hub to connect all the different USB devices.

It’s a great device that finally solves the problem of putting a traditional keyboard and mouse layout in the palms of your hands.

YAPZH! (Yet Another Pi Zero Hub)

You’d think just about all the permutations of adding a hub to the Raspberry Pi Zero were done. But you’d be wrong. [Daniel’s] approach is to put the Zero inside the existing case for the hub. The LogiLink hub used is in a nice metal case with mounting flanges on the side. It looks robust and not much like a typical consumer hub. This hack would serve well where the Zero and hub might take a few wacks.

Wiring between Zero and Hub

It took some fiddling with the hub components but he made it work. The easy part was wiring the the power and USB test points on the Zero to the hub.

More challenging were the mechanical aspects to physically fit the Zero into the case. Four LEDs were removed since their only purpose was indicating if a cables were plugged into the hub. There are four electrolytic capacitors standing upright that occupied the space needed by the Pi. [Daniel] repositioned them to lie horizontally to provide room for the Zero.

With the Zero able to fit inside the case the next steps are to create mounting holes in the USB board and cut holes in the case to access the HDMI and USB ports and the SD card holder. Some finicky work with a Dremel provided the holes and the cutouts. Fortunately, the mounting holes on the Zero aligned with some open spaces on the USB board. If they don’t, some glue and standoffs might be sufficient.

The only aspect [Daniel] left for you to hack is access to the GPIO port. That would require another cutout to bring out a ribbon cable for controlling your world. After such a nicely detailed writeup with a plethora of pictures, he had to leave something for other hackers to do.