Tiny Morse Code USB Keyboard

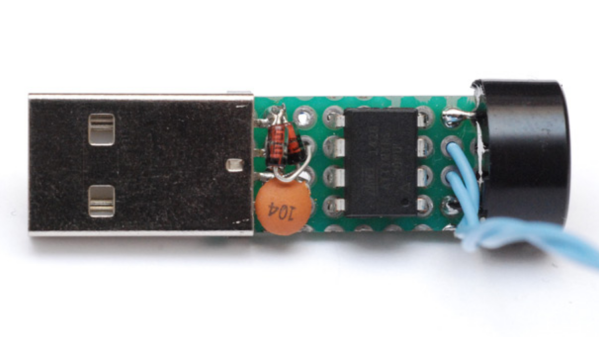
We’ve featured quite a few of [mitxela]’s projects here in the past, and many of them have the propensity to be labelled “smallest”. His Morse Code USB Keyboard Mk II adds to that list. It’s a Saturday afternoon project, with a few parts slapped onto a piece of perf-board, that allows using a Morse key as a USB keyboard. This project isn’t new or fresh, but we stumbled across it while trying to figure out a use for a Morse key lying in the author’s bin of parts. You can practise transmitting, by reading text and typing it out on the key, and then look it up on your computer to see if you made any mistakes. Or you can practise receiving, by asking a friend to punch it out for you. Either way, it’s a great way to hone your skills and prepare for your radio operators license exam.

The project is a follow up to his earlier one where he hooked up the Morse key via a RS-232 — USB converter directly to a computer and let the code do all the work. That turned out to be a very resource hungry, impractical project and made him do it right the next time around. The hardware is dead simple. An ATtiny85, a piezo buzzer, some decoupling capacitors, and a few resistors and zeners to allow a safe USB interface. The design accommodates a straight key, but there is one spare pin left over in the ATtiny to allow for iambic or sideswiper keys too. There is no speed adjustment, which is hardcoded at the moment. That isn’t very user friendly, and [mitxela] suggests adding a speed potentiometer to that last remaining pin on the ATtiny. This would prevent use of iambic/sideswiper keys. Or, you could use the RST pin on the ATtiny as a (weak) IO. The RST pin can read analog values between 5V and 2.5V, and will reset when voltage falls below 2.2V. Or just use another microcontroller as a last resort.

For the USB interface, [mitxela] is using the V-USB library after wasting some time trying to reinvent the wheel. And since this is designed to work as a HID, there are no drivers required – plug it in, and the OS detects it as a keyboard. He’s borrowed code from the EasyLogger project to use the internal oscillator and help free up the IO pins. And to detect the characters being typed, his code uses a long string of compare statements instead of a dictionary lookup. Writing that code was tedious, but it makes the identification quicker, since most characters can be identified in less that five comparisons (one dit = E, two dits = I, three dits = S and so on). This “tree” makes it easier to figure it out.

If you’d like to look up some of his other “tiny” projects, check out The smallest MIDI synthesizer, Smallest MIDI synth, again! and the ATtiny MIDI plug synth.

Continue reading “Tiny Morse Code USB Keyboard”

Electronic Prototyping With A 3D Printer

It would be nice if your 3D printer could spit out PC boards. There’s been lots of work done to make that happen, mostly centered on depositing conductive material, although we’ve been surprised no one has worked out how to just 3D print a plastic resist mask.

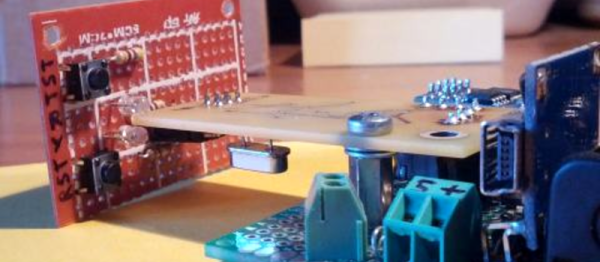
We recently found a GitHub group for [PCBPrints] which has small modules that would be useful in prototyping and breadboarding. They are really just carriers that create plug in modules for switches, LEDs, and the like. It looks like this is a aggregated list of other GitHub projects that realize these designs. The group is in Spanish, but Google Translate is your friend, as usual. You can see a video of one of the button modules in action, below.

Continue reading “Electronic Prototyping With A 3D Printer”

Pikelet – A Pi-Zero PC

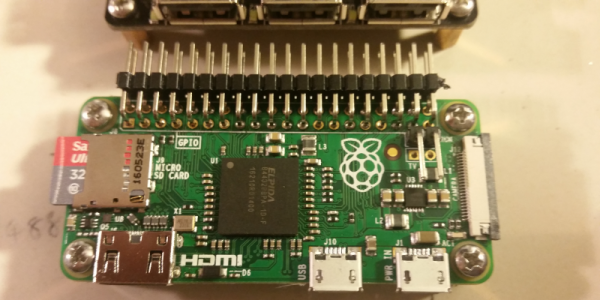
There are many uses for an old 10 Mbps Ethernet hub besides using it as a speed-bump in your network. (No fun in that!) [thinkerzone] decided to gut an old EN104 Bay Networks ‘Netgear Hub’ to re-purpose the solid steel case as a Raspberry Pi Zero PC housing. The project, which [thinkerzone] called Pikelet, aims to be an ‘IoT server’ with the feel of a PC. Note: a PC, not a Gameboy. In his hackaday.io project, he describes the minimum set of features for the Pikelet.

  • Power button – PCs need a power button
  • Power and Status LEDS – Blue for power, RGB for the programmable status LED
  • USB ports – using a Zero4U hub to expand the Pi Zero usb ports
  • Ethernet – using a ENC28J60 module was the original idea, but it burned while making the project
  • HDMI access – the case should ensure the HDMI port is accessible
  • Minimum storage – a 32 Gb SD card was found to be “enough to be useful”
  • UART – via a FT232 module
  • WiFi – a WiFi dongle with an external antenna, since the metal case would degrade the signal if it was inside, so a WiFi hat was not an option

On the software side, it runs the latest version of Raspbian with some additional configuration for the UART port and status LED pins.

In the project logs we can follow along as [thinkerzone] battles through the implementation of the project and, well, Murphy’s Law.  One of the things that a descriptive log is useful for is that it serves as a reminder that an apparently simple project can have a lot of setbacks. Sometimes an easy-to-describe project is quite a challenge to implement. And it can be annoying when explaining the challenges to other (non hackers/makers) persons and they go: “That’s just connecting some wires…”

Is the feeling familiar? It’s nice to see someone else going through it too.

WS2812B LED Clones: Work Better Than Originals!

Commodity electronics manufacturing is a tough game. If you come out with a world-beating product, like WorldSemi did with the WS2812B addressable RGB LED “pixel”, you can be pretty sure that you’re going to be cloned in fairly short order. And we’re all used to horror stories of being sold clones instead of what was ordered. But what if the clones were actually an improvement?

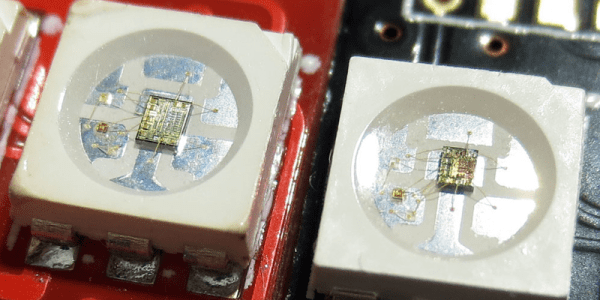
[Gonazar] bought some strips of “WS2812” LEDs and prototyped a project. When stepping up to larger production, he thought he’d go directly to WorldSemi. Long story short, the cheaper LED modules that he’d previously bought weren’t from WorldSemi, but were actually SK6812 clones labelled as WS2812Bs. When he switched to the real thing, he discovered that they had some temperature and pressure sensitivities that the clones didn’t. The clones were better!

They weren’t even straight clones. It turns out that they have a much higher PWM frequency, resulting in less flicker at low brightnesses. The distributor came clean, saying that they swapped them out without note because they spoke the same protocol, but were a strict improvement.

Continue reading “WS2812B LED Clones: Work Better Than Originals!”

Fifty Shades Of Gray Code

Some years back, a museum asked me to help them with an exhibit a contractor had built for them. It was a wheel like the one on Wheel of Fortune, but smaller and mounted on the wall instead of the floor. You would spin the wheel, it would stop on some item, and a computer would play a short video about the item. Physically and mechanically, it was a beautifully built exhibit. The electronics, though, left something to be desired.

In principle, this is pretty simple computer task. Measure the position of the wheel, and when it stops moving, play a video based on the position. The problem was the folks who created the artistic mechanics didn’t think hard about the electronics behind it. Sometimes–but not often–the wheel would play the wrong video. Sometimes it wouldn’t play at all.

The Prime Suspect

My immediate suspicion turned out to be correct. I took the wheel off its mount to discover copper foil tape on the back of it. Each pie wedge had foil in different areas and there were two brushes in each area. When the wheel stopped, two of the brushes would be shorted together and the rest were open. The way they detected that was bizarre, but that wasn’t the problem. (It involved a cannibalized PS/2 keyboard.)
Continue reading “Fifty Shades Of Gray Code”

Friday Hack Chat: CircuitPython With Adafruit Engineers

What the heck is CircuitPython? Get that question answered along with many more during this Friday’s Hack Chat. Three engineers from Adafruit join us as [Ladyada], [Tony DiCola], and [Scott Shawcoft] lead a CircuitPython discussion at Noon PST on 1/27/17.

CircuitPython is Adafruit’s new extension on the MicroPython codebase. It adds support for SAMD21 processors in MicroPython and reworks the API for better support across platforms and better documentation. Does this still sound like jibberish? The Python programming language has been extended to microcontrollers. CircuitPython is furthering that work and this Hack Chat is the perfect opportunity to talk with the people who are doing that work. They will also be doing a giveaway of five CircuitPlayground m0 Express boards (brand new, not yet released hardware).

Don’t miss this Hack Chat! Here’s a handy web tool to help convert Friday, January 27 at noon PST to your local time.

Here’s How to Take Part:

join-project-team-message-buttons
Buttons to join the project and enter Hack Chat

Hack Chats are live community events that take place in the Hackaday.io Hack Chat group messaging. Visit that page (make sure you are logged in) and look for the “Join this Project Button” in the upper right. Once you are part of the project, that button will change to “Team Messaging” which takes you to the Hack Chat.

You don’t have to wait for Friday, join Hack Chat whenever you like and see what the community is currently talking about.

Voltmeter Speaks MQTT Without Libraries

[Emilio Ficara] [built himself an Internet-connected MQTT multimeter](http://ficara.altervista.org/) (translated from Italian by robots). Or maybe we should say that [Emilio Ficara] undertook a long string of cool hacks that ended up in a WiFi-enabled multimeter, because the destination isn’t nearly as interesting as the voyage.

debugtool-sch

The multimeter, a DT-4000ZC, has a serial output but instead of transferring the data directly, it sends which cells on the LCD screen need to be activated. For testing along the way, [Emilio] used his own USB-serial-to-ESP01 dongle, which sounds like a useful tool to have around if you’re debugging an AT command session. He made a cute AVR SPI-port debugging aid with a reset button and diagnostic LEDs that we’re going to copy right now. Other home-made tools, like a 3.7V Li-ion battery manager and a serial data snooper make this project worth a look.

Continue reading “Voltmeter Speaks MQTT Without Libraries”