“Alexa, What Plane Is That?”

We’ve all probably done it — gazed up at a passing jetliner and wondered where it was going and what adventures its passengers were embarked upon. While the latter is hard to answer, the former just got a bit easier: just ask Alexa what the plane is.

Granted, [Nick Sypteras]’s Echo Dot isn’t quite omniscient enough to know exactly what plane you’re looking at. His system benefits from the constraints offered by the window of his Boston apartment — from the video below, we’d guess somewhere in Beacon Hill or the West End — that offers a view of the approach to Logan Airport. An RTL-SDR dongle receives the ADS-B transmissions from all aircraft in the vicinity, and a Raspberry Pi does a lookup, picks the closest plane, and scrapes the departure and arrival airports from FlightRadar24. Alexa does the rest, but we have to confess that hearing “Boeing seven hundred eighty-seven” rather than “seven eighty-seven” would drive us nuts.

If you don’t have the limited view of an airport approach that makes [Nick]’s hack workable, maybe a plane-spotting robot camera would work better for you.

Continue reading ““Alexa, What Plane Is That?””

Featured Image

Go Go Camera Slider

Are your arms getting tired from pushing your camera back and forth across your camera slider? That must be the case with [Max Maker], which led him to convert his manual slider into a motorized one.

The electronics are minimal — an Arduino Micro, a few toggle switches, A4988 Stepper Driver, 12V battery pack, and the ever popular NEMA 17 stepper motor. If you’re wondering why we said ‘switches’ instead of ‘switch’, it’s because 4 of the switches are used to select a time frame. The time frame being how long it takes for the slider to move from one end to the other.

Fabrication shown off in the video below will net you a few new tricks. Our favorite is how he makes a template for the NEMA motor using masking tape. After completely covering the face of the motor with tape, he clearly marks the mounting holes and colors in the shape of the motor plate as if he were doing frottage. Then just pull the tape off as one and stick it onto the slider rack.

Not including the cost of the slider itself, the parts list came out to be around $75. Even if you don’t yet own a slider, this a great first adventure into building a CNC machine. It is one degree of freedom and the hard parts have already been taken care of by the manufacturer of the slider. Get used to using belts and programming for stepper motors and you’ll be whipping up your own 3D printer with a fancy belt scheme for the Z-axis.

Continue reading “Go Go Camera Slider”

Using A Thermal Camera To Spot A Broken Wrist

Chemist and Biochemist [Thunderf00t] has shown us a really interesting video in which you can spot the wrist he broke 10 years ago using a thermal camera.

He was on an exercise bike while filming himself on a high-resolution thermal camera, As his body started to heat up he noticed that one hand was not dumping as much heat as the other. In fact one was dumping very little heat. Being a man of science he knew there must be some explanation for this. He eventually came to the conclusion that during a nasty wrist breaking incident about 10 years ago it must have affected the blood-flow to that hand, Which would go on to produce these type of results on a thermal camera while exercising.

Using thermal camera’s to spot fractures in the extremities is nothing new as it has the benefit of eliminating radiation exposure for patients, But it’s not as detailed as an X-ray or as cool as fluoroscopy and is only useful for bones near the surface of the skin.  It’s still great that you can visualize this for yourself and even after 10 years still notice a significant difference.

Continue reading “Using A Thermal Camera To Spot A Broken Wrist”

Is It A Stupid Project If You Learn Something From The Process?

Fidget spinners — so hot right now!

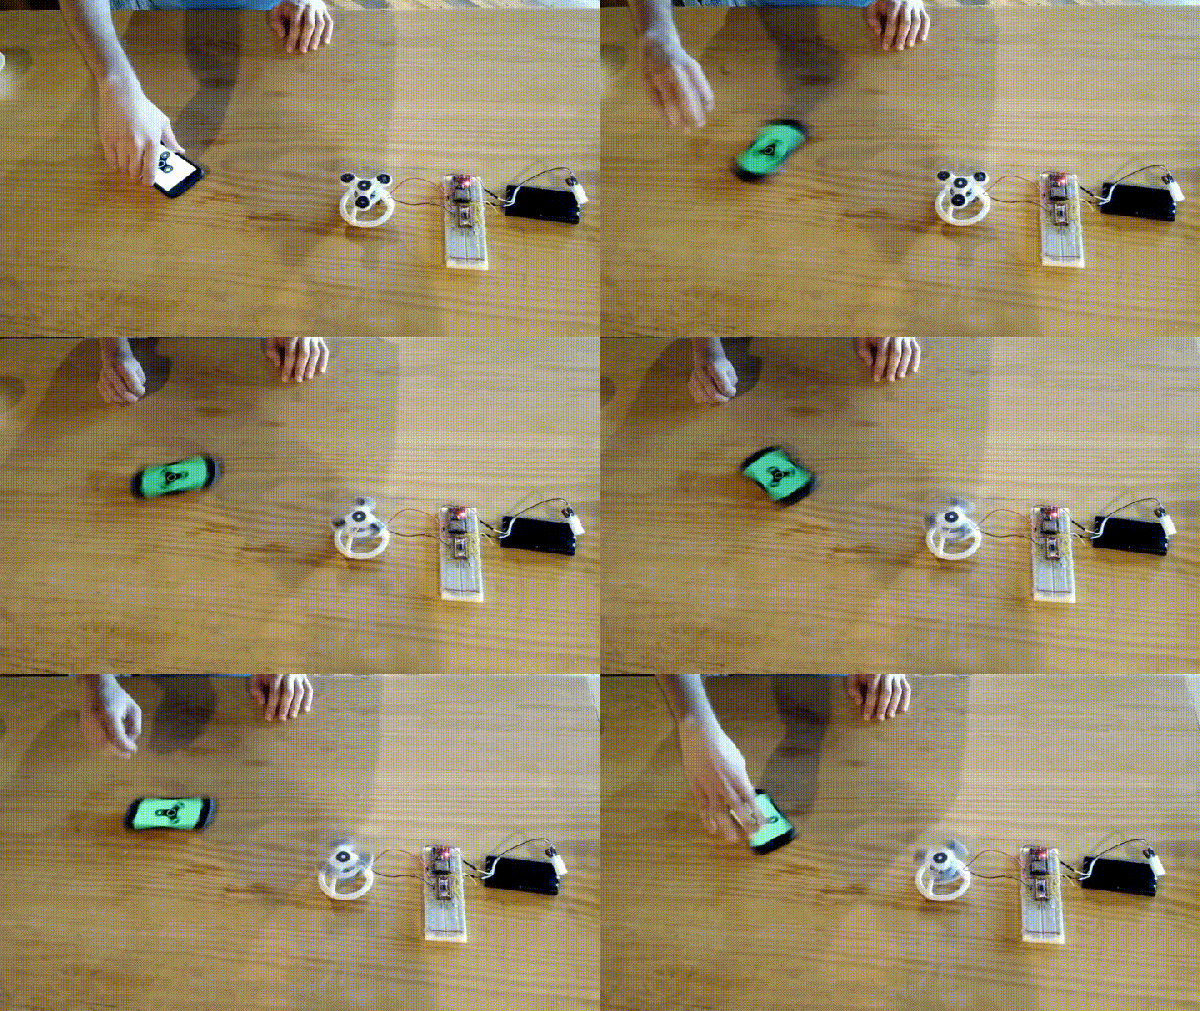
[Ben Parnas], and co-conspirator in engineering inanity [Greg Daneault], brought to the recent Boston Stupid Hackathon in Cambridge, MA, their IoT-enabled Fidget Spinner…. spinner. A Spidget Finner. Yep, that’s correct: spin the smartphone, and the spinner follows suit. Stupid? Maybe, but for good reason.

Part satire on cloud tech, part learning experience, a curt eight hours of tinkering brought this grotesque, ESP32-based device to life. The ESP can the Arduino boot-loader, but you’ll want to use the ESP-IDF sdk, enabling broader use of the chip.

Creating an app that pulls data from the phone’s gyroscope, the duo set up the spinner-bot to access the WiFi and request packets of rotational data from the smartphone via a cloud-based server — the ‘spincloud.’ Both devices were enabled as clients to circumvent existing IoT services.

Continue reading “Is It A Stupid Project If You Learn Something From The Process?”

Hackaday Prize Entry: DIY DLP

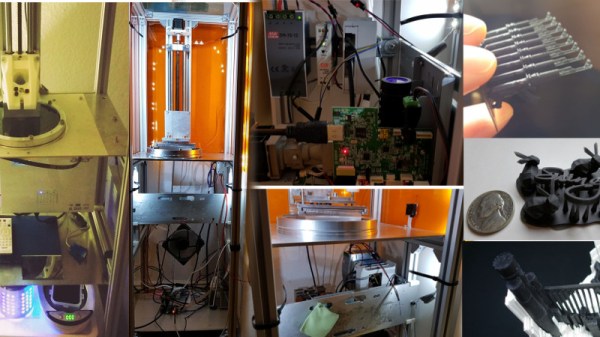
The 3D printing revolution is upon us and the technologies associated with these machines is evolving every day. Stereolithography or SLA printers are becoming the go-to printer for high-resolution prints that just can’t be fabricated on a filament-based machine. ADAM DLP 3D printer project is [adambrx]’s entry into the Hackaday Prize and the first step in his quest for higher quality prints on a DIY budget.

[adambrx]’s current iteration employs a Raspberry Pi 3 and a UV DLP Projector, all enclosed in a custom frame assembly. The logs show the evolution of the printer from an Acer DLP to the current UV DLP Light Engine. The results are quite impressive for a DIY project, and [adambrx] has put up images of 50-micrometer pillars and some nifty other prints which show the amount of work that has been put into the project.

It is safe to say that [adambrax] has outspent the average entry to the Hackaday Prize with over €5000 spent in around 3 years. Can [adambrx] can keep this one true to its DIY roots is yet to be seen, however, it is clear that this project has potential. We would love to see a high-resolution SLA printer that does not cost and arm and a leg.

Manned Multirotor Flies Again, Electric Style

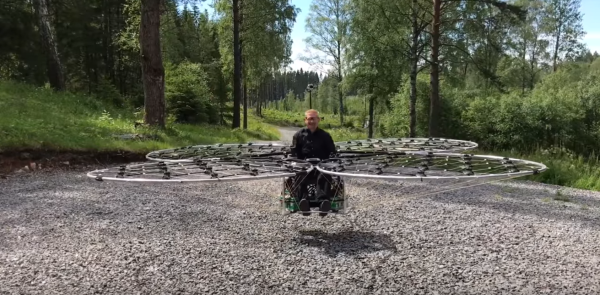
You can’t keep a good hacker down. [Amazingdiyprojects] wants to build a reliable manned multirotor, and by golly, he’s doing it.  After a crash of his petrol powered design, [Amazingdiyprojects] went back to the drawing board. The new version is called chAIR, and is electric-powered.

The flying machine is lifted by 76 Multistar Elite quadcopter motors. Control is passed through 5 KK 2.1 quadcopter controllers. The KK board is a very simple controller, and we’re a bit surprised [Amazingdiyprojects] didn’t go with a newer setup. Batteries are 80x Multistar 4S 5.2Ah packs, stored below the seat. If these names sound familiar, it’s because just about every electrical part was purchased from Hobby King – an online hobby retailer.

The machine has an all up weight of 162 kg. A bit more than a single person can carry, but chAIR breaks down for easy transport.

We’re blown away by all the little details on chAIR – including the new control system. The left stick controls throttle, while right appears to control aileron/elevator and twist for the rudder control. Somewhat different from the collective/cycle controls found on conventional helicopters!

Even the battery connectors needed custom work. How do you connect 20 batteries at once? [AmazingDiyProjects] mounted XT60 connectors in a metal ring. The ring is compressed with a central screw. A quick spin with a battery-powered drill allows this new aviator to connect all his batteries at once. Is this the future of aviation, or is this guy just a bit crazy? Tell us in the comments!

Continue reading “Manned Multirotor Flies Again, Electric Style”

The Breadboard RF103

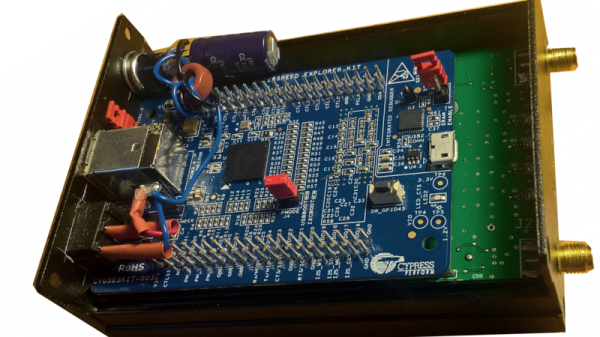
When [ik1xpv] sets out to build a software-defined radio (SDR), he doesn’t fool around. His Breadboard RF103 sports USB 3.0, and 16-bit A/D converter that can sample up to 105 Msps, and can receive from 0 to 1800 MHz. Not bad. Thanks to the USB 3.0 port, all the signal processing occurs in the PC without the limitations of feeding data through a common sound port. You can see the device in action in the video below.

The Cypress FX3 USB device is an ARM processor, but it is only streaming data, not processing it. You can find the slightly modified firmware, a driver for using PC software, and schematics and board layouts on GitHub.

Continue reading “The Breadboard RF103”