Play With A Papercraft Electronics Activity Book

As conductive ink becomes readily available and in greater varieties, we’re starting to see some intriguing applications. [Marion Pinaffo] and [Raphaël Pluviange] created a book of papercraft projects that employ silver-based ink for making a circuit’s wires, carbon-based ink for resistance, as well as color-changing ink. Electronics components’ leads are slipped into slits cut into the paper, connected to conductive-ink traces.

[Marion] and [Raphaël] use 555s, ATtiny85s, watch batteries, and other hardware to make each activity or project unique. A number of projects use a rolling ball bearing to make beeps in a piezo speaker. They also created beautifully designed pages to go with the electronics.

It looks like a fun way for neophytes to play around with electronics, and once the paper part is kaput, the user would be left with the hardware. Imagine one of those beginners googling to find the pinout of the Tiny85 or discovering the Stepped Tone Generator and makes one with the 555.

If you like this project you’ll appreciate the working papercraft organ and papercraft resistor calculator we previously published.

Continue reading “Play With A Papercraft Electronics Activity Book”

PobDuino Makes The Most Of Grove

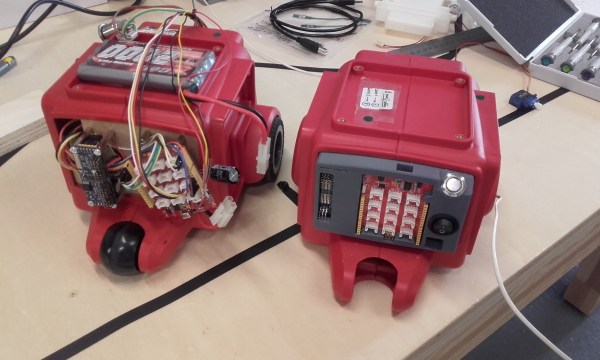
The chassis of a toy robot serves as the base of a robot built by [Jean Noel]. Called #PobDuino, the robot features two Arduino-compatible boards under the hood.

First, a Seeeduino Lotus, a Arduino board peppered with a dozen Grove-compatible sockets. The board, which is the size of an UNO, is mounted so that the plugs project out of the front of the robot, allowing ad-hoc experimentation with the various Grove System modules. Meanwhile, a custom ATmega328 board (the PobDuino) interprets Flowcode instructions and sends commands to the various parts of the robot: servos are controlled by an Adafruit servo driver board and the DC motors are driven by a Grove I2C motor driver.

We love how easy it is to customize the robot, with both the Lotus and the Adafruit 16-channel servo driver on the exterior of the robot. Just plug and play!

Learn more about Grove-compatible plugs and a lot more in [Elliot]’s My Life in the Connector Zoo.

Eye Tube Tests Capacitors

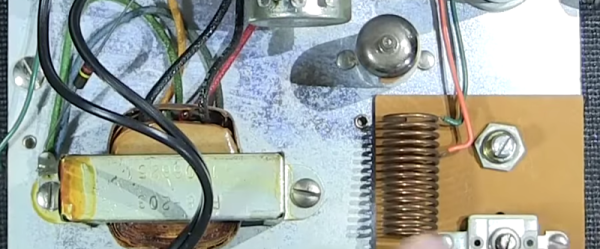
Most component testers require removal of a component to test it. [Mr Carlson] recently restored an old Paco C-25 in-circuit capacitor tester. He does a very complete video tearing it down and showing how it works and why.

The tester uses an eye tube (sometimes called a magic eye tube) as an indicator. A 40 MHz oscillator produces a signal that finds open and shorted capacitors. You can also measure resistance, although you have to wonder how accurate it would be in circuit. If you want to read the original manual, there are a few copies online.

Continue reading “Eye Tube Tests Capacitors”

Make Your Own Reed Switches

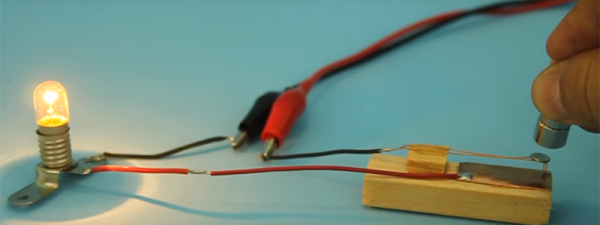
[Lucid Science] shows us how to make some simple reed switches. Reed switches are simple components that detect a magnetic field and can close or open a circuit once detected. While not really a thing of beauty, these DIY reed switches should help you out if you just can’t wait to order some or you fancied trying your hands at making some components from scratch.

Reed switches normally come in very small form factors so if you need something small then this may not be for you however the video does show you on a macro scale the fundamental workings of a reed switch. To make your own reed switch you need only a few parts: some copper, enamelled wire and magnets. They really are simple devices however sometimes it’s easy to overlook how simple some things are when they are so small that you can’t really see how they work.

Making your own components from scratch is probably the best way to understand the inner workings of said component. In the past we have seen some pretty awesome self built components from these beautiful DIY Nixie tubes to even making your own LEDs

Continue reading “Make Your Own Reed Switches”

Wire-bots, Roll Out!

Designing and 3D-printing parts for a robot with a specific purpose is generally more efficient than producing one with a general functionality — and even then it can still take some time. What if you cut out two of those cumbersome dimensions and still produce a limited-yet-functional robot?

[Sebastian Risi] and his research team at the IT University of Copenhagen’s Robotics, Evolution, and Art Lab, have invented a means to produce wire-based robots. The process is not far removed from how industrial wire-bending machines churn out product, and the specialized nozzle is also able to affix the motors to the robot as it’s being produced so it’s immediately ready for testing.

A computer algorithm — once fed test requirements — continuously refines the robot’s design and is able to produce the next version in a quarter of an hour. There is also far less waste, as the wire can simply be straightened out and recycled for the next attempt. In the three presented tests, a pair of motors shimmy the robot on it’s way — be it along a pipe, wobbling around, or rolling about. Look at that wire go!

Continue reading “Wire-bots, Roll Out!”

Fidget Spinner Slash Drone Is Both

So Hackaday loves fidget spinners and we don’t care who knows it. Apparently so does [Jeremy S Cook], who decided to mash up a spinner and a cheap quadcopter. To what end? Is that even a question? Spinners are the bearing-studded equivalent to the Rubik’s Cube craze of the ’80s and all we can do is embrace it.

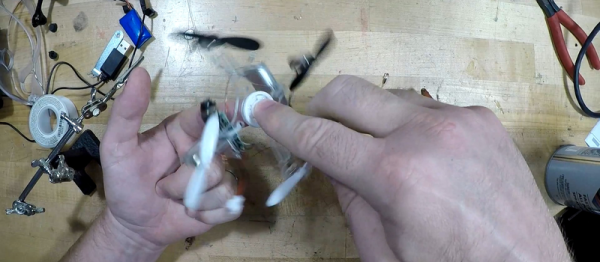
[Jeremy] designed a quadcopter shape with a hole in the center matching a VCB 22 mm ceramic bearing he had on hand. He CNCed out the design from a sheet of Lexan resin. Then he detached the electronics amd motors from a quad.

He used a rotary tool to cut off the housing, removed the motors, then inserted them in the new frame, using hot glue to secure them. He installed the control board 90 degrees off of the frame, before realizing it would mess with the accelerometer and re-installed it flat. Meanwhile, the center of the frame sports the all-important bearing.

If you’re looking for more quad projects check out these cool projects: a Power-Glove-controlled drone, this PVC-pipe quadcopter frame, and reverse engineering quadcopter controls.

Continue reading “Fidget Spinner Slash Drone Is Both”

Hackaday Prize Entry: Pan And Tilt Sprinkler

There are a few very popular irrigation systems entered into this year’s Hackaday Prize. In fact, last year’s winner for the Best Product portion of the Prize was the Vinduino, a soil moisture monitor for vineyards. Most of these irrigation systems use drip irrigation or are otherwise relatively small-scale. What if you need something a little more powerful? That’s where [Patrick]’s PTSprinkler comes in. It’s a massive lawn sprinkler coupled to a computer controlled pan and tilt mount. Think of it as a remote controlled Super Soaker, or the Internet of squirt guns. Either way, it’s a great entry for this year’s Hackaday Prize.

The PTSprinkler is designed to use as many low-cost, off-the-shelf components as possible. This started out with a heavy duty outdoor pan-tilt stage an irrigation solenoid valve.

The idea for this sprinkler is to first manually define a shape on the lawn that the sprinkler should cover. From there, the electronics figure out a fill pattern for this grassy polygon. So far, [Patrick] has an electronics board that will move the pan/tilt stage with the help of a Raspberry Pi. You can check out a video of that in action below.

Continue reading “Hackaday Prize Entry: Pan And Tilt Sprinkler”