A Shocking Wizard Duel

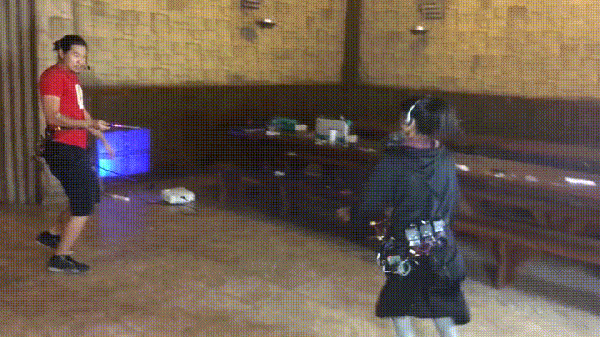
You’ve probably heard of Arthur C. Clarke’s third law, suggesting that any sufficiently advanced technology is indistinguishable from magic. Taking this literally and in the best possible way, [Allen Pan] of [Sufficiently Advanced] is using readily available technology to simulate magical wizarding duels in the fashion of Harry Potter.

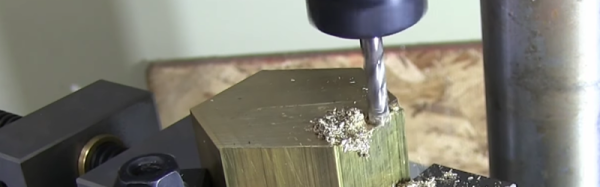
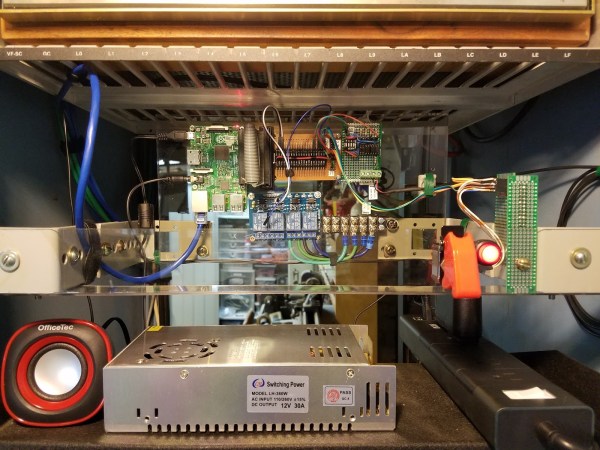
Entitled the Wizard Analogue No-Magic Dueling Simulator — or W.A.N.D.S. for short — is a slightly more interactive version of laser tag. It’s especially engaging because your body is on the line. A Raspberry Pi using Google’s speech recognition service listens for the spell names and — remember, pronunciation is key — fires off the spell from an infrared LED tipped wand. Each duelist has five spells at their disposal, but their accuracy is up to you.

Once your opponent’s receiver registers a hit, an Arduino triggers transcutaneous electrical nerve stimulation (TENS) devices which sends pulses to various regions on the body to simulate the spell’s effect. What’s a few electrical shocks between wizards, eh?

As a defense from the constant barrage, the spell Protego — aimed at one’s own sensor — grants a few seconds immunity; however all spells have a built-in cool-down to prevent their abuse and an LED on the wand indicates when they’re ready to be used.

Continue reading “A Shocking Wizard Duel”

Drill Press To Mill Conversion

Every time we look at the little short Z axis of our CNC mill, we think about converting a drill press to a mill. In theory, it seems like it ought to be easy, but we never quite get around to it. [AvE] did get around to it and made his usual entertaining video about it that you can see below. If you haven’t seen any of [AvE’s] videos before, be warned: there is a little colorful language in a spot or two.

This isn’t a CNC mill, by the way, although we suspect you could convert it. Essentially, he adds a spindle and an XY table to a Ryobi drill press. It sounds simple, but getting everything to work did take a few tricks, including a blow torch.

Actually, turns out the blow torch didn’t really do it, but we won’t spoil the final resolution to the problem. Once it was resolved, though, he did manage to do some actual milling, accompanied by some music we wouldn’t associate with [AvE].

Although billed as a “poor man’s” build, the XY table alone was about $200. So add in the cost of the drill press, the spindle, and the mill and this is still a fair chunk of cash. We’d love to see it compared to a Harbor Freight milling vise. We suspect the Harbor Freight vise might not be as good, but is the difference worth the $130 difference in price?

We’ve seen this kind of conversion done before without the colorful language. If you do this conversion and want some practice, why not build a magnetic carabiner?

Retrotechtacular: DC To DC Conversion, Rotary Style

If you want to convert one voltage to another, what do you do? Well, if you are talking DC voltages today, you’ll probably use a DC to DC converter. Really, these converters generate some sort of AC waveform and then use either an inductor or a transformer to boost or buck the voltage as desired. Then they’ll convert it back to DC. If you are talking AC voltages, you could just use a transformer. But think about this: a transformer has two sides. The primary makes an alternating magnetic field. Just like rotating a shaft with magnets on it could. The secondary converts that alternating magnetic field into electricity just like a generator does. In other words, a transformer is just a generator that takes an AC input instead of a rotating mechanical input.

That’s a bit of an oversimplification, but in the old days, a lot of mobile radios (and other devices) took this idea to its logical conclusion. A M-G (Motor Generator) set was little more than a motor connected to a generator. The motor might take, say, 12V DC and the output could be, for example 300V AC that would get rectified for the plate voltage in a tube radio.

Continue reading “Retrotechtacular: DC To DC Conversion, Rotary Style”

Softly To Sleep, My Raspberry Pi

For all their capacity, shutting down a Raspberry Pi can be a bothersome routine depending on how you have it set up — historically and abrupt cut to the power risks corrupting the SD card. [madlab5] had to make a few changes to a Pi running in headless mode, requiring them to access it externally to shut it down to prevent any damage from pulling the plug. So, why not take the opportunity to whip up a soft shut-down switch?

This is a great beginner project to get one accustomed to working with a Pi. With this in mind, [madlab5] went through two revisions of this idea: the simple way, and the fun way. For the simple way just press the button and the Pi activates a script which shuts it down in thirty seconds. Job done. But, realizing there may be a few circumstances where they’d need more functionality, [madlab5] decided to take a second swing at this.

[madlab5]’s fun way involves a button with a built-in LED and a speaker to blare an announcement that the Pi will self destruct shut down after a short time. Setting the switch up this way takes a little more doing, but you get to add a little more character to your Pi with a custom shutdown report, as well as the option to cancel an accidental button-press.

For any newbies out there, [madlab5] is kind enough to provide their code and diagrams in their blog post. If remotes are more your thing, we have also featured a similar beginner project to shut down your Pi.

[via /r/Raspberry_Pi_Projects]

We Dig This LEGO Excavator Conversion

[Frank] was lucky enough to score a bucket wheel excavator LEGO set as a birthday present, and we won’t lie – we’re jealous. However, out of the box, the kit is somewhat limited; there is only one motor to animate the entire machine and it can’t be fully remote controlled. But don’t worry — [Frank] set out to change that (Google Translation).

The first part of the build was to add motors to control the different functions of the excavator. One motor was added for each of the two tracks to allow the machine to drive forwards, backwards, and turn. Two more motors were added to raise and lower the digging buckets, and spin the tower. Finally, the original motor was left in place to turn the conveyor.

With that done, [Frank] then used a Raspberry Pi 3 to control all the hardware, being sure to house the new electronics in LEGO for an original look. The Raspberry Pi might be a lot of muscle to simply control a few motors, but it made it quick and easy for [Frank] to implement a Wiimote as a controller over Bluetooth. You can check out a couple demo videos in his most recent update.

It’s a great project, and we’d love to see the Raspberry Pi put to good use by allowing control over the Internet so we can dig in the sand over lunch breaks. We’ve seen some great LEGO hacks before, like this method of modifying cheap gear motors to work with LEGO parts.

Download And Laser Your Own Pulleys

[Scott Swaaley] needed a bunch of timing pulleys for the clock he was building. He had already decided on the MXL profile, but he needed so many of these toothed pulleys in so many configurations (hex-bored, hubless) that it would blow out his budget. Plus, he wanted them transparent as well. So why not just laser them out of acrylic?

Not finding anything useful on the manufacturers’ sites, [Scott] decided to create his own web application to generate the shapes and download them as SVGs, dreaming of a resource like Gear Generator except for timing pulleys instead of involute spur gears. [Scott] has the application running on his GitHub. You can create MXL, XL, and L pulleys with any number of teeth and any hole size. From there you can output as an SVG and laser or mill the pulley.

There’s a lot of potential for projects made with pulleys and we’ve covered them extensively. Check out a 3D-printed strain wave gear, an inexpensive XY table, and even a remote operated gate for more pulley ideas.

ESP32 Display Is Worth A Thousand Words

The ESP32 is the successor to the wildly popular ESP8266. There seems to be no end to what the chips can do. However, despite all the wireless communication capabilities, the module doesn’t have a display. [G6EJD] wanted to connect an ILI9341 TFT display and he put the code and information on GitHub. You can also see a video of his work, below.

Since the display uses a serial interface, there isn’t much wiring required. The Adafruit GFX library does the heavy lifting, utilizing the SPI library for the actual communications. The first demo shown on the hardware can pull weather data decoded. If you want more details on the display’s operation, check out [G6EJD’s] YouTube channel and you’ll find other videos that go into more detail.

We’ve seen these displays married to an ESP8266 with an integrated PCB, too. There’s a choice of libraries, and perhaps we’ll see a similar range of choice for the ESP32.

Continue reading “ESP32 Display Is Worth A Thousand Words”