Printed It: Custom Enclosure Generator

You’ve written your firmware code, etched your own PCB, and now it’s time to put that awesome new project of yours into an enclosure. Unfortunately, all you have is a generic Radio Shack project box that you picked up when they were clearing out their inventory. If you put your project in that, it’ll have all the style and grace of a kid wearing hand-me-down clothes. Your project deserves a tailor-made enclosure, but the prices and lead time on custom plastic enclosures are prohibitive for one-off projects.

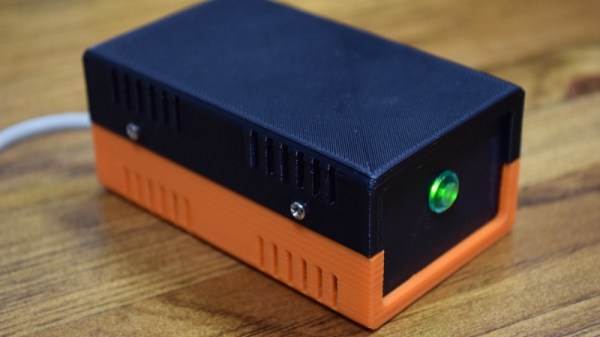
In Ye Olde Olden Days, the next step might have been to start bending some sheet metal. But it’s the 21st century, and we’ve got mechanization on our side. The “Ultimate Box Maker” by [Heartman] is a fully parametric OpenSCAD design which allows you to generate professional looking enclosures by simply providing your desired dimensions and selecting from a few optional features. In a couple of hours, you’ll have a custom one-of-a-kind enclosure for your project for a few cents worth of filament.

That’s the idea, at least. For this edition of “Printed It”, I’ll be taking a look at the “Ultimate Box Maker” by generating and printing a basic enclosure. As somebody whose Radio Shack was out of enclosures by the time I got there and who doesn’t want to slice his hand open folding sheet metal, I’m very interested in seeing how well this design works.

Continue reading “Printed It: Custom Enclosure Generator”

New Part Day: ATMegas With Programmable Logic

Since Microchip acquired Atmel, the fields of battle have fallen silent. The Crusaders have returned home, or have been driven into the sea. The great microcontroller holy war is over.

As with any acquisition, there is bound to be some crossover between two product lines. Both Atmel’s AVR platform and Microchip’s PICs have their adherents, and now we’re beginning to see some crossover in the weird and wonderful circuitry and design that goes into your favorite microcontroller, whatever that might be. The newest part from Microchip is an ATMega with a feature usually found in PICs. This is a Core Independent Peripheral. What is it? Well, it’s kinda like a CPLD stuck in a chip, and it’s going to be in the new Arduino board.

The ATMega4809 is the latest in a long line of ATMegas, and has the features you would usually expect as the latest 8-bit AVR. It runs at 20MHz, has 48 K of Flash, 6 K of SRAM, and comes in a 48-pin QFN and TQFP packages. So far, everything is what you would expect. What’s the new hotness? It’s a Core Independent Peripheral in the form of Configurable Custom Logic (CCL) that offloads simple tasks to hardware instead of mucking around in software.

So, what can you do with Configurable Custom Logic? There’s an application note for that. The CCL is effectively a look-up table with three inputs. These inputs can be connected to I/O pins, driven from the analog comparator, timer, UART, SPI bus, or driven from internal events. The look-up table can be configured as a three-input logic gate, and the output of the gate heads out to the rest of the microcontroller die. Basically, it’s a tiny bit of programmable glue logic. In the application note, Microchip provided an example of debouncing a switch using the CCL. It’s a simple enough example, and it’ll work, but there are a whole host of opportunities and possibilities here.

Additionally, the ATMega4809, “has been selected to be the on-board microcontroller of a next-generation Arduino board” according to the press release I received. We’re looking forward to that new hardware, and of course a few libraries that make use of this tiny bit of custom programmable logic.

DIY Text-to-Speech With Raspberry Pi

We can almost count on our eyesight to fail with age, maybe even past the point of correction. It’s a pretty big flaw if you ask us. So, how can a person with aging eyes hope to continue reading the printed word?

There are plenty of commercial document readers available that convert text to speech, but they’re expensive. Most require a smart phone and/or an internet connection. That might not be as big of an issue for future generations of failing eyes, but we’re not there yet. In the meantime, we have small, cheap computers and plenty of open source software to turn them into document readers.

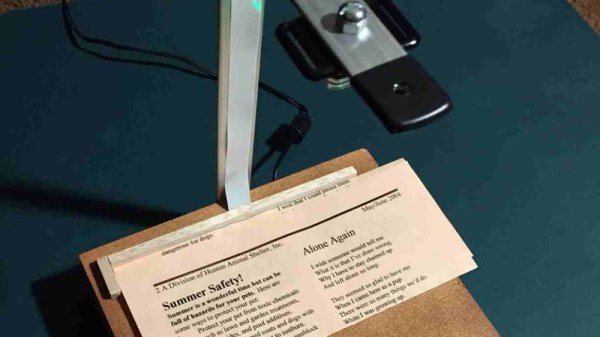
[rgrokett] built a RaspPi text reader to help an aging parent maintain their independence. In the process, he made a good soup-to-nuts guide to building one. It couldn’t be easier to use—just place the document under the camera and push the button. A Python script makes the Pi take a picture of the text. Then it uses Tesseract OCR to convert the image to plain text, and runs the text through a speech synthesis engine which reads it aloud. The reader is on as long as it’s plugged in, so it’s ready to work at the push of a button. We can probably all appreciate such a low-hassle design. Be sure to check out the demo after the break.

If you wanted to use this to read books, you’d still have to turn the pages yourself. Here’s a BrickPi reader that solves that one.

Continue reading “DIY Text-to-Speech With Raspberry Pi”

Who Ate All The Pi?

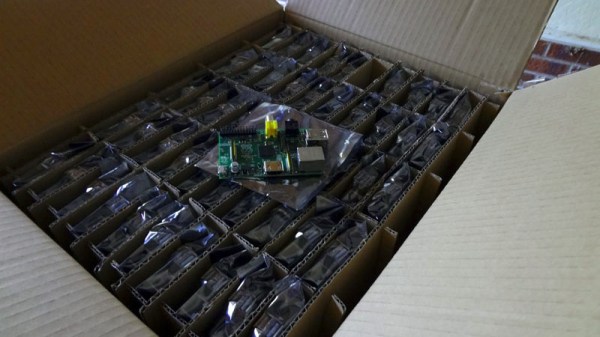
Wednesday was the last day of February, and leap year questions aside that date marks the anniversary of the Raspberry Pi launch. The oldest commercially available Pi is now 6 years old, and to mark the occasion the Raspberry Pi people have put up a retrospective of all their different models.

There is a primordial prototype from [Eben Upton]’s bench that involves an Atmel processor, but the first board dangled in front of the public was a Broadcom one, the BCM2763 ‘micro DB’. This was a form factor like one of those Android TV sticks, and while it was not a Raspberry Pi internal design or indeed sporting the SoC to be used by the Pi itself, it was sufficient to capture the imagination of what would become the Raspberry Pi community.

If you got out of bed early (British time) on the 29th of February 2012 and tried to order one of the first commercially available boards, you were most likely to be out of luck. The relatively small first batch from China was oversubscribed massively, both the RS and Farnell websites went down completely for most of the day. We received our model at some point in May. It’s an over-used phrase, “And the rest is history”, but it seems entirely appropriate here. The Pi has passed through several iterations and increased in both computing power and memory, it has spawned a whole industry of peripherals, a huge community, and a host of competitors. We have quite a few of the boards in the blog post, but some of the more exotic ones have evaded us.

It’s not the best or most powerful board out there, many of its competitors can beat it on performance, but it remains the one to beat in small and cheap Linux-capable single board computers. Why is this the case? It has probably the best-supported Linux distro of all of them, and that community has already answered many of the queries you might find with your board.

So there’s the story, a successful product line, community, and foundation. The Pi blog piece is very much their PR, but it doesn’t need to gild the lily. However, that will not stop competitors from taking aim at its crown, and the field remains open for one of them to topple it. Which of course makes for fascinating stories for us here at Hackaday, so we’d encourage anybody with an electronics factory in China, a bright team, and some good ideas to give it a try. Meanwhile, we’ll be looking towards Cambridge for whatever new products will sport the fruity logo.

Another Introduction To FPGAs

FPGAs can have a steep learning curve, so getting started tutorials are a popular topic. Intel recently published a video titled “Basics of Programmable Logic: FPGA Architecture” and you can see it below. Of course, Intel bought Altera, so the material has a bit of Altera/Intel flavor to it, but the course is generic enough that the concepts will apply to just about any FPGA.

Of course, if you do want to use Quartus, there are quite a few follow-on courses, including the wonderfully named “Become a [sic] FPGA Designer in 4 Hours.” We’d really like to see a sequel titled “Become a Proficient FPGA Designer in 9 Months” but Google didn’t turn that one up.

Continue reading “Another Introduction To FPGAs”

Finding Noise With An Antenna

[K5ACL], aka [SignalSearch], recently brought his active receive loop antenna in off the roof to give it a checkup and perform any necessary maintenance. While it was in the shack, he took the opportunity to discuss how well it would perform indoors. The verdict? Not ideal. He’d mount it 50 feet away from the house if the HOA would let him.

Houses, and subsequently most ham shacks, are filled with noise sources that interfere badly with HF. So after spending a minute or so listening on an SDR, [K5ACL] demonstrates another use for this type of tightly-tuned antenna—as a noise detector.

The main culprit in [K5ACL]’s house is the ceiling light that’s right there in the shack. You can see the noise striping the waterfall as he turns it on and off. But the noise from the light is small potatoes compared to some other common household items, like those power line adapters that turn house wiring into networking cable. Those produce so much noise that even an active loop is really no match. Stay tuned after the break to watch [K5ACL] work the bands through the noise.

Loop antennas are great if you’re stuck in an apartment building or a congested city. They’re easy enough to make, whether you want a portable loop or a permanent installation.

Continue reading “Finding Noise With An Antenna”

Pinging The Depths Of A Rain Barrel

Rain barrels are a great way to go green, as long as your neighborhood doesn’t frown upon them. [NikonUser]’s barrel sits up high enough that he has to climb up on an old BBQ and half-dangle from the pipe to check the water level, all the while at the risk of encountering Australian spiders.

Arachnophobia, it turns out, is a great motivator. At first, [NikonUser] dreamed up a solar-powered IoT doodad that would check the level and report the result on a web page. He battled the Feature Creep and decided to build a handheld device that pings the water level with an ultrasonic sensor and displays it on a 7-segment.

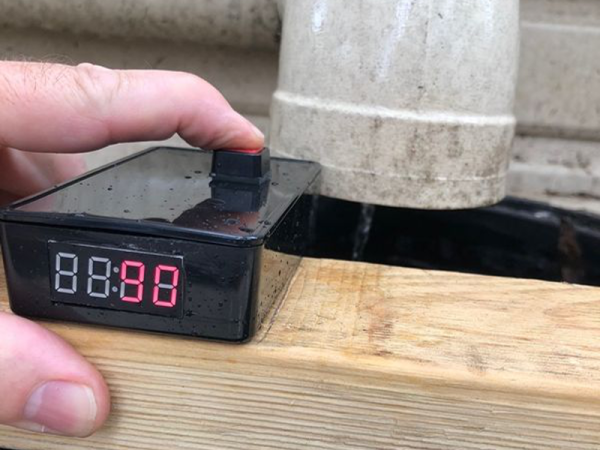
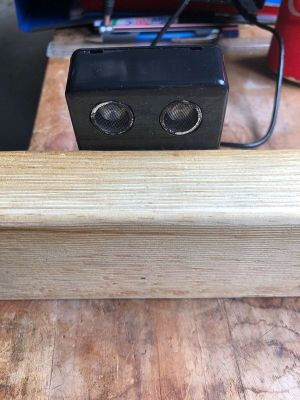
Everything is contained in a water-resistant box and driven by an Arduino Pro. The box is mounted on a piece of scrap lumber that lays across the top of the barrel. This allows the HC-SR04’s eyes to peer over the edge and send pings toward the bottom. It also helps to keep the readings consistent and the electronics from taking a swim.

Operation is simple: [NikonUser] reaches up, sets the plank across the barrel, and pushes the momentary. This activates the Arduino, which prompts the HC-SR04 to take several readings. The code averages these readings, does a little math, and displays the percentage of water remaining in the barrel.

Interested in harvesting rain water, but not sure what to do with it? You can use it for laundry, pour it in the toilet tank instead of flushing, or make an automated watering system for your garden.