The Mac That Helped Build The Xbox Rides Again

The original Xbox, released in 2001 by Microsoft, was notable for being built out of largely off-the-shelf PC components. With a custom Pentium III CPU and IDE peripherals, the console was much closer to a contemporary desktop computer than any of the dedicated game consoles which had come before it. Which of course makes perfect sense if you think about it. Microsoft would want to use technology they were intimately acquainted with on their first foray into gaming market, and if there’s anything Microsoft knows better than forced system updates, it’s x86 computers.

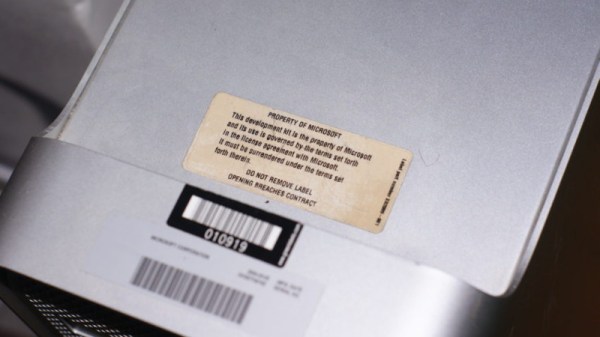
But for their follow-up system, the Xbox 360, Microsoft decided to go with a PowerPC processor they co-developed with IBM. Naturally this meant they needed PowerPC development systems to give to developers, which is how Microsoft ended up briefly distributing PowerMac G5’s. [Pierre Dandumont] came into possession of one of these oddball Microsoft-branded Macs, though unfortunately the hard drive had been wiped. But with the help of a leaked drive image and some hardware sleuthing, he’s now got the machine up and running just like it was when Microsoft was sending them to developers between 2003 and 2005.

Since you’re reading this on Hackaday, you might have guessed there was a little more to the story then just downloading an ISO and writing it to the hard drive of a PowerMac G5. There’s apparently some debate in the community about whether or not it’s some form of rudimentary DRM on Microsoft’s part, but in any event, the development kit operating system will only run on a G5 with very specific hardware. So the challenge is not only figuring out what hardware the software is looking for, but finding it and getting it installed over a decade after its prime.

Most of the required hardware, like the Intel 741462-010 network card or 160 GB Seagate ST3160023AS hard drive were easy enough to track down on eBay. But the tricky one was finding a Mac version of the ATi Radeon X800 XT. [Pierre] ended up getting a much more common ATi FireGL X3 and flashing it with the Mac X800 firmware. This is a little easier said than done as depending on which manufacturer made the memory on your specific video card you have to fiddle with the clock speeds to get a usable image, but in the end he found the winning combination and the development kit OS booted up with his hacked graphics card.

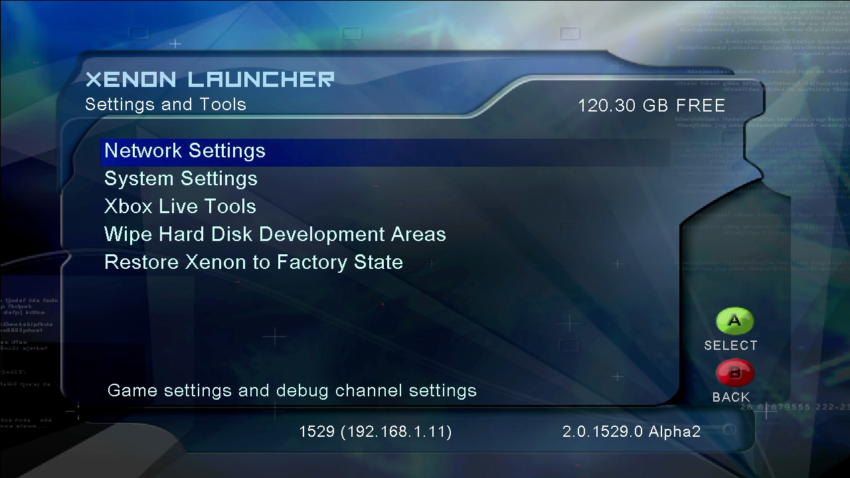
So what does all this get you in 2019? [Pierre] admits nothing terribly useful, but it’s still pretty cool. The system lets you run Xbox and Xbox 360 binaries, and even features the old Xbox 360 “blade” style dashboard. He says that he’s only had limited success getting retail games to actually run on the thing, but if your goal was running Xbox 360 games in 2019 there’s certainly better ways to do that anyway. Like, buying an Xbox 360.

We’ve previously talked about the Xbox 360’s rather unusual processor, but around these parts we more often see projects which involve tearing Microsoft’s sophomore console apart than digging into how it actually worked.

Continue reading “The Mac That Helped Build The Xbox Rides Again”

Running OpenCL On A Raspberry Pi GPU

This is an interesting development for media users and machine learning hackers: [doe300] has implemented OpenCL on the Raspberry Pi 3 Model B+called VCFCL That’s big news because the Pi 3+ has a Graphics Processing Unit (GPU) built into the processor that has been generally underutilized. The VideoCore IV GPU is built into the Broadcom BCM2837B0 and is surprisingly capable for a low-power chip. Although this GPU is well documented, it hasn’t been used that widely because you have to code specifically for this class of GPU. Adding in support for a high-level framework like OpenCL will make it much easier to run and adapt existing packages.

Continue reading “Running OpenCL On A Raspberry Pi GPU”

Rifle-Mounted Sensor Shows What Happens During Shot

People unfamiliar with shooting sports sometimes fail to realize the physicality of getting a bullet to go where you want it to. In the brief but finite amount of time that the bullet is accelerating down the barrel, the tiniest movement of the gun can produce enormous changes in its trajectory, and the farther away your target is, the bigger the potential error introduced by anticipating recoil or jerking the trigger.

Like many problems this one is much easier to fix with what you can quantify, which is where this DIY rifle accelerometer can come in handy. There are commercial units designed to do the same thing that [Eric Higgins]’ device does but most are priced pretty dearly, so with 3-axis accelerometer boards going for $3, rolling his own was a good investment. Version 1, using an Arduino Uno and an accelerometer board for data capture with a Raspberry Pi for analysis, proved too unwieldy to be practical. The next version had a much-reduced footprint, with a Feather and the sensor mounted in a 3D-printed tray for mounting solidly on the rifle. The sensor captures data at about 140 Hz, which is enough to visualize any unintended movements imparted on the rifle while taking a shot. [Eric] was able to use the data to find at least one instance where he appeared to flinch.

We like real-world data logging applications like this, whether it’s grabbing ODB-II data from an autocross car or logging what happens to a football. We’ll be watching [Eric]’s planned improvements to this build, which should make it even more useful.

[Leo] Repairs A MIDI Sequencer

We all have that friend who brings us their sad busted electronics. In [Leo’s] case, he had a MIDI sequencer from a musician friend. It had a dead display and the manufacturer advised that a driver IC was probably bad, even sending a replacement surface mount part.

[Leo] wasn’t convinced though. He knew that people were always pushing on the switches that were mounted on the board and he speculated that it might just be a bad solder joint. As you can see in the video below, that didn’t prove out.

The next step was to fire up a hot air gun. Instead of removing the chip, he wanted to reflow the solder anyway. He was a little worried about melting the 7-segment LEDs so he built a little foil shield to protect it. That didn’t get things working, either.

Continue reading “[Leo] Repairs A MIDI Sequencer”

Amateur Astronomers Spot Meteorite Impact During Lunar Eclipse

According to ancient astronaut theorists, the lunar eclipse this weekend had an unexpected visitor. Right around the time of totality, a meteoroid crashed into the moon, and it was visible from Earth.

Meteoroids crash into the Earth and Moon all the time, although this usually happens either over the ocean (70% of the Earth) where we can’t see it, on the far side of the moon (~50% of the Moon) where we can’t see it, or on the sunlit side of the Moon (another, different 50%), where we can’t see it. These meteoroids range from the size of a grain of sand to several meters across, but only the largest could ever be seen by the human eye. This weekend’s lunar eclipse, the Super Blood Wolf Moon was visible to a large portion of the population, and many, many cameras were trained on the Moon. Several telescopes livestreamed the entire eclipse, and multiple people caught a glimpse of a small flash of light, seeming to come from around Lagrange crater. Because this event was seen by multiple observers separated by thousands of miles, the only conclusion is that something hit the moon, and its impact event was recorded on video.

This is not the first time an impact event has been recorded on the moon. The Moon Impacts Detection and Analysis System (MIDAS) running out of La Hita Observatory has regularly recorded impact events, including one that was comparable to an an explosion of 15 tons of TNT. These automated observatories aren’t running during a full moon, like during a lunar eclipse, because no camera would be able to pick up the flash of light. We were somewhat lucky last weekend’s impact happened during totality, and with dozens of cameras trained on the Moon.

Further investigation will be necessary to determine the size of the meteoroid and obtain pictures of its impact crater, but for a basis of comparison, the LCROSS mission plowed a Centaur upper stage (2.2 tons) into the lunar surface at 2.5 km/s. This should have resulted in a flash visible through binoculars, but it didn’t. The meteoroid that struck the moon last weekend would have been traveling faster (a minimum of about 12 km/s), but the best guess is that this rock might have been of suitable size to have fit in the back of a pickup truck, or thereabouts.

Motorizing An IKEA SKARSTA Table

We’ve been told that standing at a desk is good for you, but unless you’re some kind of highly advanced automaton you’re going to have to sit down eventually no matter what all those lifestyle magazines say. That’s where desks like the IKEA SKARSTA come in; they use a crank on the front to raise and lower the desk to whatever height your rapidly aging corporeal form is still capable of maintaining. All the health benefits of a standing desk, without that stinging sense of defeat when you later discover you hate it.

But who wants to turn a crank with their hand in 2019? Certainly not [iLLiac4], who’s spent the last few months working in conjunction with [Martin Mihálek] to add some very impressive features to IKEA’s adjustable table. Replacing the hand crank with a motorized system which can do the raising and lifting was only part of it, the project also includes a slick control panel with a digital display that shows the current table height and even allows the user to set and recall specific positions. The project is still in active development and has a few kinks to work out, but it looks exceptionally promising if you’re looking to get a very capable adjustable desk without breaking the bank.

The heart of the project is a 3D printable device which uses a low-RPM DC gear motor to turn the hex shaft where the crank would normally go. A rotary encoder is linked to the shaft of the motor by way of printed GT2 pulleys and a short length of belt, which gives the system positional information and avoids the complexity of adding limit switches to the table itself.

For controlling the motor the user is given the option between using relays or an H-Bridge PWM driver board, but in either event an Arduino Nano will be running the show. In addition to controlling the motor and reading the output of the rotary encoder, the Arduino also handles the front panel controls. This consists of a TM1637 four digit LED display originally intended for clocks, as well as six momentary contact tactile switches complete with 3D printed caps. The front panel’s simple user interface not only allows for setting and recalling three preset desk heights, but can even be used to perform the calibration routine without having to go in and hack the source code to change minimum and maximum positions.

We’ve seen all manner of hacks and modifications dealing with IKEA products, from a shelving unit converted into a vivarium to a table doing double duty as a cheap plate reverb. Whether you’re looking for meatballs or some hacking inspiration, IKEA seems to be the place to go.

Color Sensor Demystified

When [millerman4487] bought a TCS230-based color sensor, he was expecting a bit more documentation. Since he didn’t get it, he did a little research and some experimentation and wrote it up to help the rest of us.

The TCS3200 uses an 8×8 array of photodiodes. The 64 diodes come in four groups of 16. One group has a blue filter, one has green and the other has a red filter. The final set of diodes has no filter at all. You can select which group of diodes is active at any given time.

Continue reading “Color Sensor Demystified”