Impersonate The President With Consumer-Grade SDR

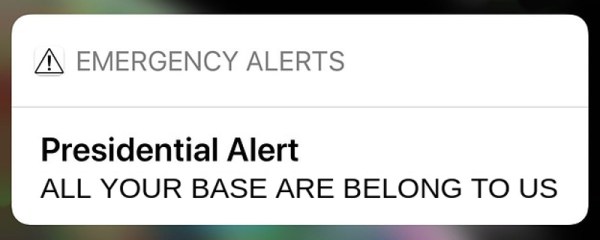
In April of 2018, the Federal Emergency Management Agency sent out the very first “Presidential Alert”, a new class of emergency notification that could be pushed out in addition to the weather and missing child messages that most users were already familiar with. But while those other messages are localized in nature, Presidential Alerts are intended as a way for the Government to reach essentially every mobile phone in the country. But what if the next Presidential Alert that pops up on your phone was actually sent from somebody with a Software Defined Radio?

According to research recently released by a team from the University of Colorado Boulder, it’s not as far-fetched a scenario as you might think. In fact, given what they found about how the Commercial Mobile Alert Service (CMAS) works, there might not be a whole lot we can even do to prevent it. The system was designed to push out these messages in the most expedient and reliable way possible, which meant that niceties like authentication had to take a backseat.

The thirteen page report, which was presented at MobiSys 2019 in Seoul, details their findings on CMAS as well as their successful efforts to send spoofed Presidential Alerts to phones of various makes and models. The team used a BladeRF 2.0 and USRP B210 to perform their mock attacks, and even a commercially available LTE femtocell with modified software. Everything was performed within a Faraday cage to prevent fake messages from reaching the outside world.

So how does the attack work? To make a long story short, the team found that phones will accept CMAS messages even if they are not currently authenticated with a cell tower. So the first phase of the attack is to spoof a cell tower that provides a stronger signal than the real ones in the area; not very difficult in an enclosed space. When the phone sees the stronger “tower” it will attempt, but ultimately fail, to authenticate with it. After a few retries, it will give up and switch to a valid tower.

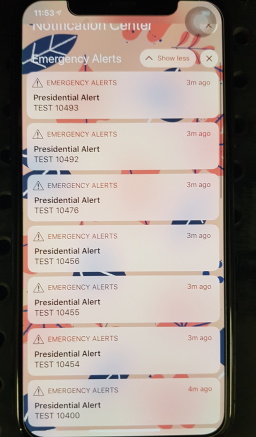
This negotiation takes around 45 seconds to complete, which gives the attacker a window of opportunity to send the fake alerts. The team says one CMAS message can be sent every 160 milliseconds, so there’s plenty of time to flood the victim’s phone with hundreds of unblockable phony messages.

The attack is possible because the system was intentionally designed to maximize the likelihood that users would receive the message. Rather than risk users missing a Presidential Alert because their phones were negotiating between different towers at the time, the decision was made to just push them through regardless. The paper concludes that one of the best ways to mitigate this attack would be to implement some kind of digital signature check in the phone’s operating system before the message gets displayed to the user. The phone might not be able to refuse the message itself, but it can at least ascertain it’s authentic before showing it to the user.

All of the team’s findings have been passed on to the appropriate Government agencies and manufacturers, but it will likely be some time before we find out what (if any) changes come from this research. Considering the cost of equipment that can spoof cell networks has dropped like a rock over the last few years, we’re hoping all the players can agree on a software fix before we start drowning in Presidential Spam.

Accurate Time On Your Pi, The Extreme Way

The Raspberry Pi is an extremely versatile little computer, but even its most ardent fans would acknowledge that there are some areas in which its hardware is slightly lacking. One of these is in the field of timing, the little board has no real-time clock. Users must rely on the on-board crystal oscillator, which is good enough as a microprocessor clock but subject to the vagaries of temperature as it is, not so much as a long-term timepiece.

[Manawyrm] has tackled this problem in a rather unusual way, by dispensing entirely with the crystal oscillator on an older Pi model and instead using a clock derived from a GPS source. The source she’s used is a Leo Bodnar mini precision GPS reference clock, which includes a low-jitter synthesiser that can be set to the Pi’s 19.2 MHz required clock. Unexpectedly this also required a simple LC low-pass filter which was made on a sheet of PCB material, because the Pi at first appeared to be picking up a harmonic frequency. The Pi now has a clock that’s sufficiently stable for tasks such as WSPR transmission without constant referral to NTP or other timing sources to keep it on-track.

It’s a short write-up, but it brings with it a further link to a discussion of different time synchronisation techniques on a Pi including using a kernel module to synchronise with the more common GPS-derived 1PPS signal. We’ve not seen anyone else do this particular mod to a Pi before, but conversely we’ve seen a Pi provide an RF time reference to something else.

A Work Of Art That Also Receives AM And SSB

Over the winter, [Michael LeBlanc] thought a good way to spend his time during those long dark nights would be to scratch build his own direct conversion receiver. He was able to find plans for such a project easily enough online, but where’s the fun in following instructions? The final result incorporates what he found online with his own unique tweaks and artistic style.

[Michael] based his receiver on a modified approach to the DC40 created by [Ashhar Farhan], a name likely familiar to readers involved in amatuer radio. He further modified the design by swapping out the audio amplifier for a TDA2003A, and bolted on a digital tuner by way of an Arduino and a Si5351 clock generator. There’s a small OLED to show the current frequency, which is adjusted with a high-quality Bourns EM14 optical encoder so he can surf the airwaves in the comfort and style.

The digital tuner mated to the analog DC40 receiver gives the radio an interesting duality, which [Michael] really embraces with his enclosure design. From a practical standpoint he wanted to keep the two halves of the system in their own boxes to minimize any interference, but the 3D printed case exaggerates that practical consideration into a fascinating conversation piece.

The analog and digital compartments are askew, and their rotary controls are on opposite sides. The radio looks like it might topple over if it wasn’t for the fact that the whole thing is bolted together, complete with brass inserts for the printed parts. The integrated carry handle at the top somehow manages to make it look vintage and ultra-modern at the same time. Rarely do you see a printed enclosure that’s both meticulously designed inside and aesthetically pleasing externally. [Michael] earned his 3D Printing Merit Badge for sure with this one.

Continue reading “A Work Of Art That Also Receives AM And SSB”

Bit Preserve: A Sanctuary For Modern Captures Of Vintage Schematics

Vintage parts may be documented, but that doesn’t mean they’re particularly useful or accessible. If the phrase “eyestrain from unsearchable, badly-scanned PDF datasheets” makes your lower eyelid twitch in sympathy, read on.

While [Bald Engineer] was researching how he might make a portable Apple II, he was delighted to find that the vintage components he needed to examine were documented. However, he became frustrated with the seemingly endless number of poor quality PDF scans and the inability to search effectively. He decided to re-create the entire Apple IIgs schematic in KiCad, and in the process the Bit Preserve project was born. The goal is to act as a safe haven for modern and editable versions of vintage electronic schematics. The GitHub repository can be found here.

[Bald Engineer] talks a bit about his Apple II project, as well as the ideas behind the Bit Preserve project in his KiCon 2019 talk “Preserving History with KiCad”. KiCon was wild, and we have loads of photos of the projects and details so be sure to check it out.

Making An Update Server For PythonAnywhere And GitHub

Cloud based IDEs and development tools have grown over the years, though most have limitations in their free tiers and may not be fully compatible with other services such as GitHub. [Aadi Bajpai] loved using PythonAnywhere and to collaborate using GitHub, so he made a update server that automatically updates the running code once you make a push to Github

PythonAnywhere gives you access to a python shell over a web browser, and also lets you run a web app that can be accessed via a custom sub-domain. Even though it does not have direct integration with GitHub, you can drop to the bash shell to and get access to a git client.

For this hack, [Aadi Bajpai] utilizes the webhooks from GitHub that are triggered when a push event is detected. A flask server running on PythonAnywhere is written such that once triggered by the get POST request, it locally executes a git pull from the repository. There a bit more work that allows adding a bit of security sauce to the recipe but it is a pretty elegant solution and can be used for other cases as well.

Setting up alert notifications has been demonstrated to be an interesting task, though integrating Discord or Slack for notifications adds a little more bragging rights.

A Rough And Ready Pan & Tilt Mirror

There’s nothing quite like waking up on a warm and sunny morning, with the sun filtering in through the windows over a magnificent beach view. Of course, in real life, not every bedroom has access to beautiful natural vistas and abundant natural light. [Rue Mohr] decided to try and solve this issue with technology.

The initial write-up may be brief, but the pictures of the resulting project show a proper hacker’s build. A stand for an old office chair appears to serve as the base, and the mirror is mounted on a frame that allows for both pan and tilt to be adjusted. There’s a large gear to enable pan rotation, which meshes with a nifty old-school cage gear built out of what we suspect is plastic and welding rod. An AVR microcontroller is charged with running the show, with it interpolating a series of waypoints to set the mirror’s position throughout the day.

[Rue] reports that the project is nearing completion, and is soon to be fully automated. With the dark bedroom that spawned the project no longer a concern, the mirror will instead be pressed into service to provide sun to a row of bean plants.

If you’re looking for a pan-tilt mechanism, but something a little smaller, this 3D-printed mechanism might be just what you’re after.

Laser Cutting Wooden Pogo Pin Test Jigs

Now as far as problems go, selling so many products on Tindie that you need to come up with a faster way to test them is a pretty good one to have. But it’s still a problem that needs solving. For [Eric Gunnerson] the solution involved finding a quick and easy way to produce wooden pogo test jigs on his laser cutter, and we have a feeling he’s not the only one who’ll benefit from it.

The first step was exporting the PCB design from KiCad into an SVG, which [Eric] then brought into Inkscape for editing. He deleted all of the traces that he wasn’t interested in, leaving behind just the ones he wanted to ultimately tap into with the pogo pins. He then used the Circle tool to put a 0.85 mm red dot in the center of each pad.

You’re probably wondering where those specific parameters came from. The color is easy enough to explain: his GlowForge laser cutter allows him to select by color, so [Eric] can easily tell the machine to cut out anything that’s red. As for the size, he did a test run on a scrap of wood and found that 0.85 mm was the perfect dimensions to hold onto a pogo pin with friction.

[Eric] ran off three identical pieces of birch plywood, plus one spacer. The pogo pins are inserted into the first piece, the wires get soldered around the back, and finally secured with the spacer. The whole thing is then capped off with the two remaining pieces, and wrapped up in tape to keep it together.

Whether you 3D print one of your own design or even modify a popular development board to do your bidding, the test jig is invaluable when you make the leap to small scale production.