DIY Induction Heater Draws 1.4 KW And Gets Metal Hot

Induction heaters can make conductive objects incredibly hot by generating eddy currents within the metal. They’re used in a wide variety of industrial processes, from furnaces to welders and even heat treatments. [Schematix] whipped up his own design, and put it through its paces on the bench.

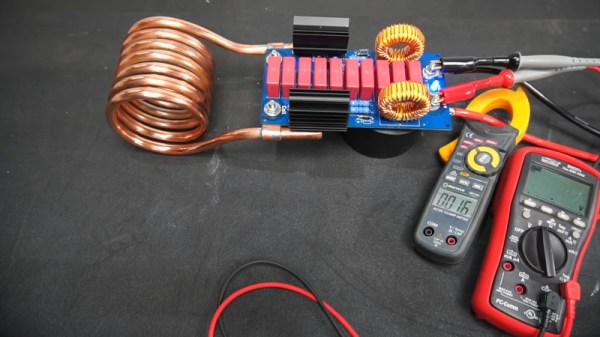
The build in question is a fairly compact design, roughly shoebox-sized when fitted with its six-turn coil. Running off anything from 12 V to 48 V, the heater put out at a massive 1.4 kW in testing. At this power level, the high current draw led the power traces to heat up enough to melt solder, and eventually burn out. [Schematix] plans to rebuild the heater with added copper wiring along these traces to support the higher power levels without failure.

The heater is able to quickly heat ferrous metals, though was not able to meaningfully dump power into aluminium under testing. This is unsurprising, as non-ferrous metals primarily undergo only Joule heating from induction, forgoing the hysteresis portion of heat transfer due to being non-magnetic. However, modification to the design could improve performance for those eager to work with non-ferrous materials.

We’ve seen a few induction heaters before, for purposes as varied as soldering and casting. Video after the break.

Continue reading “DIY Induction Heater Draws 1.4 KW And Gets Metal Hot”

Advanced Printer Control Aims To Stop Idle Waste

3D printers are capable of creating complex geometries with a minimum of fuss, but one of the tradeoffs is the long period of time it takes to print a part. Often, printers are left to run for many hours with a minimum of supervision to complete their tasks. This can leave printers idling for long periods of time after their work is finished. Noting this, [TheGrim] put together the Advanced Printer Control.

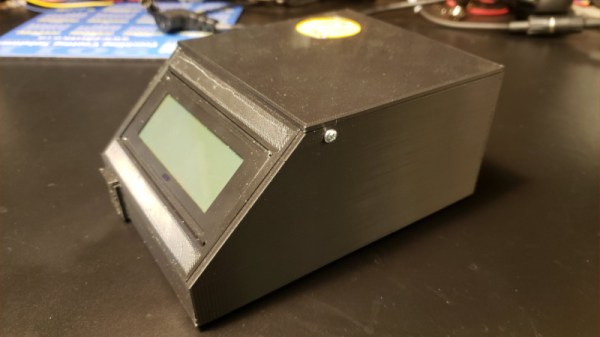
The aim of the APC is to monitor 3D printers, and shut them off when their work is complete. The aim is to avoid leaving printers running for hours after their prints are finished, which causes needless wear on fans and screens which can have a limited life. This is achieved by putting an ESP8266 in charge of the printer’s AC power supply, via a triac. It measures the current drawn by the printer when idling and in use to set a baseline. Then, whenever the printer drops back to idle levels, a timer begins. When the timer runs out, the printer is switched off. There’s also an option to automatically trigger shutdown with an I/O pin, too.

It’s a project that aims to extend printer life and save power, too. Of course, if you’re really worried about power draw, you could use a solar powered printer instead. If you’ve got your own printer controller hacks, be sure to drop us a line.

A Clap-Activated Machine For All Your Applause Needs

Applause is greatly revered as a symbol of warmth and adoration from a crowd. TV shows that film in front of a live audience often cue their audiences to clap in order to generate the desired auditory atmosphere. Of course, you don’t have to rely on squishy humans to do all the work. [Dillon] built a machine of dubious utility – one which generates mechanical applause when activated by the sound of clapping. (Video, embedded below.)

Somewhat unsurprisingly, the project was built for a Useless Machine contest, but that doesn’t diminish its value as a learning exercise. An Arduino runs the show, using a microphone module to listen out for loud noises such as claps. If two claps are detected in the nominated timeframe, the machine begins to flash its “APPLAUSE” lights and clap its hands. The Arduino achieves this with the help of a relay, which switches on a motor spinning a belt-driven cam which seperates the hands. The hands are then pulled back together to clap via a length of stretchy bungee cord.

With an incredibly noisy drivetrain and somewhat amateur clapping ability, the sound coming from the machine isn’t exactly recognisable as “applause”. However, it’s a start, and it remains the best clapping machine we’ve seen this decade. If you’ve got your own under construction, consider dropping us a line. And if all this has you waxing nostalgic for the vintage Clapper circuit, you can always build one of those, too.

Continue reading “A Clap-Activated Machine For All Your Applause Needs”

Open Hardware GPS Tracker Works On Your Terms

These days, there’s plenty of options if you want to get a GPS tracker for your vehicle. Unfortunately, they come with the sort of baggage that’s becoming increasingly common with consumer tech: subscription fees, third-party snooping, and a sneaking suspicion that you’re more commodity than customer. So [Viktor Takacs] decided to take things into his own hands and create an open GPS tracker designed for privacy minded hackers.

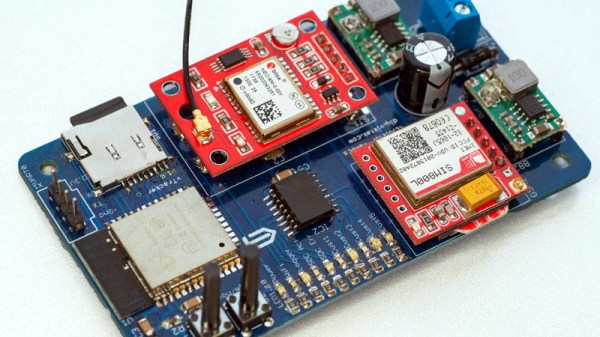
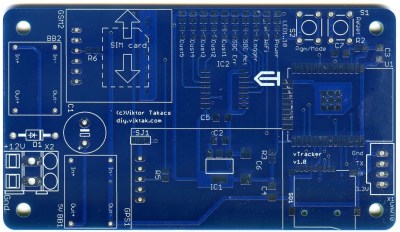
As [Viktor] didn’t want to reinvent the wheel, his design leverages several off-the-shelf modules. The core of the tracker is the ESP32, which gives him plenty of computational power while still keeping energy consumption within reasonable levels. There’s also a NEO-6M GPS receiver which works at the same 3.3 V level as the ESP32, allowing the microcontroller to read the NMEA sentences without a level shifter. He decided to go with the low-cost SIM800L GSM modem, but as it only works on 2G networks, provisions have been made in the board design to swap it out for a more modern module should you desire.

For the code to glue it all together, [Viktor] pulled in nearly a dozen open source libraries to create a feature-complete firmware that uses MQTT to create a database of location data on his personal server. From there the data is plugged into Home Assistant and visualized with Grafana. This is enough to deliver core functionality, but he says that more custom software components as well as a deep-dive into the security implications of the system is coming in the near future.

We’ve seen custom built GPS trackers before, as generally speaking, it doesn’t take a whole lot to spin up your own solution. But we think the polish that [Viktor] has put on this project takes it to the next level, and ranks it up there among some of the most impressive bespoke tracking solutions we’ve seen over the years.

Ham Radio Needs To Embrace The Hacker Community Now More Than Ever

As many a radio amateur will tell you, ham radio is a hobby with as many facets as there are radio amateurs. It should be an exciting and dynamic place to be, but as those who venture forth into it sometimes sadly find out, it can be anything but. Tightly-knit communities whose interests lie in using $1,000 stations to chase DX (long-distance contacts), an advancing age profile, and a curious fascination of many amateurs with disaster communications. It’s something [Robert V. Bolton, KJ7NZL] has sounded off about in an open letter to the amateur radio community entitled “Ham Radio Needs To Embrace The Hacker Community Now More Than Ever“.

In it he laments that the influx in particular of those for whom disaster preparedness is the reason for getting a licence is to blame for amateur radio losing its spark, and he proposes that the hobby should respond by broadening its appeal in the direction of the hacker community. The emphasis should move from emergency communications, he says, and instead topics such as software defined radio and digital modes should be brought to the fore. Finally he talks about setting up hacker specific amateur radio discussion channels, to provide a space in which the talk is tailored to our community.

Given our experience of the amateur radio community we’d be bound to agree with him. The hobby offers unrivalled opportunity for analogue, mixed-signal, digital, and software tinkering in the finest tradition of the path set by the early radio amateurs around a hundred years ago, yet it sometimes seems to have lost its way for people like us. It’s something put into words a few years ago by our colleague Dan Maloney, and if you’re following [KJ7NZL]’s path you could do worse than read Dan’s long-running $50 ham series from the start.

Via Hacker News.

Header image: Unknown author, Public domain.

Taking Over The Amazing Control Panel Of A Vintage Video Switcher

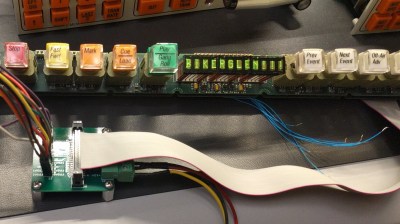
Where does he get such wonderful toys? [Glenn] snagged parts of a Grass Valley Kalypso 4-M/E video mixer switcher control surface from eBay and since been reverse engineering the button and display modules to bend them to his will. The hardware dates back to the turn of the century and the two modules would have been laid out with up to a few dozen others to complete a video mixing switcher console.

[Glenn’s] previous adventures delved into a strip of ten backlit buttons and gives us a close look at each of the keyswitches and the technique he used to pull together his own pinout and schematic of that strip. But things get a lot hairier this time around. The long strip seen above is a “machine control plane” module and includes a dozen addressible character displays, driven by a combination of microcontrollers and FPGAs. The square panel is a “Crosspoint Switch Matrix” module include eight individual 32 x 32 LCDs drive by three dedicated ICs that can display in red, green, or amber.

[Glen] used an STM8 Nucleo 64 to interface with the panels and wrote a bit of code to help map out what each pin on each machine control plane connector might do. He was able to stream out some packets from the plane that changed as he pressed buttons, and ended up feeding back a brute-force of that packet format to figure out the LED display protocols.

But the LCDs on the crosspoint switch were a more difficult nut to crack. He ended up going back to the original source of the equipment (eBay) to get a working control unit that he could sniff. He laid out a man-in-the-middle board that has a connector on either side with a pin header in the middle for his logic analyzer. As with most LCDs, the secret sauce was the initialization sequence — an almost impossible thing to brute force, yet exceedingly simple to sniff when you have a working system. So far he has them running under USB control, and if you are lucky enough to have some of this gear in your parts box, [Glen] has painstakingly recorded all of the details you need to get them up and running.

Scratch Building A Supersized CNC Router

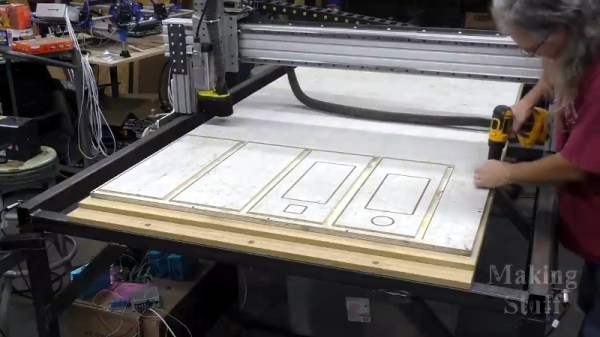
Many of us have spent the better part of a year on COVID-19 lockdown, and what do we have to show for it? Bit of progress on the Netflix queue? Maybe a (slightly) cleaned up garage or workshop? Not if you’re [Bob] of Making Stuff fame: he’s spent the last nine months working on a completely custom CNC router big enough to take a whole sheet of plywood.

The build is documented over a series of nearly a dozen YouTube videos, the first of which was put out all the way back in January of 2020. Seeing [Bob] heading to the steel mill to get his frame components with nary a mask in sight is a reminder of just how long he’s been working on this project. He’s also put together a comprehensive Bill of Materials on his website should anyone want to follow in his footsteps. Coming in at only slightly less than $4,000 USD, it’s certainly not a budget build. But then when we’re talking about a machine of this scale, nothing comes cheap.

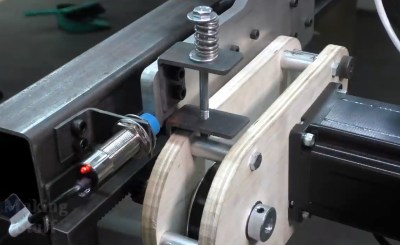
Every component on this build is heavy-duty.

Even if you don’t build you own version of this router, it’s impossible to watch the build log and not get inspired about the possibilities of such a machine. In the last video we’re even treated to a bit of self-replicating action, as the jumbo CNC cuts out the pieces for its own electronics enclosure.

You can tell from the videos that [Bob] is (rightfully) proud of his creation, and isn’t shy about showing the viewer each and every triumph along the way. Even when things don’t go according to plan, there are lessons to be learned as he explains the problems and how they were ultimately resolved.

Of course, we know a home-built CNC router doesn’t need to cost thousands of dollars or take up as much space as a pool table. The average Hackaday reader probably has no need of a monster like this, and wouldn’t have anywhere to keep it even if they did. But that doesn’t mean we can’t look on with envy as we wait to see what kind of projects [Bob] churns out with such an incredible tool in his arsenal.

Continue reading “Scratch Building A Supersized CNC Router”