3D-Printed Tooling Enables DIY Electrochemical Machining

When it comes to turning a raw block of metal into a useful part, most processes are pretty dramatic. Sharp and tough tools are slammed into raw stock to remove tiny bits at a time, releasing the part trapped within. It doesn’t always have to be quite so violent though, as these experiments in electrochemical machining suggest.

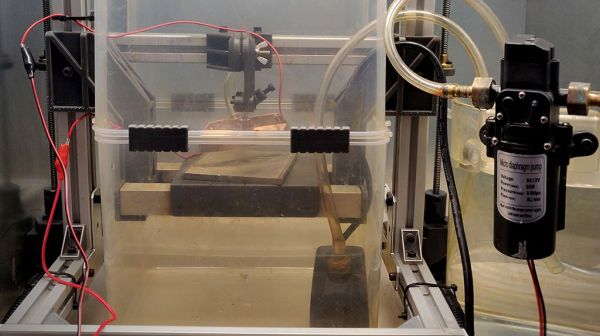
Electrochemical machining, or ECM, is not to be confused with electrical discharge machining, or EDM. While similar, ECM is a much tamer process. Where EDM relies on a powerful electric arc between the tool and the work to erode material in a dielectric fluid, ECM is much more like electrolysis in reverse. In ECM, a workpiece and custom tool are placed in an electrolyte bath and wired to a power source; the workpiece is the anode while the tool is the cathode, and the flow of charged electrolyte through the tool ionizes the workpiece, slowly eroding it.

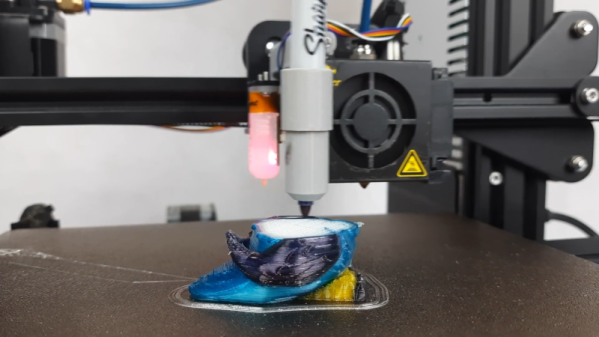
The trick — and expense — of ECM is generally in making the tooling, which can be extremely complicated. For his experiments, [Amos] took the shortcut of 3D-printing his tool — he chose [Suzanne] the Blender monkey — and then copper plating it, to make it conductive. Attached to the remains of a RepRap for Z-axis control and kitted out with tanks and pumps to keep the electrolyte flowing, the rig worked surprisingly well, leaving a recognizably simian faceprint on a block of steel.

[Amos] admits the setup is far from optimized; the loop controlling the distance between workpiece and tool isn’t closed yet, for instance. Still, for initial experiments, the results are very encouraging, and we like the idea of 3D-printing tools for this process. Given his previous success straightening his own teeth or 3D-printing glass, we expect he’ll get this fully sorted soon enough.

Know Audio: Amplifiers And Distortion

As we’ve traced our no-nonsense path through the world of Hi-Fi audio, we’ve started with the listener, understood the limitations of the human ear, and thence proceeded to the loudspeaker. We’ve learned a bit about speaker cabinets and their design, so it’s time to venture further down the chain to the amplifier that drives those speakers.

The sharp-eyed will be ready to point out that along this path also lies the  speaker cables, but since we’ll be looking at interconnects at a later date we’ll be making the dubious and simplistic assumption for now that the wires between speaker and amplifier are ideal conductors that don’t have a bearing on listening quality. We’ll be looking at amplifiers in enough detail to warrant more than one piece on the subject, so today we’ll start by considering in a slightly abstract way what an amplifier does and where it can fall short in its task. We’ll be introducing probably the most important thing to consider in any audio system, namely distortion.

The job of an audio amplifier is to take an audio signal at its input and present the same signal on its output at a greater amplitude. In the case of a preamplifier it will usually be designed to work with high impedances in the order of 50 kΩ at both input and output, while in a power amplifier designed to drive speakers or headphones it will drive a much lower impedance. Commonly this will be 4 Ω or 8 Ω for loudspeakers, and 32 Ω for headphones. Continue reading “Know Audio: Amplifiers And Distortion”

3D Printer Add On Makes Sharp(ie) Colors

We’ve all seen 3D printed jigs that use a permanent marker to color filament as it goes into the hot end. [Sakati84] has a completely different idea. A holder on the print head can pick up one of several pens and use it to color the layer the hot end just laid down. In the video below, it looks like it works well and, although we imagine it will be a bear to calibrate on height, it seems like something you could replicate with nearly any conventional printer.

Logically, you print a layer with no pen in the holder and when you do pick up a pen, it will need to be somewhat lower than the print nozzle or else you’ll drag around in the fresh plastic.

Continue reading “3D Printer Add On Makes Sharp(ie) Colors”

Orbiter Is Now Open Source

We always have it on our list to learn more about Orbiter. If you haven’t seen it, it is a hyperrealistic space simulator. Granted, you can put it in an easy mode, but its real strength is you can very accurately model spacecraft like the Space Shuttle and have very realistic controls. In order to spur development, the program is now open source.

We think this is interesting for two reasons. First, if you ever wanted to contribute into a project of this scope, here’s your chance. You might not want to write a full-blow space simulator but you might have something to add. However, open source also means you can see how the program works and either reuse it in your own open source projects or just simply learn from the techniques.

Continue reading “Orbiter Is Now Open Source”