Drastic Plastic: Enclosure Rebuild Uses Donor Material

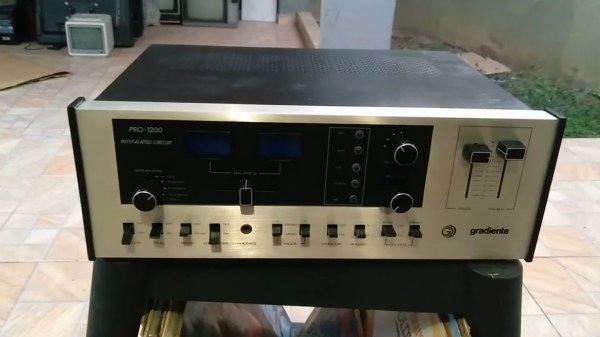
Although 3D printers are great, people tend to use them as a universal hammer wherein almost everything becomes a nail that’s just begging to be struck. So as hacker appetites become finicky with the same old fare, it’s refreshing to see an enclosure restoration done in such an old-school fashion. To wit: [Doidão Santos]’ classic repair of the crumbling side fairings on a vintage amplifier.

Yes, instead of designing replacement pieces, printing them, and hiding the layered evidence with paint or an acetone blur, [Doidão] called upon a broken sound system whose chassis bore a relief in the corners similar to that of the amplifier.

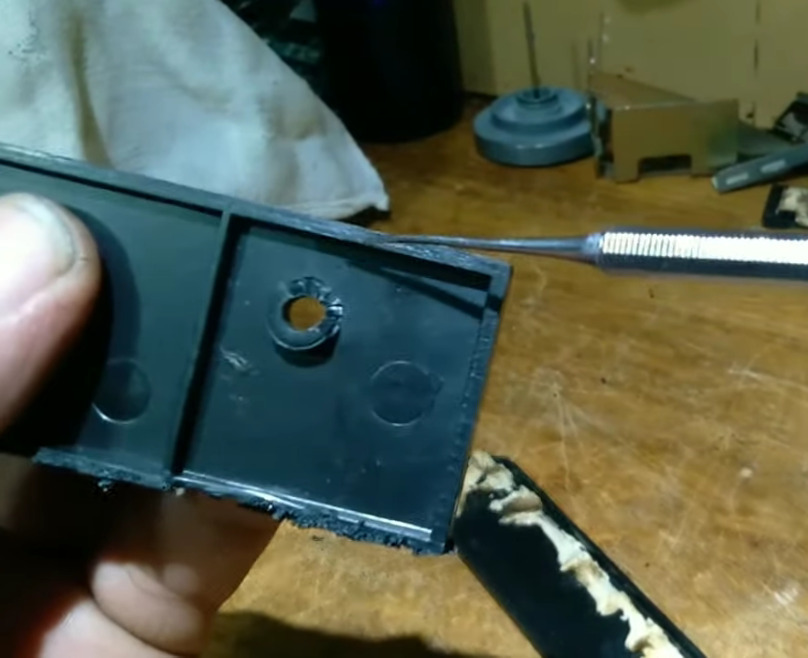
After cutting out two matched pieces of donated plastic, [Doidão] taped them together and welded ’em with a soldering iron outfitted with a curved-but-flattened spade tip that looks ideal for this purpose. Although the donor enclosure provided much-needed relief, one corner was lacking in this aesthetic, so [Doidão] cast a little bit of molten plastic using the relief as a mold.

Once the pieces were tacked together, [Doidão] filed them down, sanded them, polished them to a nice shine, and installed them on the amplifier. They look great, and no one will be the wiser. But if we were in [Doidão]’s shoes, we’d tell everyone what we’d done. Be sure to check it out after the break.

Ready for more fantastic plastic resto-hacks? Let us introduce you to [drygol].

Continue reading “Drastic Plastic: Enclosure Rebuild Uses Donor Material”

Knight Rider Keeps On Truckin’

[AJ] and [Joe], collectively the [Knight Rider Historians] are bringing back one of the most iconic vehicles of the 1980’s. Everyone remembers KITT driving into the F.L.A.G. truck. Even the Mythbusters re-enacted the stunt back in 2007. The duo managed to track down the original tractor and trailer from the show for restoration, and part of that process means uncovering the Hollywood hacks used to make the car-driving-into-trailer stunt work.

Back in the ’80s when a movie or TV show wrapped up, the props were often re-used in other productions or sold off. The 1975 Dorsey trailer used on Knight Rider was eventually purchased, stripped down, and painted white. It spent the last 30 years serving as a racing trailer. Carrying cars, and tools, and serving as a mobile shop at the track.

Unsurprisingly, most of the custom parts from Knight Rider are gone – but some hints remain. Specifically, [KRH] are trying to figure out how the drive-up door operated. Originally they assumed it was a hydraulic ram system that pulled the cables. However, above a dropped ceiling they found a welded hard mount and a 24-foot rail running down the trailer roof.

They believe the hard mount was for a winch, and the rail was used as a cable guide for two winch cables.  A set of pulleys just behind the door directed these cables down to the ramp itself.

Continue reading “Knight Rider Keeps On Truckin’”

Clover Computer: A Modern Z8000 CP/M Machine

Seeing some old Zilog 16-bit chips on eBay recently, [Scott Baker] was curious enough to snap them up and build himself a Z8000 computer. It started as a two-board solution, then he added a display module. Instead of layering the boards vertically à la a PC/104 stack, [Scott] decided to build them flat. His first backplane was triangular, but he opted for a square to accommodate one more expansion board in the future. The assembled contraption resembles a clover, hence the name Clover Computer.

The Z8000 was Zilog’s first 16-bit microprocessor, introduced in 1979. It was not hugely popular for a variety of reasons (the Z8000 Wikipedia article has some interesting details). The Z8000 was eclipsed in the marketplace by Intel’s 8088 and Motorola’s 32-bit 68000. One interesting point is that the Z8000 did not use microcode, and as a result, its transistor count was significantly less than its contemporaries. The Z8000 was used in some military applications, and despite its limited commercial success, it continued to be available from Zilog and licensed second sources up until 2012.

[Scott]’s design splits the system into a CPU board, a memory and serial board, and a display board. Along the way, he learns 1980’s era tricks from the Olivetti M20, one of the few computer systems designed around the Z8000. He also manages to find a recent Z8000 implementation of CP/M by GitHub user [], which [Scott] forked and adapted to his project (see project repo here). He succeeds in getting everything working, and ports a monitor, Tiny Basic, and Zork.

Check out his project write-up introductory link, and see it in action in the video below the break. Did you ever use or encounter the Z8000? Let us know in the comments!

Continue reading “Clover Computer: A Modern Z8000 CP/M Machine”

Why Didn’t We Think Of Making A Remote Trigger Button?

One of the many functions a digital oscilloscope offers over its analog ancestors is a trigger button. Alongside the usual electronic means of triggering the instrument, you can reach over and press a button to “freeze-frame” the action and preserve the trace. Sometimes doing it repeatedly it can become a chore to reach for the ‘scope. That’s where [Kevin Santo Cappuccio]’s remote trigger button comes in.

The button itself is about as simple a hack as it gets. The ‘scope was carefully dissected and some fine wires laid from the contacts within the front panel to a connector on the case. From there a cable goes to a box with a momentary action button switch. Plug in the box, and you can trigger the ‘scope from a distance!

We have to admit to rather admiring this hack, as needing to trigger the ‘scope is a well-known problem here. It’s easy to stab the wrong button and lose what you are looking for, so we’re rather surprised we didn’t think of this one ourselves. But then again from another viewpoint, it involves dissecting an expensive instrument which is best left unmolested. Perhaps manufacturers should consider adding this functionality.

This may be the most straightforward oscilloscope hack we’ve shown you, but it’s certainly not the first.

Blog Title Optimizer Uses AI, But How Well Does It Work?

[Max Woolf] sometimes struggles to create ideal headlines for his blog posts, and decided to apply his experience with machine learning to the problem. He asked: could an AI be trained to optimize his blog titles? It is a fascinating application of natural language processing, and [Max] explains all about what it does and how it works.

The machine learning framework [Max] uses is GPT-3, a language model that works with natural-seeming human language that is capable of being tweaked in different ways. [Max] uses OpenAI’s GPT-3 API (which, by the way, is much easier to experiment with than one might think) and here is the basic workflow for his title optimizer:

  1. The optimizer takes as input a blog post title to optimize.
  2. OpenAI’s pre-trained GPT-3 engine is used to generate six alternate titles.
  3. For each of those alternate titles, a fine-tuned version of GPT-3 is consulted to judge how “good” they are based on custom training data. (“Good” in this context means “similar to titles of successful submissions on Hacker News“, but more on that in a moment.)
  4. Print the results.

Continue reading “Blog Title Optimizer Uses AI, But How Well Does It Work?”

PicoStepSeq Is Small But Perfectly Formed

The Raspberry Pi Pico is what you might call the board of the moment, thanks to its combination of affordability, features, and continued availability during the component shortage. We have seen plenty of great projects using it, and the latest to float past is [todbot]’s PicoStepSeq, an extremely compact MIDI sequencer.

All the components are mounted on a PCB, with the sequencer’s eight steps selected by a row of buttons with integrated LEDs. The interface is via an SSD1306 OLED, and there is also a rotary encoder. Software comes courtesy of CircuitPython, and the output is delivered via a 3.5 mm TRS jack. Finally the whole is wrapped in a 3D printed enclosure.

The result is a sequencer that could almost be a product in its own right, and we think anyone whose interests lie in electronic music should find straightforward enough to build. All the files and information required to build your own can be found in the linked repository, and he’s placed a Tweet with a video online which we’ve embedded below the break.

Continue reading “PicoStepSeq Is Small But Perfectly Formed”

Batteries Get Tiny

Steve Martin had a comedy routine that focused on the idea of “getting small.” That probably didn’t inspire the researchers at the Institute for Integrative Nanoscience when they set out to create a sub-square-millimeter microbattery. As you might expect, you won’t be starting your car with a battery the size of a grain of sand anytime soon, but these batteries do have a surprising capacity.

The key is creating what they call “micro-swiss rolls” where the electrodes are wrapped in a tiny cylinder. This isn’t a new idea. However, creating workable rolls at the scale where a grain of rice looks huge isn’t trivial.

Continue reading “Batteries Get Tiny”