At Last, A Beagle V In The Wild

The RISC-V ISA specification contains the recipe for everything from the humblest of microcontrollers to the most accomplished of high-end application processors, but it’s fair to say that at our end of the market it’s mostly been something for the lower end. There are plenty of inexpensive small RISC-V microcontrollers, but so far not much powerful enough for example to run a Linux-based operating system.

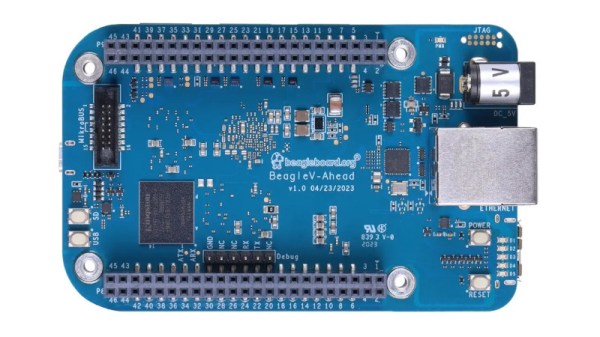
It’s a situation that’s slowly changing though, and it looks as though things may have taken a turn for the better as a new BeagleBoard has appeared using a RISC-V chip. The BeagleV-Ahead has a BeagleBone form factor and packs an Alibaba T-Head TH1520 SoC, a 2GHz quad-core part with a GPU and DSP components on-board. They link to a selection of distributors, from which one can seemingly be bought for about $170.

It’s a departure from the ARM chips that have until now powered the BeagleBoard line, but its appearance shouldn’t come as a surprise to seasoned Beagle watchers as they announced their RISC-V developments back in 2021. We’re guessing they too had to contend with the chip shortage which hit other players such as Raspberry Pi, so we’re pleased to see a product on the market. In particular though we’re pleased to see one on a BeagleBoard. because unlike a random no-name single board computer they’re a manufacturer who supports their products.

There’s a page with a good choice of operating systems for the board, and we hope that this means they provide kernel support for this SoC. This is the real benefit of buying a BeagleBoard or a Raspberry Pi, because cheap competitors will typically support only one kernel version compared with their years of support. So while this board is by no means cheap, we’re hoping it heralds a new wave of powerful RISC-V computers. Something to look forward to indeed.

Orca Slicer Is The New Game In Town

Slicers are the neat little tools that take your 3D models and turn them into G-code that your 3D printer can actually understand. They control the printing process down to the finest detail, and determine whether your prints are winners or binners. Orca Slicer is the new tool on the block, and [The Edge of Tech] took a look at what it can do.

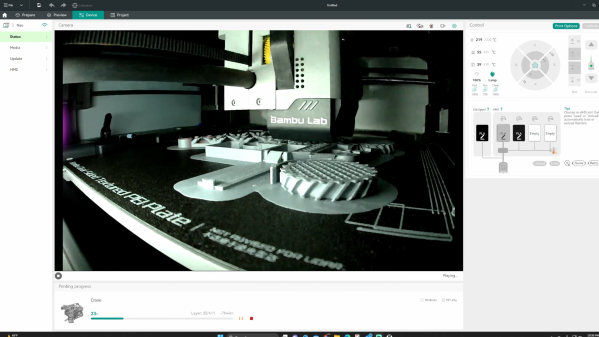
The video explores the use of Orca Slicer with the Bambu Lab P1P and X1 Carbon. [The Edge of Tech] jumps into the feature set, noting the rich calibration tools that are built right into the software. They work with any printer, and they’re intended to help users get perfect prints time and time again, with less messy defects and print failures. It’s also set up out of the box for network printing and live updates, which is super useful for those with multiple printers and busy workflows. You can even watch camera feeds live in the app from duly equipped printers. It’s even got nifty features for calculating your filament cost per print.

If you’re not happy with your current slicer, give Orca Slicer a go. Let us know what you think in the comments. Video after the break.

Continue reading “Orca Slicer Is The New Game In Town”

Taking Mechanical Keyboard Sounds To The Next Level

When it comes to mechanical keyboards, there’s no end to the amount of customization that can be done. The size and layout of the keyboard is the first thing to figure out, and then switches, keycaps, and then a bunch of other customizations inside the keyboard like the mounting plate and whether or not to add foam strips and other sound- and vibration-deadening features. Of course some prefer to go the other direction with it as well, omitting the foam and installing keys with a more noticeable click, and still others go even further than that by building a separate machine to make their keyboard activity as disruptive as it could possibly be.

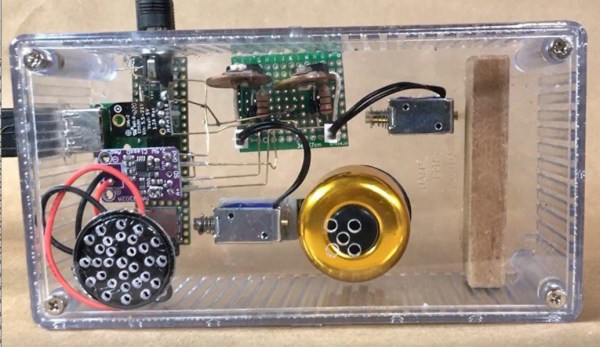
This started as a joke among [ac2ev] and some coworkers, who were already teasing about the distinct sound of the mechanical keyboard. This machine, based on a Teensy microcontroller, sits between any USB keyboard and its host computer, intercepting keystrokes and using a small solenoid to tap on a block of wood every time a keystroke is detected. There’s also a bell inside that rings when the enter key is pressed, similar to the return carriage notification for typewriters, and as an additional touch an audio amplifier with attached speaker plays the Mario power-up sound whenever the caps lock key is pressed.

[ac2ev] notes that this could be pushed to the extreme by running a much larger solenoid powered by mains electricity, but since this was more of a proof-of-concept demonstration for some coworkers the smaller solenoid was used instead. The source code for the build can be found on the project’s GitHub page and there’s also a video of this machine in action here as well. Be careful with noisy mechanical keyboards, though, as the sounds the keys produce can sometimes be decoded to determine what the user is typing.

Awning Motorized And Automated To Avoid Wind Damage

Awnings can be architecturally beautiful, and they provide lovely shelter from the sun and even a bit of rain. They don’t always like taking a pounding from high winds though. [Steve Carey] installed some nice awnings, but wanted to avoid any potential issues, so he built an automated system to extend and retract them for him. 

An ESP32 serves as the brains of the operation. It’s set up to open and close the blinds using a high-torque brushed motor run by a BTS7960 motor driver. The motor turns the awning’s rod via a hook, so it can be readily removed in the event [Steve] moves house. Reed switches are used as end stops to ensure the motor stops when the awning is fully open or closed. The ESP32 is hooked up to an accelerometer mounted on the awning. It’s set up to sum the accelerations detected in all three axes, and close the awning in the event conditions get too windy.

There’s a certain peace of mind that comes with having your awning hooked up with a preventative safety system. We don’t have a lot of awning posts on Hackaday, but we have seen a good number of automated blinds in the past. If you’ve been working on your own outdoor home automation gear, be sure to hit up the tipsline! Happy…awnings…ing? Anyway.


Timekeeping For Distributed Computers

Ask any programmer who has ever had to deal with timekeeping on a computer, and they’re likely to go on at length about how it can be a surprisingly difficult thing to keep track of. Time zones, leap years, leap seconds, various timekeeping standards, clock drift, and even relativity are all problems that can creep in to projects. Issues with timekeeping are exacerbated in distributed systems as well, adding another layer of complexity when we need to reliably determine the order that a series of actions occurred across a number of different computers with a high precision. One solution to this problem is the implementation of a vector clock.

When using other systems such as logical clocks to attempt to keep track of the order of events on different computers, a problem that may arise is that these systems don’t always track these changes with perfect reliability due to many issues such as varying temperature, race conditions, or clock skew. The vector clock instead tracks causal relationships between events. Each separate process maintains its own vector clock, represented by a list of integers. When one of these processes performs an event, it increments its own clock and sends it out to the rest of the system. By keeping track of this clock as it is updated by various processes across the computer the distributed system can be much more confident about the order in which events took place.

Of course, there are always downsides with elegant solutions like this. In the case of vector clocks the downside is largely increased overhead for keeping track of all of the sets of integers. But in systems where the ordering of processes is of the upmost importance, this is worth the trade-off to ensure reliability. And unless we hook all of our computers up to atomic clocks like they do for some computers at CERN we will have to take the increased overhead instead.

How Duck Tape Became Famous

If you hack things in the real world, you probably have one or more rolls of duck tape. Outside of the cute brand name, many people think that duck tape is a malapropism, but in truth it is the type of cloth traditionally used in our favorite tape: cotton duck. However, as we’ll see, it’s not entirely wrong to call it duct tape either. Whatever you call it, a cloth material has an adhesive backing and is coated with something like polyethylene.

Actually, the original duck tape wasn’t adhesive at all. It was simply strips of cotton duck used for several purposes, including making shoes and wrapping steel cables like the ones placed in 1902 at the Manhattan Bridge. By 1910, the tape was made with adhesive on one side and soaked in rubber, found use in hospitals for binding wounds. In May 1930, Popular Mechanics advised melting rubber from an old tire and adding rosin to create a compound to coat cotton tape, among other things.

Continue reading “How Duck Tape Became Famous”

Roboticized Zelda Ocarina Plays Itself

[3DSage] has long been obsessed with a certain type of musical instrument after playing The Legend of Zelda: Ocarina of Time. It spawned a project to robotically control an ocarina, which turned out beautifully.

The first step was to build an air blower that could excite the ocarina into making noise. With that completed, [3D Sage] then 3D scanned an ocarina so he could design a mechanism that would fit the instrument and let it be played. The final design uses a set of solenoids with rubber caps to plug the various holes of the ocarina to play different notes. The solenoids are actuated according to notes pressed on a printed keyboard. Alternatively, it can be programmed to play pre-stored songs by itself.

The results are charming, though the ocarina does sound a little off-pitch. Overall, though, the project is a great use case for a 3D scanner, since the instrument itself is such an odd irregular shape.

Continue reading “Roboticized Zelda Ocarina Plays Itself”