Humble 555 Gets A Boost For ESR Meter

[Peter Demchenko] wanted to use a low power TS555 in an ESR meter design. The problem is, he needed to handle significant current sink requirements for cases where the capacitor under test had a low ESR. The TS555 wasn’t up to the task.

However, [Peter] made an interesting observation. the output pin of the device can sink or source current. However, the discharge pin is exactly the same output but can only sink current.

But what if you tied them together? Using some equalizing resistors, that’s exactly what he did, and this roughly doubles the rated current sink capability. According to [Peter], you do make the circuit more sensitive to power supply variations, but that could be an acceptable trade, depending on your application.

Continue reading “Humble 555 Gets A Boost For ESR Meter”

The Worsening Raspberry Pi RP2350 E9 Erratum Situation

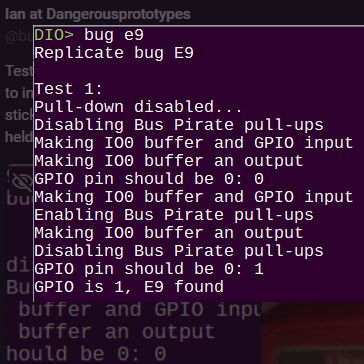
There’s currently a significant amount of confusion around the full extent of the GPIO hardware issue in the Raspberry Pi RP2350 microcontroller, with [Ian] over at [Dangerous Prototypes] of Bus Pirate fame mentioning that deliveries of the RP2350-based Bus Pirate 5XL and 6 have been put on hold while the issue is further being investigated. Recorded in the MCU’s datasheet as erratum RP2350-E9, it was originally reported as only being related to the use of internal pull-downs, but [Ian] has since demonstrated in the primary issue ticket on GitHub that the same soft latching behavior on GPIO pins occurs also without pull-downs enabled.

Ian from Dangerous Prototypes demonstrating the RP2350-E9 issue in a Bus Pirate prototype without pull-ups.

When we first reported on this hardware bug in the RP2350’s A2 (and likely preceding) stepping there was still a lot of confusion about what this issue meant, but so far we have seen the Bus Pirate delay and projects like [Agustín Gimenez Bernad]’s LogicAnalyzer have opted for taking the RP2350 port out back. There are also indications that the ADC and PIO peripherals are affected by this issue, with workarounds only partially able to circumvent the hardware issue.

In the case of the Bus Pirate a potential workaround is the addition of 4.7 kOhm external pull-downs, but at the cost of 0.7 mA continuous load on the GPIO when pulled high and part of that when pulled low. It’s an ugly hack, but at the very least it might save existing boards. It also shows how serious a bug this is.

Meanwhile there are lively discussions about the issue on the Raspberry Pi forums, both on the E9 erratum as well as the question of when there will be a new stepping. The official statement by Raspberry Pi is still that ‘they are investigating’. Presumably there will be a Bx stepping at some point, but for now it is clear that the RP2350’s A2 stepping is probably best avoided.

Boss Byproducts: The Terrible Beauty Of Trinitite

While some byproducts recall an idyllic piece of Americana, others remind us that the past is not always so bright and cheerful. Trinitite, created unintentionally during the development of the first atomic bomb, is arguably one of these byproducts.

A see-through vial pendant with several small samples of Trinitite.
A Trinitite pendant. Image via Galactic Stone

Whereas Fordite kept growing back for decades, all Trinitite comes from a single event — the Trinity nuclear bomb test near Alamogordo, New Mexico on July 16, 1945. Also called ‘atomsite’ and ‘Alamogordo glass’, ‘Trinitite’ is the name that stuck.

There wasn’t much interest in the man-made mineral initially, but people began to take notice (and souvenirs) after the war ended. And yes, they made jewelry out of it.

Although there is still Trinitite at the site today, most of it was bulldozed over by the US Atomic Energy Commission in 1953, who weren’t too keen on the public sniffing around.

There was also a law passed that made it illegal to collect samples from the area, although it is still legal to trade Trinitite that was already on the market. As you might expect, Trinitite is rare, but it’s still out there today, and can even be bought from reputable sources such as United Nuclear. Continue reading “Boss Byproducts: The Terrible Beauty Of Trinitite”

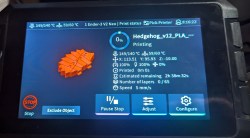
Art of 3D printer in the middle of printing a Hackaday Jolly Wrencher logo

3D Printering: Switch And Klip(per)

Last time I tried to convince you that, if you haven’t already, you should try running your 3D printer with Klipper. There are several ways to actually make it work.

The first thing you need is something to run the Klipper host. Most people use a Raspberry Pi and if you already have one that runs OctoPrint, for example, you might well use it. Just tuck your SD card away in case you give up and install a fresh Linux system on a new card.

The Creality Sonic Pad has issues, but it does work.

However, a Pi isn’t your only option. You should be able to make it work on nearly anything that runs Linux. We’ve even seen it running on Windows under WSL. If you have an old laptop that can run Linux, that would work, too. We’ve even heard it works on a Chromebook.

The other option is to get a “pad.” Several vendors make touchscreens with some Linux single-board computer bundled together with Klipper preinstalled. For example, there is the Creality Sonic Pad, along with similar devices from other 3D printing companies.

If you decide to go that route, you might want to make sure it is easy to install your own software easily. Some pads, like the Creality unit, are notorious for having so much customization that they don’t lend themselves to upgrades unless they come from the manufacturer. In some cases, you can wipe out the stock firmware and install a normal operating system, but at that point, you could probably just buy a Pi and a touchscreen, right?

Continue reading “3D Printering: Switch And Klip(per)”

Multi-Material Printing Enables Low Cost Silicone Prototypes

While it’s the ideal choice for mass production, injection molding is simply no good for prototyping. The molds are expensive and time-consuming make, so unless you’ve got the funding to burn tens of thousands of dollars on producing new ones each time you make a tweak to your design, they’re the kind of thing you don’t want to have made until you’re absolutely sure everything is dialed in and ready. So how do you get to that point without breaking the bank?

That’s not always an easy question, but if you’re working with silicone parts, the team at OpenAeros thinks they might have a solution for you. As demonstrated through their OpenRespirator project, the team has developed a method of 3D printing single-use molds suitable for large silicone parts that they’re calling Digital-to-Silicone (D2S).
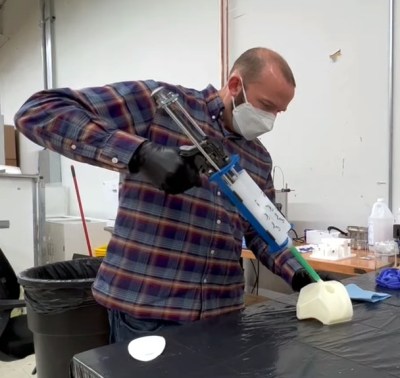
In the video below, [Aaron] and [Jon] explain that they started off by simply printing injection molds in the traditional style. This worked, but the molds can get quite complex, and the time and effort necessary to design and print them wasn’t a great fit for their iterative development cycle. They wanted to be able to do from design to prototype in a day, not a week.

Eventually they realized that if they printed the mold out of a water-soluble filament, they could simplify its design greatly. They’ve documented the design process in detail, but the short version is that you essentially subtract the 3D model of the design you want to produce from a solid shape in your CAD package, and add a few holes for injecting the silicone. Once the silicone has cured, the mold can be dissolved away in warm water to reveal the finished part.

They then took this concept a step further. Thanks to the multi-material capabilities offered by some of the latest 3D printers, it’s possible to print structures within the mold. Once the silicone is injected, these structures can become part of the finished part. For the OpenRespirator, this lets them add PETG stiffening rings around where the filters to snap into the silicone mask body.

Continue reading “Multi-Material Printing Enables Low Cost Silicone Prototypes”

OpenSCAD Library Creates QR Codes On The Fly

If you’ve been reading Hackaday for awhile, you’ll know we’re big fans of OpenSCAD around these parts. There’s a number of reasons it’s a tool we often reach for, but certainly one of the most important ones is its parametric nature. Since you’re already describing the object you want to generate with code and variables, it’s easy to do things like generate an arbitrary number of cloned objects by using a for loop.

There are a number of fantastic OpenSCAD libraries that explore this blurred line between code and physical objects, and one that recently caught our eye is scadqr from [xypwn]. The description says it lets you “Effortlessly generate QR codes directly in OpenSCAD”, and after playing around with it for a bit, we have to agree.

Continue reading “OpenSCAD Library Creates QR Codes On The Fly”