Building A ZX Spectrum Using Only New Parts

Ah, the Sinclair ZX Spectrum. A popular computer in Britain and beyond, but now rather thin on the ground. If you can’t find one, fear not, for now—you can apparently build a new one with new parts! [TME Retro] is here to demonstrate how.

Before you get excited, no—Sinclair has not risen from the dead. Instead, it’s simply down to the state of the retrocomputing community. There are enough reproduction parts and components out there for the ZX Spectrum that it’s now possible to assemble the whole computer from new bits. You can get new cases and new mechanical keyboards, and a 100% compatible motherboard in the form of the Harlequin board. The latter even reproduces the unobtainable Spectrum ULA glue logic chip in raw logic!

It’s neat to see the ZX Spectrum live on decades after the production lines ground to a halt. We’ve seen similar feats achieved with the legendary Commodore 64; you’d think we had enough of them given they were the best-selling computer of all time. Video after the break.

Continue reading “Building A ZX Spectrum Using Only New Parts”

Redbox Is Dead, But The Machines Are Kind Of Hanging On

Redbox was a service for renting DVDs from automated kiosks. The business was going well until it wasn’t anymore, and then the company went bankrupt in July this year. And yet… the machines live on. At least, that’s according to YouTuber [Smokin’ Silicon], who spotted some remaining Redbox kiosks out and about. Including at his local Walmart!

Here’s the thing. There’s not one big switch at Redbox that turns all the machines off, and even if there was—nobody hit it the moment the company declared bankruptcy. Thus, when [Smokin’ Silicon] rocked up to Walmart, he was able to flick through the movies and even add one to cart for purchase. However, trying to complete the transaction failed—the kiosk eventually reported itself as out of service. That makes sense—you’d expect payment processing to be the first thing to go down.

However, other Redbox kiosks were different. A kiosk at a Food Lion location actually still worked—and [Smokin’ Silicon] was able to complete the transaction and walk away with a Black Adam disc! On a second trip, he was able to walk away with even more!

The rest of the video dives into Redbox lore and other posts online about the status of the company, software, and hardware. Apparently, someone on Reddit was claiming they had the Redbox kiosk OS available. Meanwhile, some users have had trouble returning their discs because the company is now defunct. However, [Smokin’ Silicon] was able to return his without issue. Ultimately, though, he recommends his viewers to go out and score as many DVDs and Blu Rays as possible from the machines since soon enough, they’ll be gone forever.

The fact is, businesses are big and Kafkaesque, the kiosks are scattered all over the country, and so it’s anybody’s guess if and when they stop working. Back when this website began, a redbox was something different entirely. Video after the break.

Continue reading “Redbox Is Dead, But The Machines Are Kind Of Hanging On”

Laser Painting Explained

If you get an inexpensive diode laser cutter, you might have been disappointed to find it won’t work well with transparent acrylic. The material just passes most of the light at that wavelength, so there’s not much you can do with it. So how did [Rich] make a good-looking sign using a cheap laser? He used a simple paint and mask technique that will work with nearly any clear material, and it produces great-looking results, as you can see in the video below.

[Rich] starts with a piece of Acrylic covered with paper and removes the paper to form a mask. Of course, even a relatively anemic laser can slice through the paper covering with no trouble at all. He also cuts an outline, which requires a laser to cut the acrylic. However, you could easily apply this to a rectangular hand-cut blank. Also, most diode lasers can cut thin acrylic, but it doesn’t always come out as cleanly as you’d like.

Continue reading “Laser Painting Explained”

Tiny LoRa GPS Node Relies On ESP32

Sometimes you need to create a satellite navigation tracking device that communicates via a low-power mesh network. [Powerfeatherdev] was in just that situation, and they whipped up a particularly compact solution to do the job.

As you might have guessed based on the name of its creator, this build is based around the ESP32-S3 PowerFeather board. The PowerFeather has the benefit of robust power management features, which makes it perfect for a power-sipping project that’s intended to run for a long time. It can even run on solar power and manage battery levels if so desired. The GPS and LoRa gear is all mounted on a secondary “wing” PCB that slots directly on to the PowerFeather like a Arduino shield or Raspberry Pi HAT. The whole assembly is barely larger than a AA battery.

It’s basically a super-small GPS tracker that transmits over LoRa, while being optimized for maximum run time on limited power from a small lithium-ion cell. If you’re needing to do some long-duration, low-power tracking task for a project, this might be right up your alley.

LoRa is a useful technology for radio communications, as we’ve been saying for some time. Meanwhile, if you’ve got your own nifty radio comms build, or anything in that general milleu, don’t hesitate to drop us a line!

Access The Information Superhighway With A Mac Plus

For some time now, Apple has developed a reputation for manufacturing computers and phones that are not particularly repairable or upgradable. While this reputation is somewhat deserved, especially in recent years, it seems less true for their older machines. With the second and perhaps most influential computer, the Apple II, being so upgradable that the machine had a production run of nearly two decades. Similarly, the Macintosh Plus of 1986 was surprisingly upgradable and repairable and [Hunter] demonstrates its capabilities by bringing one onto the modern Internet, albeit with a few tricks to adapt the old hardware and software to the modern era.

The Mac Plus was salvaged from a thrift store, and the first issue to solve was that it had some rotten capacitors that had to be replaced before the computer could be reliably powered on at all. [Hunter] then got to work bringing this computer online, with the only major hardware modification being a BlueSCSI hard drive emulator which allows using an SD card instead of an original hard disk. It can also emulate an original Macintosh Ethernet card, allowing it to fairly easily get online.

The original operating system and browser don’t support modern protocols such as HTTPS or scripting languages like Javascript or CSS, so a tool called MacProxy was used to bridge this gap. It serves simplified HTML from the Internet to the Mac Plus, but [Hunter] wanted it to work even better, adding modular domain-specific handling to allow the computer to more easily access sites like Reddit, YouTube, and even Hackaday, although he does call us out a bit for not maintaining our retro page perhaps as well as it ought to be.

[Hunter] has also built an extension to use the Wayback Machine to serve websites to the Mac from a specific date in the past, which really enhances the retro feel of using a computer like this to access the Internet. Of course, if you don’t have original Macintosh hardware but still want to have the same experience of the early Internet or retro hardware this replica Mac will get you there too.

Continue reading “Access The Information Superhighway With A Mac Plus”

Ubiquitous Successful Bus: Version 2

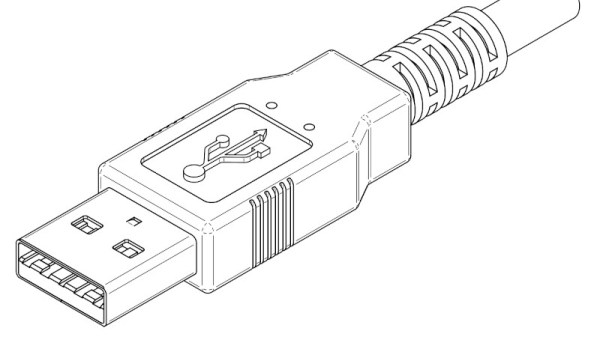
I’ve talked a fair bit about USB-C before, explaining how it all works, from many different angles. That said, USB-C is just the physical connector standard, plus the PD part that takes care of voltages and altmodes – things like data transfer are still delegated to the two interfaces you invariably end up using on USB-C ports, USB 2, and USB 3.

You might think USB 2 and USB 3 are tightly related, but in many crucial ways, they couldn’t be more different. I have experience working with both, and, as you might guess, I want to share it all with you. You might be surprised to hear there’s plenty to learn about USB 2 in particular – after all, we’ve had it hang around for 30 years now. Well, let’s make sure you’re fully caught up!

The Ingredients

USB 2 is a point-to-point link – one side is “host” and another is “device”, with the host typically being a PC chipset or a single-board computer. USB 2 relies on a single pseudodifferential pair. It’s “pseudodifferential” because the wires don’t just do differential signaling – they also use digital logic levels and pullup/pulldown resistors to signal device presence, especially in the beginning when the USB link is still getting established. Indeed, you can imitate a USB device’s presence with just a resistor.
Continue reading “Ubiquitous Successful Bus: Version 2”

The FNIRSI HRM-10 Internal Resistance Meter

Occasionally, we find fun new electronic instruments in the wild and can’t resist sharing them with our readers. The item in question is the FNIRSI HRM-10 Internal resistance meter, which we show here being reviewed by [JohnAudioTech].

So what does it do, and why would you want one? The device is designed to measure batteries so you can quickly determine their health. Its operating principle also allows it to do a decent job of measuring low-resistance parts, which is not necessarily as easy to achieve with the garden variety multimeter, especially the low-end ones. We reckon it would be useful in the field for checking the resistance of switches and relays, possibly in automotive or industrial applications. The four-pin connector is needed because there are two wires per probe, making a Kelvin (also known as four-wire) connection.

Likely, the operating principle is to apply a varying load to the battery under test and then measure the voltage drop. The slope of the voltage sag vs load is a reasonable estimate of the resistance of the source, at least for the applied voltage range. The Kelvin connection uses one pair of wires to apply the test current from a relatively low-impedance source and the second pair to measure the voltage with a high input impedance. That way, the resistance of the probe wires can be calibrated out, giving a much more accurate measurement. Many lab-grade measurement equipment works this way.

Circling back to the HRM-10, [John] notes that it also supports limit testing, making it a helpful gauging tool for the workbench when sorting through many batteries. Data logging and the ability to upload to a computer completes the feature set, which is quite typical for this level of product now. Gone are the days of keeping a manual logbook next to the instrument stack and writing everything down by hand!

We’ve touched on measuring battery internal resistance before, but it was a while ago. Regarding Kelvin connections, here’s a quick guide and a hack upgrading a cheap LCR to support 4-wire probes.

Continue reading “The FNIRSI HRM-10 Internal Resistance Meter”